Garden Related Activities


In spring, gardeners will be starting to seek out materials like mulch, stone, compost and topsoil as a foundation or as a finishing touch for many projects. These materials can be sold in bags or as a bulk product. While the difference between the two may seem obvious, a gardener may select bagged or bulk materials based on many factors surrounding the project they are planning out.

Mulch bags in front of a deck.
Mulch in bags can be easier for small scale applications. Photo by H. Zidack

Bagged materials are pre-measured and can be useful in multiple applications. Consumers can purchase topsoil, mulch, stone, soilless media, and other components of soil structure to amend their planting beds to their needs. Bags are often used for smaller scale solutions. Bagged materials are commonly sold in units of cubic feet, which conveniently fit into the trunk of a car for easy transport. Their packaging can allow for protection against contaminants or pathogens while it is being shipped and stored. Additionally, bagged materials can often include pre-measured additives like fertilizer, moisture control materials, or other materials to make its contents appropriate for its intended use.

Fresh pile of brown mulch on a landscape bed.
Bulk mulch deliveries will leave a pile in a designated area of your property. Photo by H.Zidack

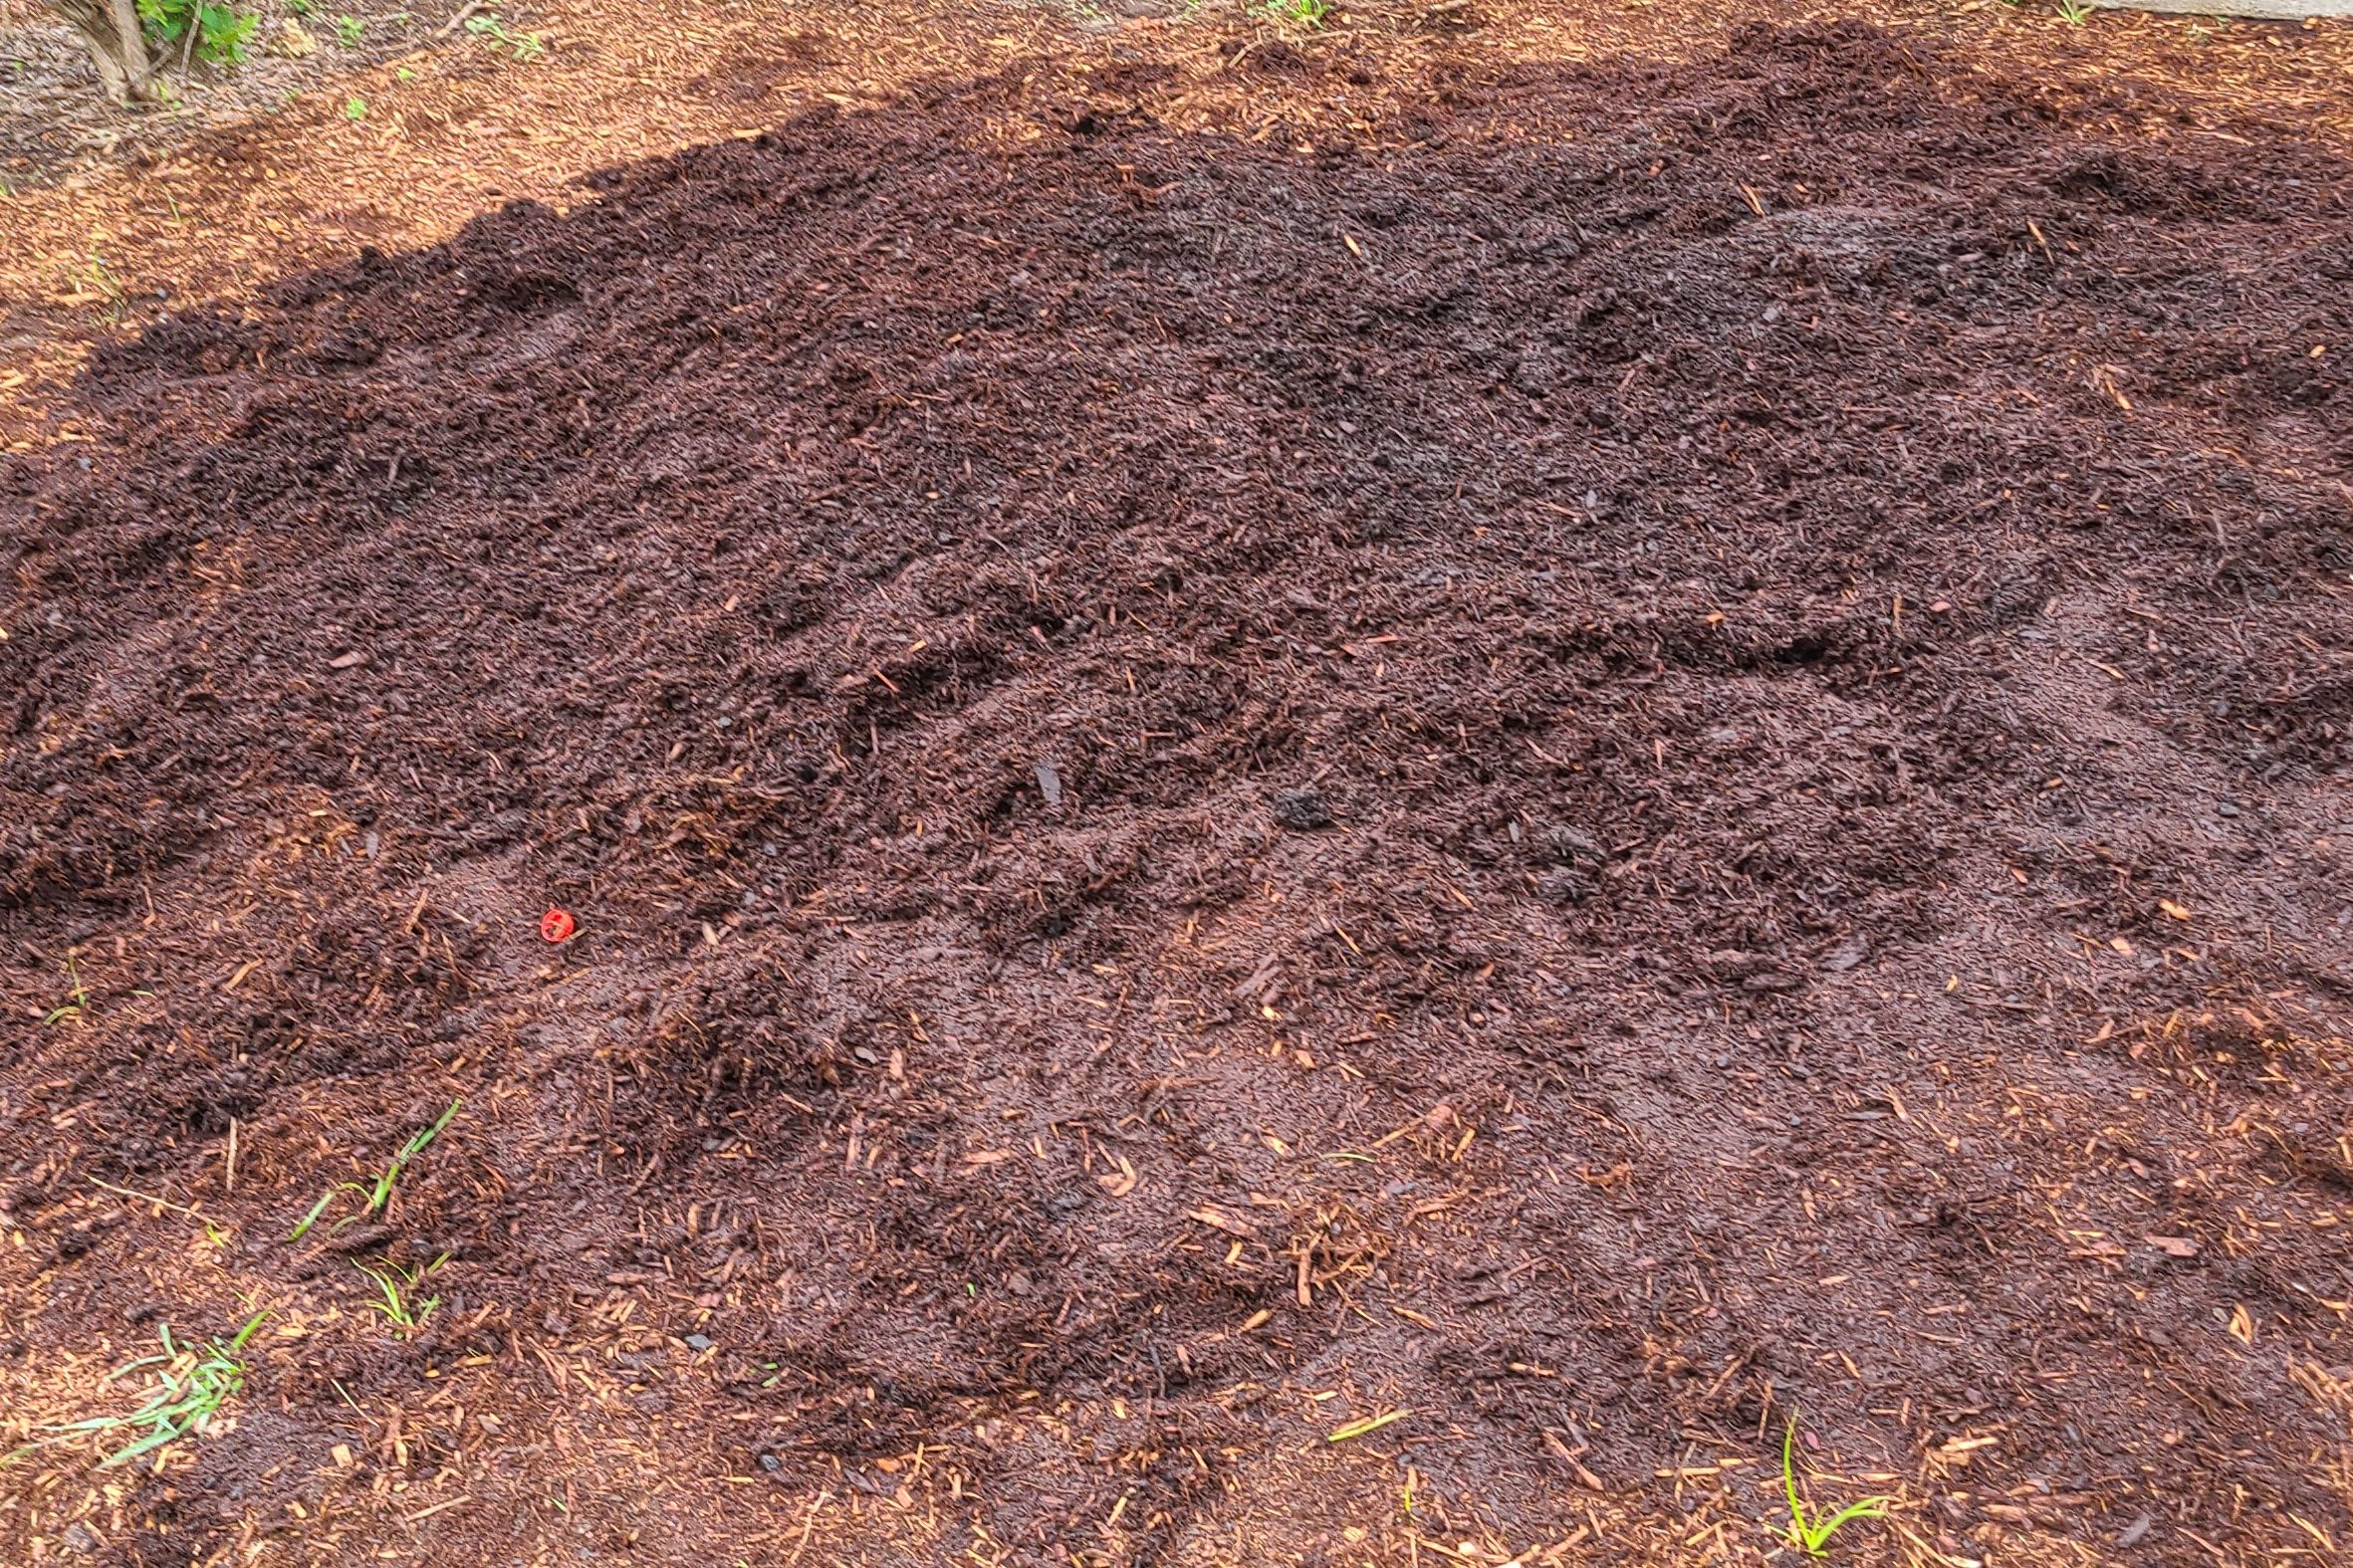
Bulk materials can provide consumers with an opportunity to purchase larger quantities of material without the cost of packaging and disposable plastics. These applications are great for filling raised beds, mulching large areas, or replacing eroded soil. Gardeners can inspect the material, check the soil texture or color of the mulch, at the landscape center and, for an added fee, have it delivered to their home.

Basic algebra will help calculate how much material is needed for a project. Follow along with the example below to see how to calculate the exact quantity to purchase for your projects this spring:

Doing the Calculations

1.  Using a measuring wheel or tape measure, measure and calculate the area of the space you want to mulch (length x width) 

10ft x 10ft = 100 ft2 


2. Multiply the area of your space by the depth of new material you want to add. For mulch, 3 inches is a common thickness to help prevent weeds, hold moisture and regulate temperature within the planting bed.  

Remember it’s important to keep units the same. To keep this consistency, the example below, (inches), will be represented as 1/12th of a foot.

100ft2 x (3/12) ft = 25 ft3 


3. Decide how you want to purchase your product and calculate what to buy.  

3a. For Bagged Materials

Divide your cubic feet by the size of the bags you are considering purchasing (Most bags come in 1, 2 or 3 cubic feet)

Example: Purchasing bags that are 2 cubic ft in size

25 ft3 / 2 ft3 = 12.5 2CF Bags

*Round up to make sure you have enough material for complete coverage. Excess should be minimal.


3b. For Bulk Materials

Divide your cubic feet by 27 to discover how many cubic yards you need.

25 ft3 / 27 ft3 = 0.92 Cubic Yards

*Round up or down based on your overall gardening needs keeping in mind that materials are usually sold by the quarter, or half, or full yard.


If you’re intimidated by the math, don’t worry! The University of Maine has a good resource page that has further simplified these calculations. If we check the work we did against it, their recommendation will match at just less than one yard.

Lastly, consider how you want to complete your project. Do you want to save money? You may have to do more calculator work to figure out what kind of savings you are getting by using one instead of the other. Is this project on a deadline or do you want to spend less time running back and forth from the garden center? A delivery of bulk material would be your best bet. Would you need to rent a pickup truck? Does a pile of mulch in your driveway sound overwhelming and would you rather break your project up into manageable chunks? There is a lot to consider!

Whatever you decide, remember to use safe lifting techniques, stay hydrated, give yourself breaks, and know that the bottom of that pile gets closer with every shovel full!

By Heather Zidack, UConn Home & Garden Education Center

Native Eastern redbud Cercis canadensis flowers before leaves appear in early spring

Daffodils,
That come before the swallow dares, and take
The winds of March with beauty.”
William Shakespeare

Native red maple Acer rubrum

In late March there are signs that spring is here. Snow is usually gone, and although no leaves have appeared on our deciduous trees and shrubs, there may be flowers that will provide early bees with their first meal of the year. Red maples bloom early and provide food for many pollinators like flies, bees and beetles that are just emerging in the spring. While some native plants flowering coincides with native bee activity, there are also non- native plants that can be of great value to early pollinators.

Skunk cabbages produce heat and appear through the snow in February

Skunk cabbages are our first native bloomers. They can arise in wetlands when snow still covers the ground. Honeybees, native bees, some moths and flies visit these putrid flowers as early as late February and then into March.

Honeybee on skunk cabbage flower

One of the first harbingers of spring is the appearance of native Colletes inaequalis ground-nesting bees which can be seen visiting the first flowers of spring. Look for them on native and non- native ornamental willow flowers in late March, and soon after that on native bloodroot.

Native bloodroot

Non-native Japanese andromeda shrubs, Pieris japonica, can bloom as early as late February and can be an important food source for bees that appear before native willows bloom. There are many varieties, some tall and others more compact and they may have white, red or bicolored, drooping, urnlike flowers. They do best in sunny locations with afternoon shade.

Red flower variety of Japanese andromeda

Native bloodroot can form small colonies on sunny woodland edges, and their bright white flowers are often the highlight of the still monochromatic landscape. Flowers open on sunny days and close by night.

Common bluets, commonly called Quaker ladies Houstonia caerulea, are small, blue native wildflowers with four petals and a distinctive yellow center. Many bee species, butterflies and syrphid and other flies visit these low- growing plants for nectar and pollen. They can appear as early as late March, depending upon the temperatures. Flowering can last into early July.

Native bluets

Native red or purple trillium Trillium erectum appears a little after bloodroot, and supports certain moths, bees and flies. Look for it in dry woodland areas with highly acidic soils where there is some sun, especially where there are mountain laurels. It often is found where there are ramps and bloodroot.

Native purple trillium

Trailing arbutus and round- lobed hepatica are native wildflowers of open woodlands. They are uncommon, or perhaps seem so because they are found in very small areas with specific soil and other site conditions. Pollinators are flies and specialist native bees.

Trailing arbutus

Native twinleaf Jeffersonia diphylla produces its bloodroot-like white flowers as early as March and as late as June. A single flower arises on a leafless stalk above the peculiar joined leaves that resemble wings. These flowers attract bees, especially specialized foragers.

Twinleaf

Currants, especially the extremely fragrant clove currant, plus josta berry, a cross between currant and gooseberry, are favorites of bumblebees and other native bees. The clove currant fragrance must be what the island of Zanzibar smalls like as travellers approach it by boat.

Clove currant flowers

Dwarf ginseng Panax trifolius L. is a native woodland wildflower that is only 4-8 inches tall. The airy cluster of small flowers appear in early to late spring and since plants grow in the duff of woodlands, the flower heads, although very small, can help find these little plants.

Dwarf ginseng

Among the non-native flowering shrubs that support native pollinators is the Rhododendron mucronulatum ‘Cornell Pink’. This plant blooms in early April before the leaves appear. Many native bees including Osmia spp., Colletes inaequalis and Bombus spp. and wasps visit the flowers. Cornus mas, or Cornelian cherry, is a non-native shrub or small tree whose flowers line the branches before the leaves appear.

“Cornell Pink’ Rhododendron muconulatum
Non-native Cornus mas

Ornamental plants like violas and pansies also attract spring pollinators, and dandelions have a great pollen source for spring and summer bees alike.

Tiny bee covered with dandelion pollen

Native Amelanchier, also called shadbush and serviceberry blooms in April and attracts many bees and other pollinators. Its delicate racems of white flowers can be profuse and stand out as leaves are not fully expanded. Many specialized bees are supported by this small tree or multithemed shrub.

Amelanchier spp.

 Star magnolias, Magnolia stellata, bloom in April before leaves are out. These trees support many pollinator species and butterflies like spring azures and tiger swallowtails that are out in early spring.

Star magnolia

There are many other plants for pollinators in early spring- daffodils, crocus, currants to name a few.  As I hike around at this time of year, I take note of which flowers the most pollinators are attracted to, and I may decide to add some of these to my own gardens. I also stop to enjoy all the new colors and textures coming into the landscape. I appreciate Algernon Charles Swinburne’s comment-

“Blossom by blossom the spring begins.”

Pamm Cooper

Violas

Do you have an uneven yard or hills that look like the Himalayas? If this sounds like your landscape, slope is important to know when designing or managing a landscape.

Safety and erosion control are the primary reasons to know the angle or degree of a slope in a yard. Steep slopes can cause a loss of traction and stability for riding lawn mowers, which can result in it tipping over and harming the operator. Serious injury and even death can happen, so it’s not a situation to take lightly. Most manufacturers have recommended guidelines for best practices when using a riding lawn mower on slopes and should be closely followed. Erosion is not only unsightly, but it can also be dangerous. Topsoil, with all of its complex structure, washes away, along with contaminants such as fertilizer, pesticides and petroleum products. It can erode downhill, which could end up in our water supply. That’s why it’s important to utilize the proper erosion control products on slopes.

There are many ways to control erosion on slopes. Native plants, ornamental grasses, groundcovers and some shrubs help prevent erosion. But depending on the steepness of the slope, plants may need a little help from other means.  Retaining walls and terrace gardens are popular but they can be cost prohibitive.   There are products available on the market that can be installed by savvy DIYer. The caveat is knowing the angle of the slope to get the right product for the job. 

Slope, also known as grade, shows how much change there is in elevation over a given distance.  Think of it as a staircase. The “rise” is the elevation of one step to the next.  “Run” is the distance from the edge of the rise to the next rise:

Smart phones offer apps that can measure the angle of a slope but with a few simple tools a slope can easily be measured without any technology.  All you need is a yardstick or 2’x4’, (if you’re using a 2×4, make sure you have a measurement of it’s length),  a carpenter’s level and a measuring tape: 

To start, place the 2×4 board along the slope of the hill. Then, place the level on top of the board and lift the lower end and bring it up to a horizontal position. Next, measure the plumb line (vertical distance from the ground) with the tape measure from the raised end of the board to the ground.

Using the formula below, calculate the slope:

Below is a worksheet that we’ve created for you to use if you want to try this at home! If you have a larger yard and to get the most accurate measure, calculate three measurements of slope from three different places on the hill and calculate the average.

 It’s as simple that. No need for special tools or a Ph.D in quantum mechanics to get the slope of a hill. Just a few basic tools and a simple formula to get the job done.  Of course, we are always ready to help if you have any questions on slope, erosion or any other gardening questions. 

By Marie Woodward & Heather Zidack

From the jack-o-lanterns lighting Halloween streets to the pies adorning Thanksgiving tables, it wouldn’t be the fall season without pumpkins! Learn how to make the most out of your fall pumpkins this year with a tour of Connecticut’s local orchards, recipes to try, and gardening tips below. 

Photos taken by Laurel Humphrey at Wicked Pumpkin Orchards LLC. 

Best Pumpkin Patches in the UConn Area 

Whether you like to display your pumpkins as decorations or eat them in desserts, getting outside and picking your own pumpkins can be a fun and memorable way to celebrate the season. Here are some of Connecticut’s best* pumpkin patches to try: 

  1. Wicked Pumpkin Orchards LLC in Willington, CT 

This first pick-your-own pumpkin patch is less than a 20 minute drive away from the UConn campus, perfect for students and faculty. Choose from a variety of pumpkins and gourds, and if you’re feeling adventurous join one of their haunted walkings! 

  1. Rogers Orchards in Southington, CT 

As an eight-generation family farm, Rogers Orchards is famous for its CT grown fruits and vegetables. Come for a festive fall day to pick your own pumpkins and apples, and stop by the farm market bakery for a sweet treat when you’re done! 

  1. Lyman Orchards in Middlefield, CT 

Lyman Orchards is the perfect place to spend a fall day, with plenty of fun outdoor activities to choose from. Along with pumpkin and apple picking fields, this farm has a corn maze, golf course, and local food market to keep you busy. 

  1. The Pickin’ Patch in Avon, CT 

For a scenic fall activity, visit this quaint orchard and pick your favorite pumpkins, flowers, vegetables, and other fruits. You can also enjoy a hayride through the pumpkin fields and delicious treats like apple fritters and donuts. 

  1. Belltown Hill Orchard in Glastonbury, CT 

Belltown Hill Orchard has all types of pumpkins for your choosing in their pick-your-own patch, along with a variety of other garden veggies at the market. Also be sure to try some of their freshly baked sweets including pies, cookies, and apple cider donuts. 

*Note that these are personal recommendations by the author. UConn does not endorse or prioritize these businesses over our other excellent local businesses!

Roasted Pumpkin Seeds Recipe 

Once you’ve chosen the perfect pumpkins for jack-o-lantern carving, roasted pumpkin seeds can be a fun and tasty reward for your work. Try this recipe for a savory or sweet pumpkin snack in just a few steps. 

Step 1: 

Remove the seeds from your pumpkin and wash them in a colander until most of the pulp is gone. Dry the seeds as much as possible with a towel to help them crisp up in the oven. 

Step 2: 

Mix the seeds in a bowl with olive oil and a blend of your favorite seasonings. For a savory snack, try salt, black pepper, garlic powder, paprika, and/or chili powder. For a sweet treat, try brown sugar and cinnamon. 

Step 3: 

Spread the seeds evenly on a lightly greased cookie sheet. Roast them in the oven at 350℉ for 12 to 15 minutes, tossing the seeds every 5 minutes to get an even color. Once the seeds are golden brown with a nutty aroma, your snack is ready! 

Planting Pumpkin Seeds and More Growing Tips 

Before you eat all your pumpkin seeds away, be sure to save a few to grow your own pumpkin patch for next season! After washing off the seeds, you can let them dry and store in an envelope until planting. Early summer is a good time to plant pumpkin seeds so that they’ll be ripe by October.  

When choosing a planting spot, look for full sun to light shade, with plenty of space for the pumpkin vines to spread. Next, form small mounds of your garden soil with two to five feet between each mound. Plant three to five seeds per mound, placing them about an inch deep in soil. 

Your pumpkin plants can be fertilized once they are about a foot tall. A nitrogen-based fertilizer applied every other week will give them the best nutrients to grow. Pumpkins also need a lot of water, so water them daily under the leaves. Once a few pumpkins have formed, you can prune back the vines to encourage growth. Be on the lookout for squash bugs, powdery mildew, or bacterial wilt disease which could harm your pumpkin plants. 

You’ll know the pumpkins are ripe when they are brightly colored with a hard rind, and the stem has begun to dry and shrivel. To achieve a brighter pumpkin color from the sun, a good tip is to remove leaves shading the pumpkins as they grow. Once your pumpkins are ready to harvest, just cut the stems off the vine and let the fall festivities begin! 

– Laurel Humphrey, Student Extension Assistant, UConn Plant Diagnostic Lab

Megachile bee on perennial sweet pea

 “In early June the world of leaf and blade and flowers explodes, and every sunset is different.” ―John Steinbeck

June sees a significant increase in bee activity here in Connecticut. During the past two weeks on my own property the perennial flowers like catmint, yarrow, hyssops, beardtongue (Penstemon spp.) and giant plume flowers are in full bloom. Heuchera and astilbe are or will be blooming. Winterberries, mock orange, shrub dogwoods, and Itea virginica (sweetspire) shrubs are also in full bloom, and the bees are having a field day on all of these. By far, the most pollinator species on my plants are visitng hyssops, catmints, winterberries and  Itea and sea holly. Annuals like lantana and salvias help fill the gap between spring blooms and summer bloomers like Echinacea, Coreopsis, and mountain mints.

Bumblebee bee on native mountain laurel

I just planted a newer variety of winterberry called ‘Sunsplash’ near two old ‘Red Sprite’ winterberries, and all are teeming with many species of bees and other pollinators. I like the bright yellow contrast to the green leaves of this new winterberry- makes a sparkly, happy addition to the garden. I have the male counterparts of all my winterberries to ensure pollination and later, the optimum berry crop.

‘Sunsplash’ winterberry

Tucked in between the winterberries are a couple of sea hollies- Eryngium planum. These plants have a very interesting stem, bract, leaf and flower color- a chalky blue- purple that seems to change somewhat during the day depending upon the available sunlight. Flowers resemble thistle or teasel in form and shape. Little green sweat bees found the flowers minutes after the plants went in the ground. Many other bees, large and small, visit the flowers throughout the day.

Sea holly
Yellow bumblebee Bombus perplexus had a preference for sea holly and winterberries

Nepeta spp. catmints bloom for a long period, and can be cut back for rebloom. Although the flowers are small, bees of all kinds visit them, as do skippers and other small butterflies. There are a variety of smaller catmints that can be inserted into the garden that will not crowd out other plants.

Salvias are a great source of nectar for bees and butterflies, and most hang on to flowers until frost. Black and blue, red, and the ‘Rocking’ series are also a huge draw for hummingbirds. A favorite of mine is the salvia ‘Hot Lips’. Flowers are a combination of red, white or half red and half white. Most bloom until frost for added appeal.

A small native shrub, New Jersey tea, attracts pollinators of all types including flower beetles, bees, butterflies and syrphid flies. Flowers are airy clusters of white and are fragrant. The one drawback to this plant is its attraction to deer.

New Jersey Tea
Native bee on New Jersey tea

Hyssops of all kinds attract bees and butterflies. The most bees I am seeing is on the Agastache ‘Blue Boa’ (Giant Hyssop). This hyssop blooms earlier than most varieties, and its flower heads are large and puffy. Short-tongued bees enter the flowers, an bumblebees can be spotted with their rear ends and hind feet sticking out of the flowers.

Agastache hyssop “Blue Boa’
Bumblebee entering flower of “Blue Boa’

In the wild or in the landscape, Penstemon, hairy beardtongue, is a plus to any pollinator garden. In the wild, large colonies can form, which is useful in reducing travel efforts of our native bees. In the garden, planting quite of few of these plants in a group is very helpful to bees.

‘Husker Red’ Penstemon

Milkweeds are beginning to bloom now, butterfly weed being among the first to flower. Many pollinators and other interesting insect species have affinities toward milkweeds, making them a great addition to gardens and landscapes.

Megachile bee on Butterfly weed

Heuchera and Astilbe are often overlooked as pollinator plants, and these are especially useful in areas with good afternoon shade. Bees are not averse to being in the shade, and there are many plants that will benefit pollinators. Hostas have flowers for a while, and before and after that, foliage is of interest until cold weather arrives.

White variety of Astilbe

There are many other plants flowering in June that can supply nectar and pollen for our native butterflies and pollinators. If you have room, trees such as Catalpa and lindens are of great value. A note on this year- perhaps because of cool weather(?), the bloom periods of many plants like the Kpusa dogwoods have seemed to go on forever. And little, if any crabgrass has been seen yet, which may be a good thing for some people.

Bombus perplexus on Itea virginica ‘Henry’s Garnet’
Giant fleece flower Persicaria polymorpha gets over 5 feet tall
Red Valerian Centranthus ruber with green sweat bee and tiny katydid nymph
Tiny bee on Agastache buds
Bees and butterflies like annuals like Cosmos
Shrub dogwood

Annual Salvia ‘Hot Lips’

Check flowers for pollinator activity, and expect that to increase as the weather warms up. It is a satisfying aspect of gardening to know other creatures benefit from your efforts. Bees would send a thank you card, but they are not interested it doing so. Too busy…

Pamm Cooper

With Father’s Day in mind, many of us would like to give a dad a break by helping out with some outdoor chores while he covers the grill. Keep reading for convenient tips so that dads, granddads, pet dads, plant dads, and dad-like figures everywhere can rest easy – you’ve got this!

  1. Mow the lawn on the longest setting and don’t mow when wet.

For some, mowing the lawn can be a satisfying chore while others can’t stand it. Whichever camp you fall in, odds are that you want to keep your lawn looking its best! A great way to keep a healthy-looking lawn is to keep it at a stable, healthy height by mowing at the longest setting of the mower.

This tip may seem counterintuitive for some. “If I mow on the longest setting, won’t I just need to mow again sooner?” My answer to this thought is “Yes, but isn’t it better to mow a healthy lawn more frequently than an unhealthy lawn less often?”. Grass blades need enough surface area to photosynthesize, respirate and thrive. A good rule of thumb is to cut off no more than a third of the height of the blade at a time. Unless you’re maintaining putting greens and fairways, there isn’t really an advantage to mowing your lawn at a short setting. It will only be more susceptible to drought-related brown patches, weed pressure, and disease.

Speaking of lawn diseases, those caused by fungi are more easily spread to new areas when the lawn is wet, so it’s better to only mow dry lawns. Another disadvantage of mowing a wet lawn? The grass clippings will clump together and stick to the mower and uncut sections of lawn. This will result in a more uneven cut, even when diseases aren’t an issue.

  1. Water plants (including lawns!) in the early morning hours when needed.

From the last paragraph, you probably inferred that the organisms that cause plant diseases typically prefer wet environments. This is nearly always the case! Fungi and bacteria thrive in wet conditions and may even require a film of water on a leaf surface to infect it and cause those leaf spots, blight, and cankers that we all dread.

While we can’t control the weather, a great way to reduce the amount of time that leaves remain wet after watering is to provide water at a time of day when the water will dry quickly but won’t heat up and scald the leaves. The best time to water plants with a sprinkler system is in the early morning. Watering in the evening runs the risk of plants remaining wet all night when they don’t need to. Water midday and there’s a chance, particularly in the hot summer months, that the water will cause sunscald on the leaves before it dries off. A way to avoid this and water any time you like? Aim your water source at the base of the plant and avoid wetting the leaves altogether.

  1. Use the leaf blower to clean the garage before putting it away.

Recently I had a friend visit and he had to get something from the garage. He remarked how clean it was. I said it only looks tidy because there wasn’t a car in it, but he countered, “no we keep our garage tidy too, but we can’t prevent dirt, leaves and spiders from constantly getting in”.  My trick to keeping the leaves, spiders and dirt out? I use the leaf blower to quickly blow out my garage every time I mow the lawn or rake leaves. Because we have a one-car garage, this usually takes me less than five minutes. Doing this frequently (basically every time I do yard work), even when the garage doesn’t seem dirty, keeps it effortlessly spick and span. Don’t have a leaf blower? A broom works just as well. The real trick is keeping to a schedule and cleaning before the garage gets “dirty” in the first place.

  1. In summer, mark trees that need to be cut down with bright string or paint to make identifying them easier in winter.

Cutting down trees isn’t exactly work most of us enjoy doing often, which is why we usually contract the work out to an arborist (and should definitely do so if the trees are large, unsafe for a novice to cut down, or are at risk of falling on something important like a neighbor’s fence). It’s summer and you notice a tree (or five) that should really be cut down. Maybe the tree is sick or in a place where it shouldn’t be, maybe it’s only five feet tall and has a trunk with a diameter of a toilet paper roll – no need to call an arborist. Sometimes when we face little trees that need cutting down, we turn to our dads. Dads always have a chainsaw handy, right?

Fast forward six months and Dad is visiting for Christmas. Winter is the best time to cut down trees – everything is dormant and there are hardly any leaves to get in the way. You tell him “Thanks for bringing your chainsaw, Dad! I just need to cut down the two little trees out back next to the hydrangeas…”, immediately realizing that the hydrangeas will be hard to identify without their leaves and you (and your dad) don’t want to accidentally cut those down instead.

To save you both some time, trouble and frustration, tag the trees you want to cut well ahead of time with some brightly-colored tape or string. Even if you plan to cut the trees only a week later, it will be helpful to remember which trees needed to be cut, especially if you have several to get through.

These trees are marked for cutting with bright pink ties – this will make discerning them from trees that you want to keep a cinch any time of year!
  1. Remember to wear safety equipment and maintain your tools!

Finally, don’t forget to be safe when performing outdoor chores, especially ones you aren’t familiar with. Wear long sleeves, pants, and closed-toe shoes. Wear safety goggles if projectiles cold be a factor (e.g., borrowing that chainsaw). Wear sunscreen and tick/mosquito repellant as appropriate. Always read the labels of pesticides, cleaning products, and fertilizers. Store and apply them as instructed.

Also be sure to take good care of your tools! Dad wouldn’t want you returning something worse for wear, and few things impress dads more than an organized and well-kept selection of tools! Remember to run water through your power washer for a minute or so before turning it on. Remember to check the cord of your weed-whacker/edger/line trimmer before starting work to see if it needs to be replaced. If you haven’t used a power tool such as a mower, chainsaw, or similar in a while, be sure to check and see if it needs to be oiled before running it. Better to be safe than sorry! We don’t want to ruin Dad’s relaxation with a broken tool or trip to the emergency room.  

Until next time,

Nick Goltz, DPM (son, uncle, plant and pet dad)

Gardeners are no strangers to insect pests. While typically a mild nuisance, insect damage can weaken plants and lead them to be more susceptible to disease. There are even times when insect feeding alone can damage a plant sufficiently to kill it, so noticing when insect feeding is occurring and the different types of insect feeding damage are important skills for gardeners to keep in their tool belt.

The Nibblers

We all know these. Nibblers cause the most obvious type of feeding damage – the holes and leaves munched away. Insects that commonly cause this type of damage are grasshoppers (order Odonata), caterpillars (order Lepidoptera), immature sawflies (order Hymenoptera), and others with mandibles (mouthparts) made for chewing. Usually, the most economic way to deal with these pests is to simply pick them off of your plants when you observe them.

Although many types of Lepidopteran pests simply chew through leaves, some remove leaves (and needles!) to form casings needed for pupation and metamorphosis, as is the case with these bagworms (likely Thyridopteryx ephemeraeformis). Photo credit: Nick Goltz

The Borers and Miners

This subgroup of the nibblers are tougher to deal with. While they have similar chewing mouthparts, they are the usually found within their plant hosts. Borers are usually beetles that chew through woody plants (order Coleoptera), though sometimes caterpillars (order Lepidoptera) chew through herbaceous plants (such as the squash vine borer, Melittia cucurbitae). Leafminers may also be Lepidopterans, though most are immature flies (order Diptera). They are best managed by using a systemic insecticide – one that is taken up by the plant and distributed throughout. As with all insecticides, be sure to apply following label instructions and not while pollinators are visiting the plant.

Beetles have bored through this wood. Some species burrow deeply into the plant’s vascular tissue while others burrow along the bark, forming tunnels called “galleries”. Both types of damage can be seen on this log in the Sonoma forest. Photo credit: Nick Goltz

The Piercing-suckers

These insect pests have a modified mouthpart called a stylet, which works like a straw. Piercing-sucking pests use their stylets to suck plant “juices” from soft tissue, stunting growth and causing leaf distortion, spotting, and reduced vigor. Common insects that cause this type of damage are aphids and whiteflies (both are order Hemiptera). Insects in this group are more likely to transmit viruses than those in most other orders.  

Aphids (order Hemiptera, family Aphididae) are the bane of many a gardener! They reproduce quickly and often target young, supple tissue like new leaves and flower buds. Above is a photograph of aphids feeding on my roses earlier this year. Photo credit: Nick Goltz

The Gall-makers

Some insects, such as thrips (order Thysanoptera) can cause some similar disfigurement damage as those mentioned above, but may also cause the formation of galls, a type of unusual growth on plant tissue caused by insect feeding and/or the production of unusual plant growth hormones by the insects. The larvae of some wasps (order Hymenoptera) can cause the production of really interesting galls. There are non-insect pests, such as mites (class Arachnida), and certain types of fungi and bacteria that can also cause galling. Most of the time, the production of these galls do not seriously injure the plant and are only an aesthetic issue, but be sure to keep an eye out for any reduced vigor associated with these galls.

Plant galls take many different shapes, sizes, and forms! Often, an insect will lay her egg on/in a leaf, and the feeding young larva will cause the gall to form around it, providing necessary nutrients and protection from predators. Some insects only lay one egg on a leaf. This was obviously not the case in the above photo. Photo credit: Nick Goltz

…and (Nearly) Everyone Else

It’s important to remember that most of the insects we encounter in the garden are harmless or beneficial – pollinating our plants, eating pests and keeping the insect community diverse and healthy. Be sure to only apply insecticides as a last resort and only when pollinators and other beneficial critters aren’t present. The best time of day to apply insecticides (to minimize sun injury and contact with pollinators) is in the evening when plants are dry unless otherwise specified on your product label. Not sure what insect is visiting your garden? Contact the folks at the UConn Home & Garden Education Center by emailing ladybug@uconn.edu for advice and identification services. If you’re dealing with a plant disease, ask to have your sample forwarded to the UConn Plant Diagnostic Laboratory instead. The UConn PDL is funded, in part, by the state of Connecticut and the USDA through IPM Extension Implementation and National Plant Diagnostic Network grants.

Nick Goltz, DPM

Spring thunderstorms are a part of life in New England. While we know to prepare our homes, pets, and livestock for inclement weather when it hits, we may not think to secure our beehives for bad weather as well. It is important for beekeepers to adequately prepare for storms to minimize colony losses and damage to hives. This is especially necessary in early spring when colonies tend to be less strong due to the combination of winter recovery and reduced nectar flow. Following the steps below will ensure that bees will be equipped to handle a significant storm. Large-scale operations with many hives may want to follow additional recommendations for severe storms and hurricanes provided by the USDA.

  1. Place hives in an ideal location to handle the storm – If a severe weather event is forecast, consider moving your beehives to a secure, offsite location that will not be directly impacted by the storm. Hives should be placed on high, level ground and moved away from areas where water could accumulate. Though trees may provide a windbreak to offer some protection, hives should not be placed directly under trees that could drop branches on them. Any debris near hives should be removed as they could become projectiles if winds are sufficiently strong. If you have access to a shelter location, such as a fortified shed or barn, hives may be moved there. Close the entrances of the hives to prevent bees from escaping in the building. Never keep bees in a storage area attached to where humans or animals live, such as a garage. Move the bees back to their normal location as soon as safe to do so.
  2. Provide colonies adequate resources – Colonies should be equipped to handle intense rain and a short period without access to nectar. Repair any damages to hive exteriors and apply fresh weatherproof paint if needed. Ensure the colonies are supplied with honey or other sources of food and water, such as a sugar solution. Top feeders may not be a good choice for hives remaining outside as they can be blown off, increasing likelihood of water infiltration.
  3. Secure hives in place – For hives that remain outside, it is essential to minimize the risk of them toppling over. While it may seem best to raise hives off the ground using stands to prevent water infiltration, this effort may be counterproductive if it increases the risk of the hive falling over. Use packing crates weighted with cinder blocks if flooding is likely and the hives cannot be relocated. Bricks or stones placed on lids of hives are not an ideal choice as they are surprisingly easy to be blown off with intense winds, increasing risk of damage to hives. Instead, use ratchet straps or quality rope, securely anchored to the ground, to hold hives in place. Cinder blocks may be left on lids if they are strapped securely (through the hole) to the top.
  4. Secure supplies – Place all beekeeping supplies in waterproof containers. Gloves, veils, smokers, hive tools, etc. should be placed in a sealed, waterproof container that can be easily accessed after the storm. Similarly, unused frames, wax and honey extraction tools and any other pieces of equipment that may carry an odor (which may attract pests) should be placed in a sealed, waterproof container that may be further reinforced with duct tape or another sealant.
  5. DO NOT:
    • – Cover hives with plastic (suffocation, drowning, or overheating may occur)
    • – Remove propolis from hives before the storm (propolis reduces water infiltration)
    • – Place hives next to or inside residential buildings (even if they will be evacuated prior to a severe storm)
    • – Place hives under trees that could drop limbs or fall on them
    • – Raise hives off the ground with unstable stands (this increases the likelihood of them falling over)
    • – Clean up or repair damage until safe to do so and all damage has been documented (for insurance purposes)

References and Further Reading:

For any plant health inquiries or plant disease issues, contact the UConn Home & Garden Education Center and the UConn Plant Diagnostic Laboratory by emailing ladybug@uconn.edu. The UConn PDL is funded, in part, by the state of Connecticut and the USDA through IPM Extension Implementation and National Plant Diagnostic Network grants.

Until next time,

Nick Goltz, DPM

Crabapples in bloom along a driveway

“In the village, a sage should go about
Like a bee, which, not harming
Flower, colour or scent,
Flies off with the nectar.”
― Anonymous

As March begins and weather starts to warm up, not only plants are awakening from their slumber. Also beginning to stir are many native and non- native bee species including Collettes ssp. Bombus spp.Honey bees, Andrena spp. and Megachile spp. These bees need flowers available for nourishment and food stores for their nesting chambers starting as early as March. Plants that support bees in spring may be native and non-native, wild and cultivated, weeds or ornamentals. The following are just a handful of plants that can be especially helpful in supporting bees from March- May.

Native bee on a dandelion flower

There are several non-native plants that flower in early March and are visited by bees- crocus, Whitlow grass, dandelions, Cornell pink azalea and daffodils. In the early spring, blooms are few and far between, and while daffodils are not usually considered pollinator plants, bees like honeybees will visit daffodil flowers if there is not much else around. The Rhododendron mucronulatum ‘Cornell Pink’ azalea is one of the first azaleas to bloom here in Connecticut. Loaded with pink blooms, many species of pollinators, not just bees, will visit these flowers.

‘Cornell Pink’ Azalea is one of the first cultivated azaleas to bloom in the spring
Daffodils

Korean Spice Viburnum Viburnum carlesii blooms in April and has abundant clusters of extremely fragrant flowers that attract many pollinators. Arrowwood viburnum is also a spring bloomer and is native.

Korean spicebush Viburnum has extremely fragrant flowers

Amelanchier canadensis, shadblow serviceberry, is a small tree or multi- stemmed shrub that flowers in April. Both bees and butterflies will visit the flowers.

Amelanchier

Crabapples, black cherry and flowering plum attract many bee species and other pollinators in late April- May, including Osmia spp. like the red mason bee, Osmia bicornis. Cornus mas, Cornelian cherry, is a small tree or large shrub that blooms in late winter or early spring. Clusters of small yellow flowers appear before the leaves. Andrena bees, native specialist pollinators, visit these flowers.

Cornus mas

Dandelions and dead nettles, while considered weeds in a lawn, attract many spring pollinator species and a few in a lawn should not be the end of the world…

Bumblebee on dead nettle

Japanese andromeda, Pieris japonica, is a non-native evergreen shrub that can bloom from March- June, depending upon the cultivar. Flowers are white or shades of red and resemble the urnlike tubular flowers of blueberry.

Japanese Andromeda

Bloodroot is a low growing native perennial that can bloom in April. Many bees, especially Megachile spp. and Coletes spp. visit flowers of this open woodland species. There are many other native perennials that have early blooms that support bees. Including Solomon’s seal, Geranium maculatum (cranesbill), and columbine that are all shade tolerant.

Native bloodroot
Solomon’s seal attracts bumblebees and hummingbirds

Cornus florida, the native flowering dogwood tree blooms usually by mid-May. The native dogwood has white flowers and an open, layered form in forest understories, while cultivars may have pink to red flowers and various sizes and growth habits. Red maples are among the earliest maples to flower and bees will visit the flowers readily.

Flowering dogwood ‘Cheyenne Brave’
Red maple flower

There are many more plants that will support bees in the landscape whether natural or cultivated.  Consider planting a few of these, if you have the room and a desire for a little splash of color in the spring garden. I wonder if Ray Bradbury was right, when he wrote in “Dandelion Wine”-  “Bees do have a smell, you know, and if they don’t they should, for their feet are dusted with spices from a million flowers.”?

Native columbine and Geranium Maculatum along a country road
Carpenter bee on native redbud

Pamm Cooper

A list of good plants for spring pollinators:

Acer (maples)         Phlox                    Lupine                        Alders              Lilac

Amelanchier           Violets                  Eastern redbud        Spicebush       Cornus spp.

Salix (willow)          Columbine           Cranesbill                  Sassafras         Currant            

Blueberry                Chokecherry        Cornus mas              Hyacinth          Raspberry  

Basswood                Crabapple            Trillium                     Dandelion       Phlox 

Crocus                      Viola spp.             Currant                    Dead nettle     Prunus spp.     

Huckleberry

“Every leaf speaks bliss to me, fluttering from the autumn tree.” – Emily Brontë

Late September and early October signal the end of summer, but the weather has been warm enough for pleasant excursions that do not require a heavy coat. Lots of insects and flowers are still around, and not too many migrating birds are coming through so far. I am not a big fan of pumpkin spice anything, but I do enjoy leaf colors and cool, crisp mornings with a clear blue sky backdrop.

Light streams early in the morning in autumn 2021

Keep your eye on cedar trees with an abundant amount of berries on them for yellow-rumped warblers passing through, and other year-round birds as well. Crabapples, viburnums and hawthorns are also good food sources for birds late in the year. Today there were bluebirds, phoebes, white-throated sparrows, cardinals, mockingbirds and blue jays on a Cornus florida in my backyard.

Yellow-rumped warbler eating a cedar berry

Ludwigia alternifolia, also known as alternate leaved seedbox is a North American perennial wildflower found in wet areas- swamps, stream banks, edges of ponds and other places with damp soils.  Leaves resemble willow- slender and alternate along the stems. Yellow flowers resemble those of moth mullein and appear in summer for 2-3 months only blooming for a day. Seed capsules are a quarter of an inch square and rattle when they are shaken. Flowers of rattlebox are pollinated primarily by bees. 

Rattlebox seed pod flanked with sepals.
Tiny seed box of Ludwegia alternifolia

Wolf Eyes Kousa dogwoods are included as specimen plantings in many landscapes for good reason. These small trees have a nice form and attractive variegated foliage that is an outstanding backdrop for the strawberry- like fruit that appear in late summer.

Wolf eyes Kousa dogwood

Chickweed geometer moths are small, yellow with pink bands and markings. Caterpillars are inchworms and host plants include chickweed, smartweed. Because lawns may contain some of these plants, the small moths are often spotted resting on blades of grass.

Chickweed geometer moth

Stacked kites look like a lot of fun to launch and enjoy. Recently someone had several kite stacks flying at Harkness Memorial State Park, where the offshore winds are ideal for this hobby. This park has many things of interest including a cutting flower garden, 111 year old full moon maples, gardens, buildings and expansive grounds. There also is a very fragrant heliotrope garden that is worth a visit just past the main building.

Water tower and cutting garden

Stacked kites

This weekend along a forest trail, I was delighted to find two diminutive puffball species that were new to me. Both had stalks, and were on bare soil, and the stems had a gelatinous film covering them. From directly above, the caps looked like acorns with the tip side up. The aspic puffball Calostoma cinnabarinum had a red cap and the ghoul’s eyes puffball, Calostoma lutescens had a yellow- ochre cap with a red apical mouth resembling, I guess, the eyes of a ghoul.

Aspic puffball
Ghoul’s eyes puffball
Hericium americanum bear’s head tooth fungus looks like a tight cluster of tiny icicles

Some late blooming plants are providing food sources for pollinators that are still active. Lespedeza bush clovers, asters, some goldenrods and lots of annuals like lantana and salvias are important nectar and pollen sources for native and non-native beetles and bees.

Bumblebee on an aster flower
Pink flowered Lespedeza bush clover

Recently the gardener at the golf course and I were delighted to find an eft of the red spotted newt and a very small spotted salamander under some bushes being removed from a neglected landscape. After making sure they were okay, they were returned to a safe place. The excitement never ends…

Juvenile spotted salamander

We also discovered a small spicebush along a cart path that had 5 spicebush caterpillars on it. By the time all had left to pupate, there were only two leaves left uneaten.

Checking a small spicebush
Spicebush swallowtail caterpillar

As the weather cools and leaves begin to drop, many of the little creatures that brightened our day will soon head for a protected spot to overwinter. Although gray treefrogs are still hanging out on leaves, they will retire under leaf litter or other places until next spring. Hardy insects are slowing down to do the same. Sunsets may be more spectacular in cooler weather, but I will miss those surprise encounters with living things in the garden and the wild landscape.

Besides the autumn poets sing, a few prosaic days, a little this side of the snow, and that side of the haze.

Emily Dickinson

Path in the autumn woods

Pamm Cooper

Next Page »