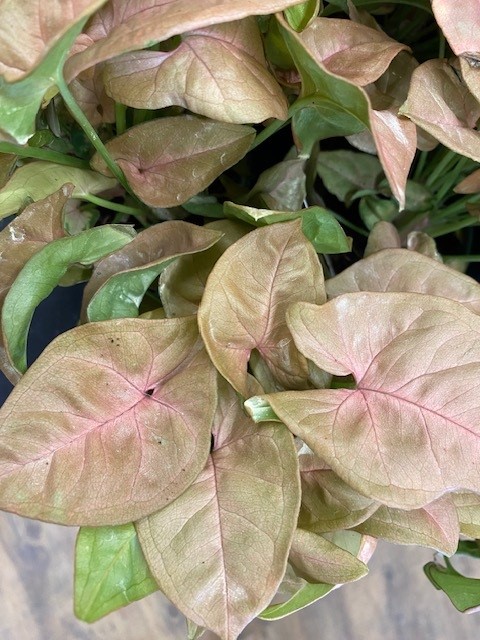
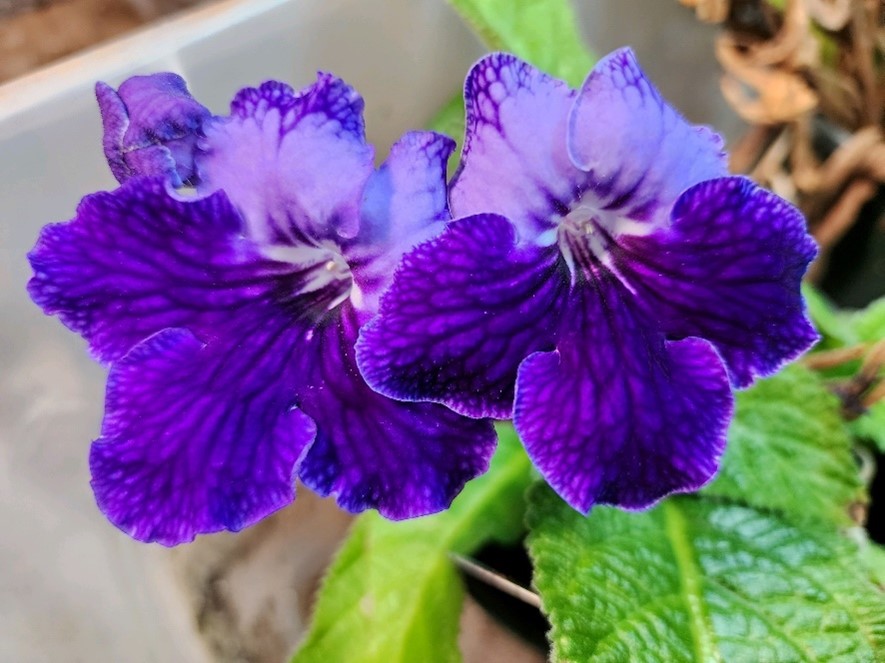
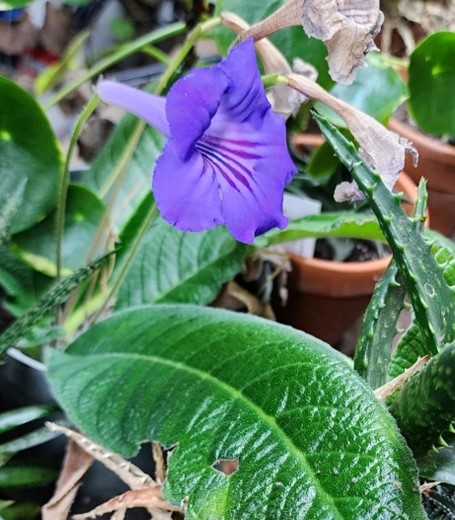
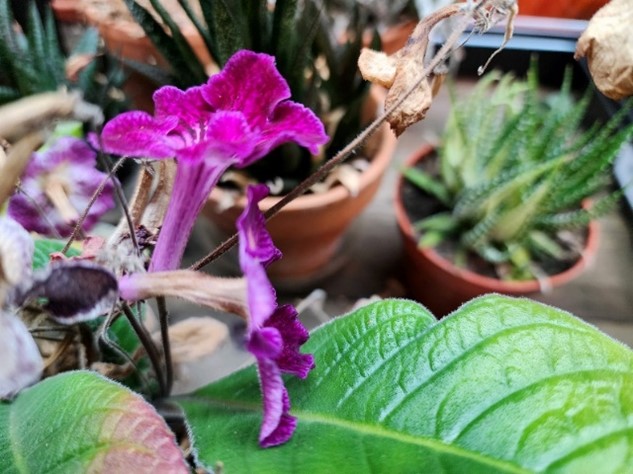
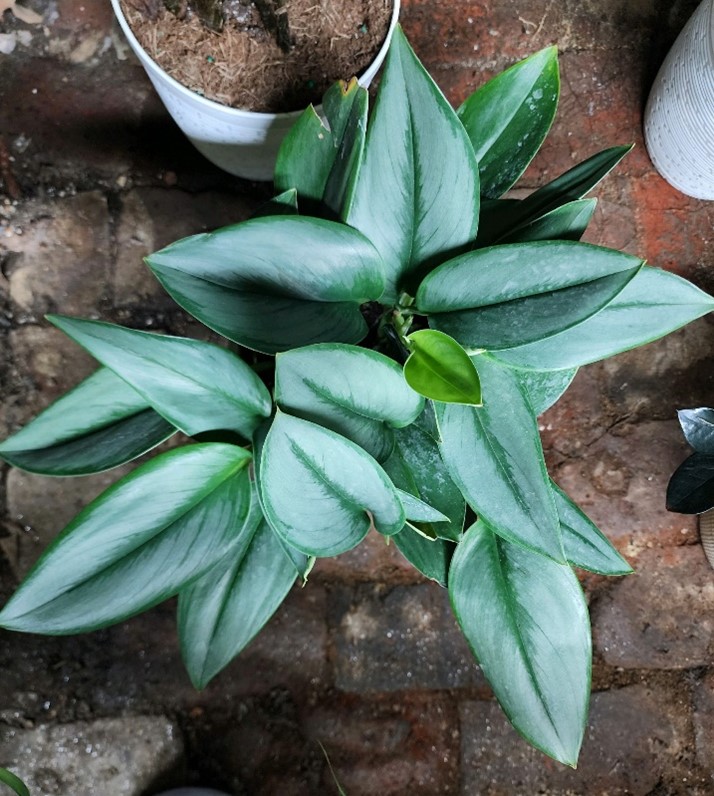
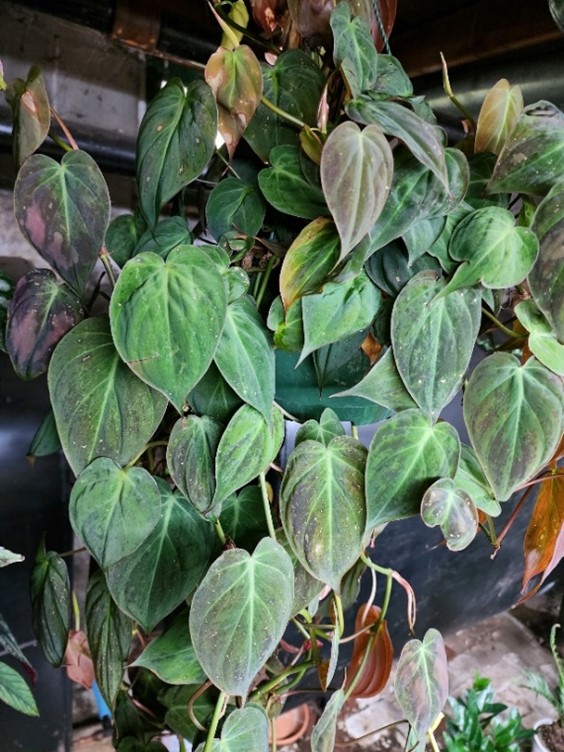
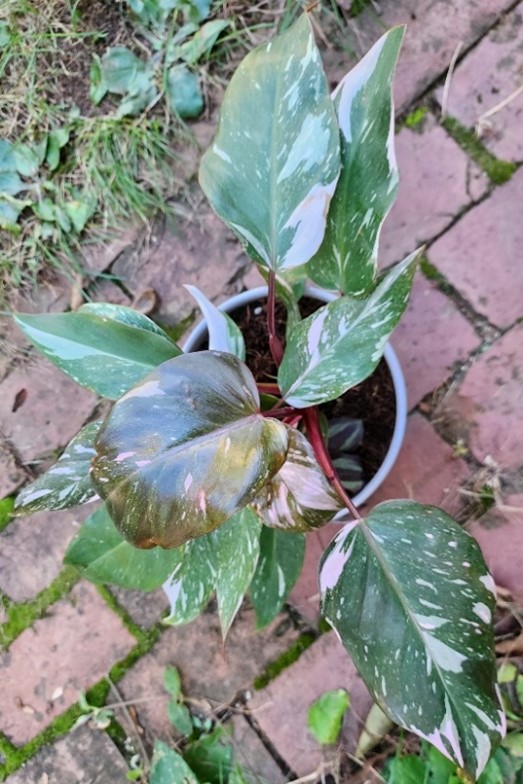
I don’t want to depress anyone, but its almost over. Winter is coming, and it will come fast, thereby ending our beautiful growing weather. We can enjoy the last few days of warm weather before the nights start getting significantly cooler. Fairly soon, when temps start dipping below 50oF, we should be bringing in our houseplants. Not everything that beautified our yard all summer needs to fall victim to Old Man Winter, however. Some plants can winter over nicely and be saved for next year.
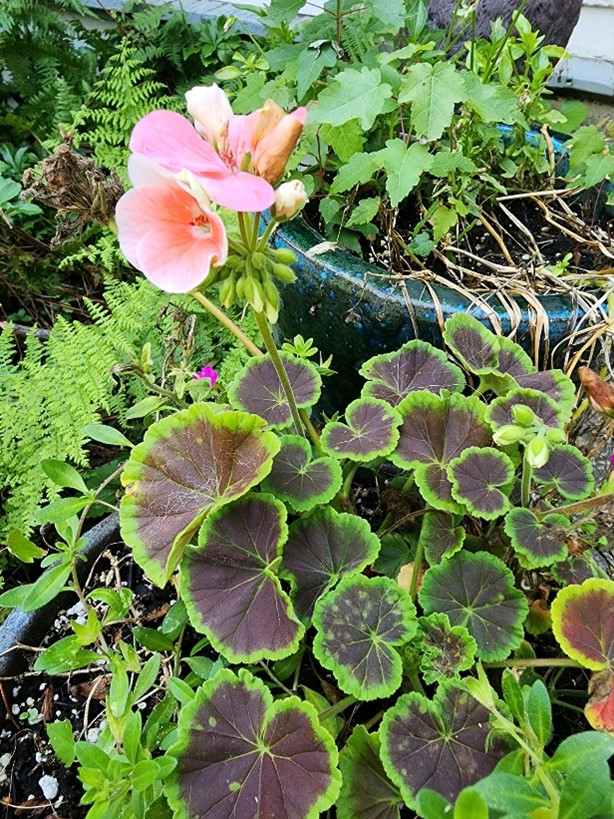
This unique geranium with beautiful dark leaves would make a great houseplant over the winter. Photo by mrl2022.
The first thing to understand is that you will be going from one extreme to another. The amount of solar radiation outside compared to what is inside is literally going from one end of the spectrum to the other. A brightly lit window, even if sunny, does not really compare to unfiltered direct sun. Fluorescent or LED light fixtures are great, but they need to be close to the plants (right above, nearly touching). The more lights the better. There are higher powered artificial lights available (like high intensity discharge, sodium lights, metal halide, etc.), but these are not something seen in the common home. Either way, leaves are adapted to the light they are accustomed to, so when going from one extreme to another, you will probably lose some. The best example of this is buying a pothos at a greenhouse or home improvement store, then bringing it home. Leaf loss is normal, especially in the lower/shaded leaves. The plants still look nice, but they are much thinner. If your plant’s journey to the inside is going from shade outside to bright window inside, that generally is not too bad and leaf loss may be minimal. 

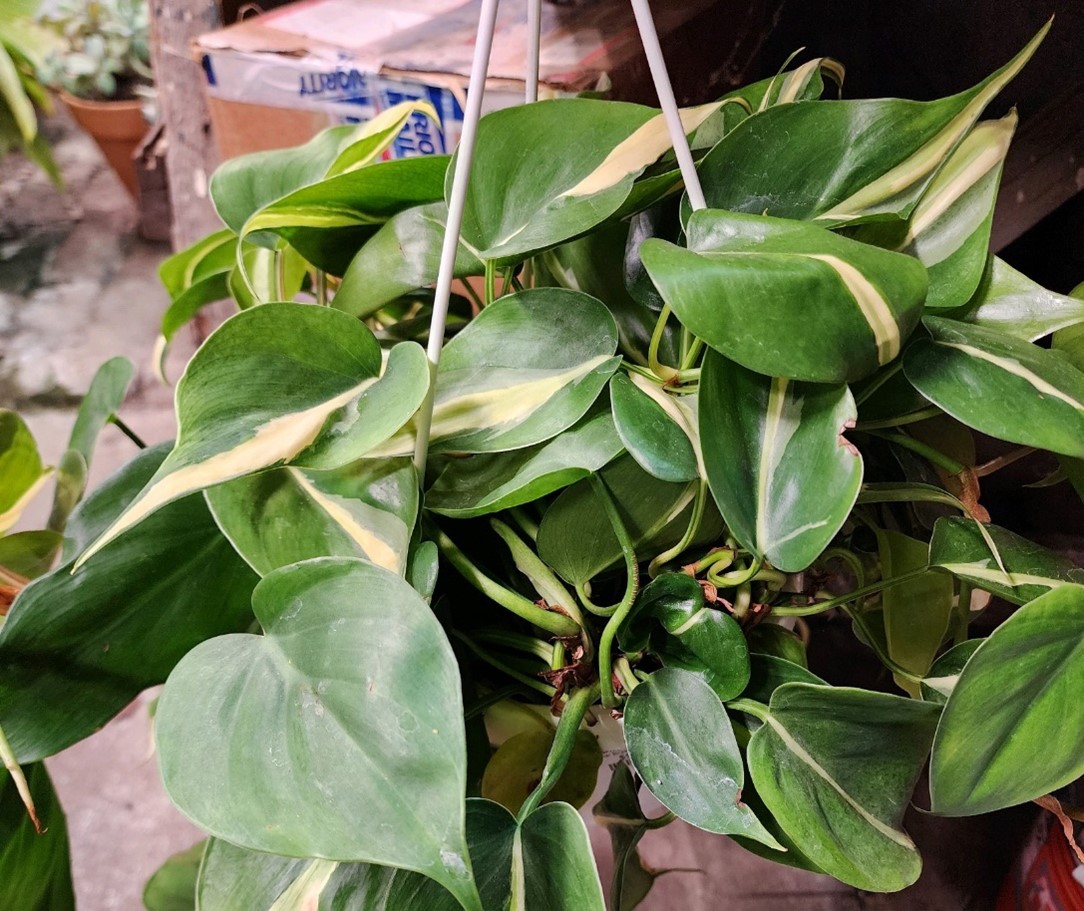
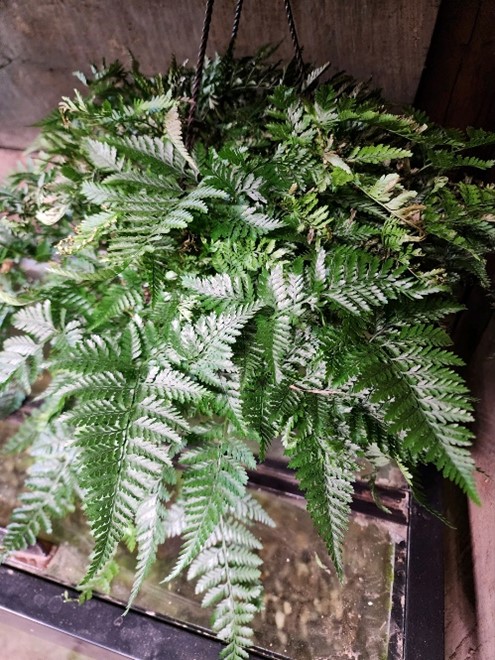
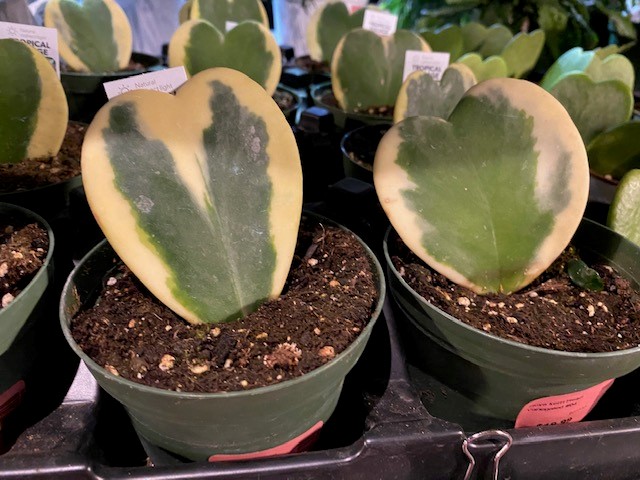
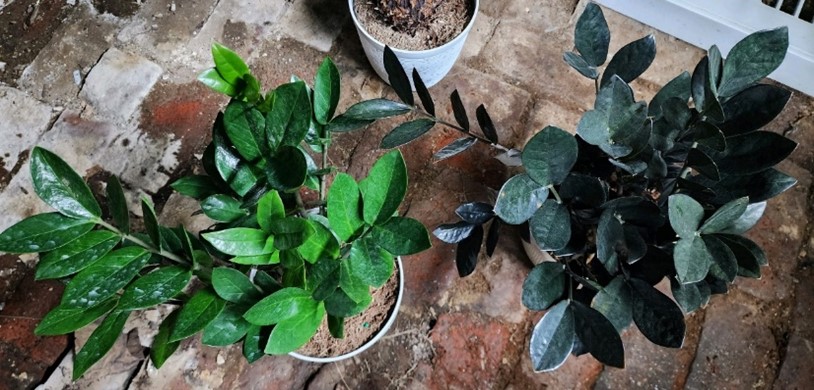
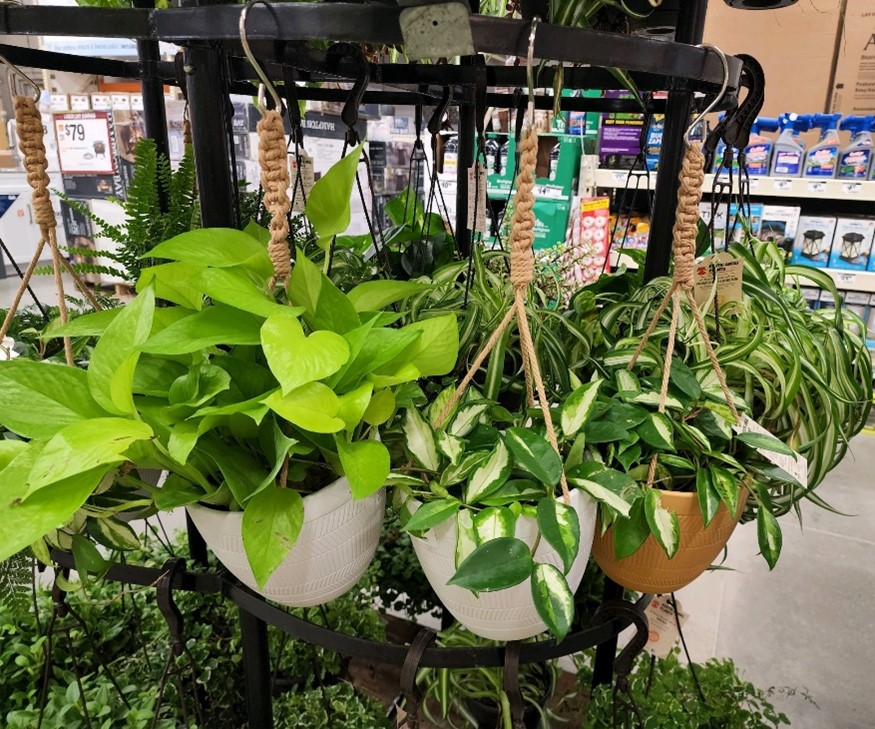
These nice-looking houseplants will certainly drop some leaves as they adjust to the lower light levels in your home. Expect the Neon Pothos (left) to lose a lot of the leaves near the base of the pot. Photo by mrl2022

There are a number of hitchhikers that can enter our home when we bring our plants inside. The first, and worst, is the mosquito. If your tray has some water in it, then you might accidentally introduce these into your home. They won’t last too long, but you will wake up with some annoying itchy bumps! Spiders are the next most common. They are normally good, and eat some pests that like our plants, but their webs can get annoying. Their presence triggers many horror-movie like reactions in most people as well. Earwigs are another annoying little critter.  Their pincers on the back end look intimidating. They usually do not do too much damage to your plants. Avoid overwatering the plant which will allow them a moist space in which to survive. One of the most interesting visitors I ever had was a frog! Luckily, I was able to capture him and release him back outside. Usually frogs or toads can be spotted if you carefully inspect your plant. They are more likely to be found under the saucer or pot than inside of it.

Some of my favorite out-for-the-summer plants are banana, various citrus, and fig trees. These do not need a ton of light over the winter either. I like to place them in a cool basement under one light and water sparingly. The first chance I get to move them out in the spring I take it. I like to freshen the potting mix they are planted in and add some fertilizer at that time as well.  They tolerate this type of cultivation fabulously.

In addition to bringing in houseplants, there are some of our annuals that can make fine additions to the home. My absolute favorite are the geraniums. Many times throughout history, these plants were kept in greenhouses or conservatories year-round. A friend of mine said she likes to bring in some coleus. Both of these plants are rather expensive, and it might be nice to save some for next year. There are a number of people that like to overwinter their pepper plants. I find that the best for this are the really hot ones that seem to grow slowly like the habanero. The following year you will have more peppers than you know what to do with. For a number of years, I brought in a large, not-so-hardy rosemary plant.

There are some very pretty plants which just do not seem to do well indoors. The first that comes to mind is the calibrachoa. Although beautiful outside, they seem to struggle indoors. They are not very forgiving if they get too dry. They easily and almost always suffer from western flower thrips as well. I really do not want to deal with spraying pesticides indoors all winter. The same story is true for petunias. Most bedding plants are best left outside – purchase new ones in the spring. Another pest that you need to watch out for are aphids. There are many species of all different colors. If a few sneak in, they can quickly reproduce asexually. The females essentially clone themselves.

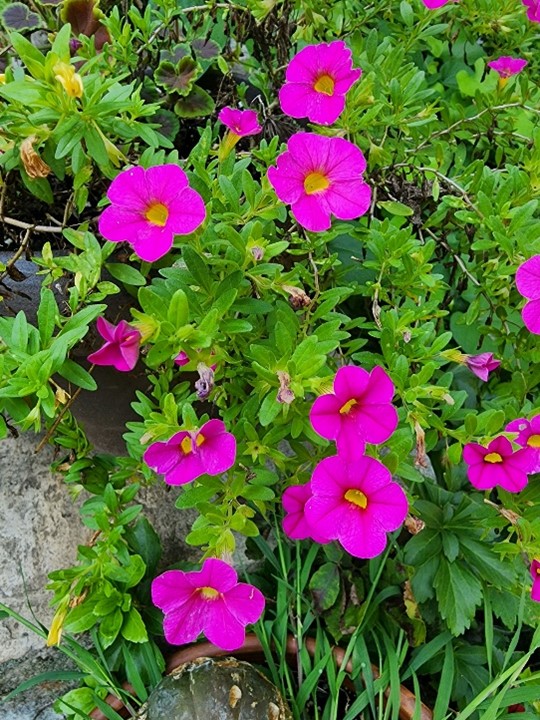
Although beautiful and still going strong, calibrachoa generally does not do very well indoors, and is prone to a number of insect pests including western flower thrips. Photo by mrl2022.

No matter what you bring in from outside, I recommending isolating it from your regular indoor houseplants for a few weeks. This is best done in a separate room with the door closed. Any trouble should present itself by then. After the quarantine period, your plants may become a part of your regular collection, or you might simply set them up under some lights in the basement.  Be careful with watering. Cold and soggy soil are a perfect recipe for disease. You don’t have to wait too long before it is spring again! Keep the plants out of real drafty areas that favor the development of diseases as well. 

The last piece of advice is that you may not want to bring in the entire plant. For year I kept my geranium collection going by taking a few cuttings of each plant. These overwintered nicely, took up less space, and required less care. I could fit my whole collection under a few lights.  By the time the spring rolled around, I had nice plants with strong root system ready for a pot. Figs can be grown in this way too (or you might simply want more fig trees).

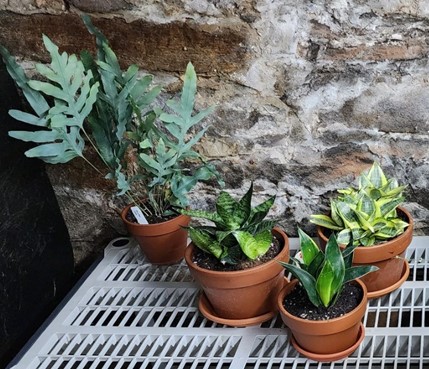
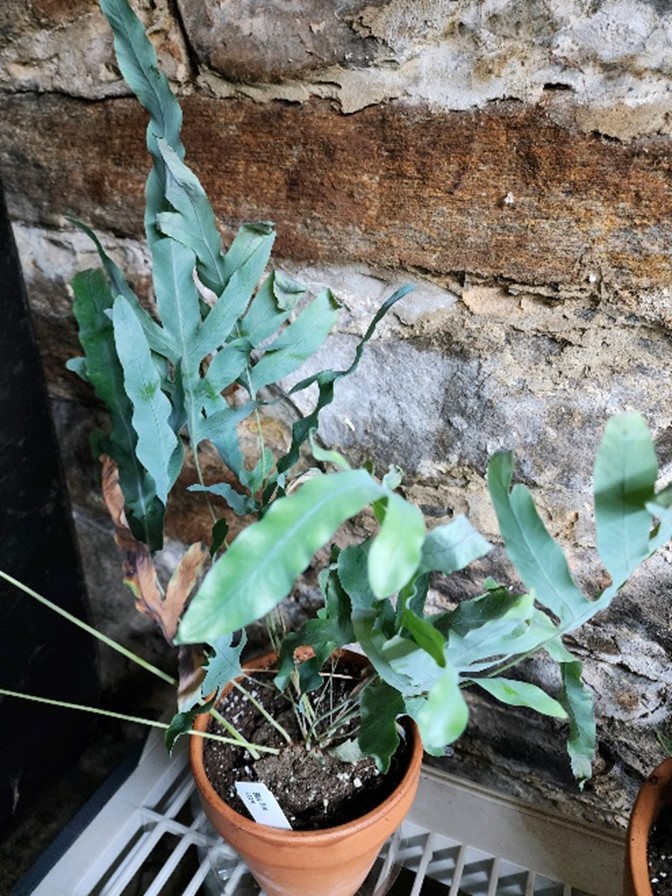
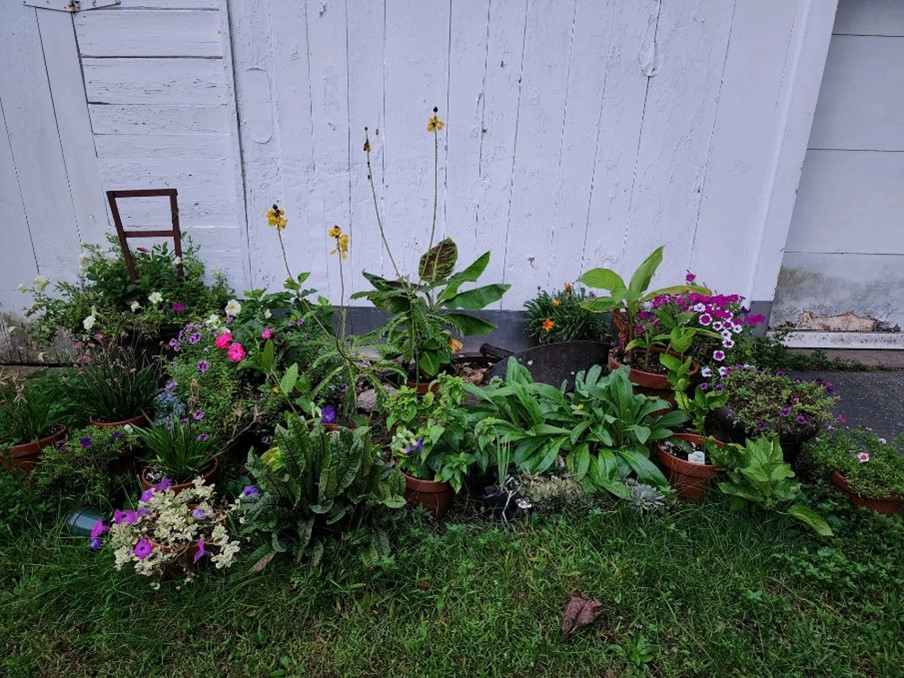
A mixed collection of houseplants and annuals, many of which will be brought inside for the winter. Photo by mrl2022.

By bringing in some of your favorite annuals, it might help ward off the winter blues. It could save you a little bit of money in the spring, or simply allow you to expand an existing collection of plants. I wonder how many geranium varieties I could have if I just took a few cuttings in each fall? The following spring, I could buy additional varieties. This kind of thinking makes for a large plant collection!

Matt Lisy

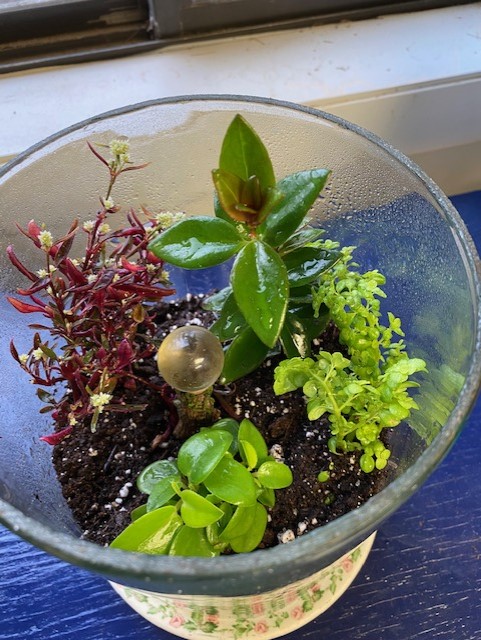
Although it really has not been a bad January weather wise, the dull, cold days find me searching for that bit of green. Thoughts turn to inside plants and sprucing them up a bit. Most houseplants respond well to some grooming and repotting. This is also a good time to take a hard look at any dish gardens and terrariums that were made several months or years ago and if the plants have outgrown their space allotment, the planter can be redone. Such was the case of my poor terrarium.

Overgrown terrarium

Houseplant popularity has been on the rise for several years now and many enjoy displaying their plants attractively in dish gardens and terrariums. Our modern day terrariums stem from a discovery by a London doctor, Nathanial Ward (1791-1868). He discovered healthy ferns growing in a glass jar he was using to study moths and caterpillars. The air inside the jar was cleaner than polluted London air and growing conditions could be controlled. The invention of these portable, glass containers, known as Wardian cases, meant that botanists and other scientists could transport plants from their foreign habitats back to Europe for study in a manner more conducive to their survival.

Wardian cases from http://www.wikipedia.com

While the Wardian cases were closed containers, modern day terrariums can be either open or closed. Closed terrariums work best with plants that tolerate or thrive in relatively high humidity and enjoy indirect light. Care must be taken not to overwater and they should not be set in direct sunlight. I remember filling brandy sniffers with mosses, partridge berry, wintergreen, and small ferns during my high school days. After sealing with plastic wrap, these microcosms of the forest floor would share my desk space for months while I did my homework.

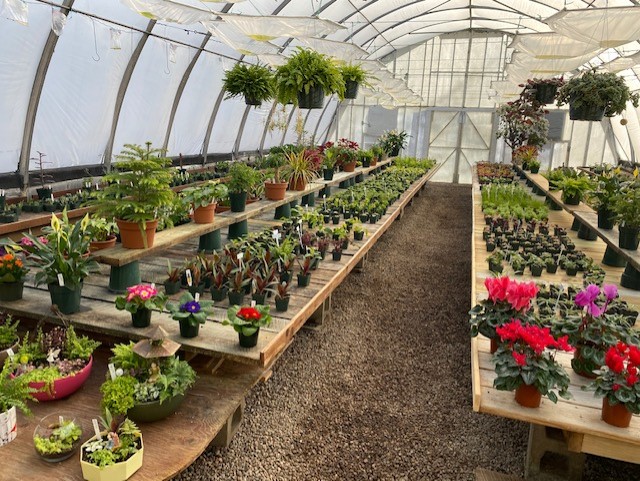
Enclosed terrariums are enchanting but lately I have just made open topped ones because it is easier to monitor moisture levels and humidity; lower humidity lessens the chances of disease. Also, if a plant or two sends its stems over the top, it’s a clear, distinct signal that my plants need attention. Usually I wait until winter to redo the terrarium as this is my favorite time to visit greenhouses for that glimpse of spring warmth amid winter’s chill. Last weekend I traveled to Stone Hedge Gardens in Charlton, MA. This is a small family run operation with a delightful selection of herbs and small houseplants, just perfect for terrariums and dish gardens. You can purchase ready-made dish gardens or individual plants to make your own creations. They also sell seasonal plants, silk floral designs, fairy garden accessories, and potting supplies.

Lots of potential terrarium plants at Stone Hedge Gardens in Charlton, MA

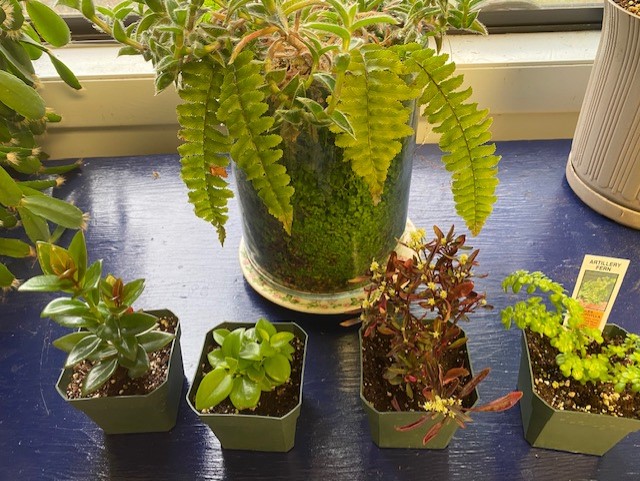
For my terrarium makeover, I found an artillery fern, a goldfish plant, an alternanthera and truthfully, I forgot the name of the fourth plant. Try for plants that have similar light and moisture requirements or at least tolerance. Keep in mind that regardless of how cute they look when purchased, just about all plants will grow bigger. That’s what they are programmed to do. Once they have outgrown a pot or dish garden or terrarium, they need to be moved into larger living quarters. If that is not an option, cuttings can be taken, or they can simply be composted. 

New and old terrarium plants

To make or remake your terrarium, first you need a glass container. Be as creative as you like. Look around the house for what containers could be repurposed or go explore a local antique shop for unique finds. I recycled an old acid bottle. Unlike potted plants, no drainage holes are necessary.

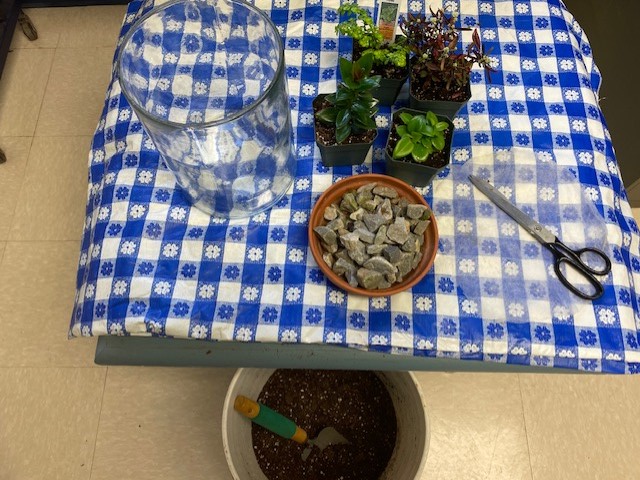
Then, gather supplies. Often small rocks or glass pebbles or even colored marbles are used to line the bottom inch or so. To keep the potting media from getting in between the rocks, some place a layer of sphagnum moss but since I did not have any right now, I use a circle cut out of leftover row cover material and placed that over the rocks.

Terrarium supplies

There are plenty of recipes for terrarium potting mixes, but I just find Pro-Mix works fine. I moisten it and mix in a tablespoon of activated charcoal before placing a shallow layer over the row cover. The charcoal is supposed to retard growth of unwanted microbes but I have made terrariums without it and not had problems.

Next carefully remove the plants from their pots and place on the potting mix, filling around the sides with extra mix and gently firming in place. Plants can then be watered moderately. It is easy to apply too much and even though the excess will drain into the rocks below, too much water makes plant roots susceptible to root rot. A mister can be used to remove any potting soil from the leaves of your plants. I usually only water my terrarium twice a month but I do check it more often in hot weather or when the heat is constantly running. Mine sits in a north window and gets turned on Fridays so the plants will not reach for the light.

Finished terrarium – good for another year

Once the planting and watering is finished, add any touches that tickle your fancy. I set in a fairy size gazing globe. Enjoy your creation and once it overgrows its bounds, get some new plants and start anew.

Dawn P.

January is my time to pay more attention to my houseplants. Crowded pots need dividing and give me the opportunity to share plants with friends. Some folks even sell their newly propagated plants on social media sites hopefully for enough money to cover the potting soil and pots. If you are using old pot, wash them with a 10% bleach and water solution to eliminate any old plant diseases. Use fresh potting soil. I buy a larger bag from my local independent garden center. Woodland Gardens near me sells their own bagged mix I love. It is well draining and I have great success with it. Well draining is key to keep the roots from being too wet and giving opportunity for root rot diseases to invade.

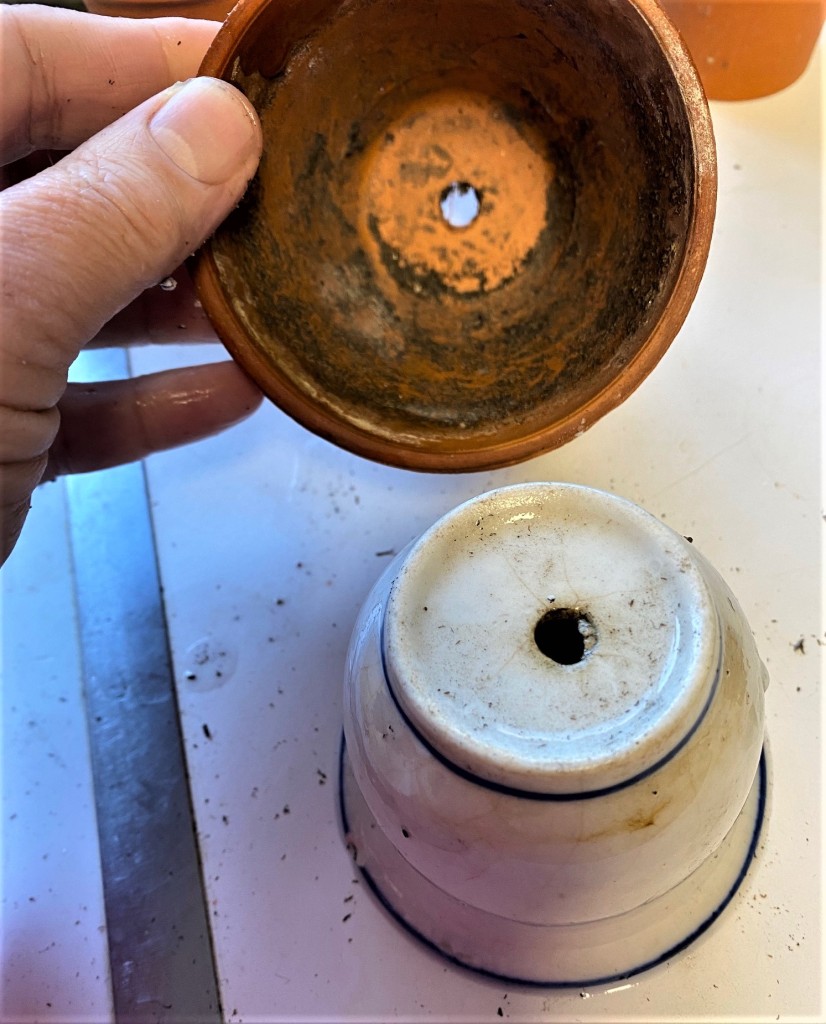
Pots need drainage holes.

Pots need to have drainage holes in the bottom to allow excess water to drain into a saucer or dish. Always poor off any water from the saucer after watering. Never let the pot sit in water or the dreaded root rot can happen.

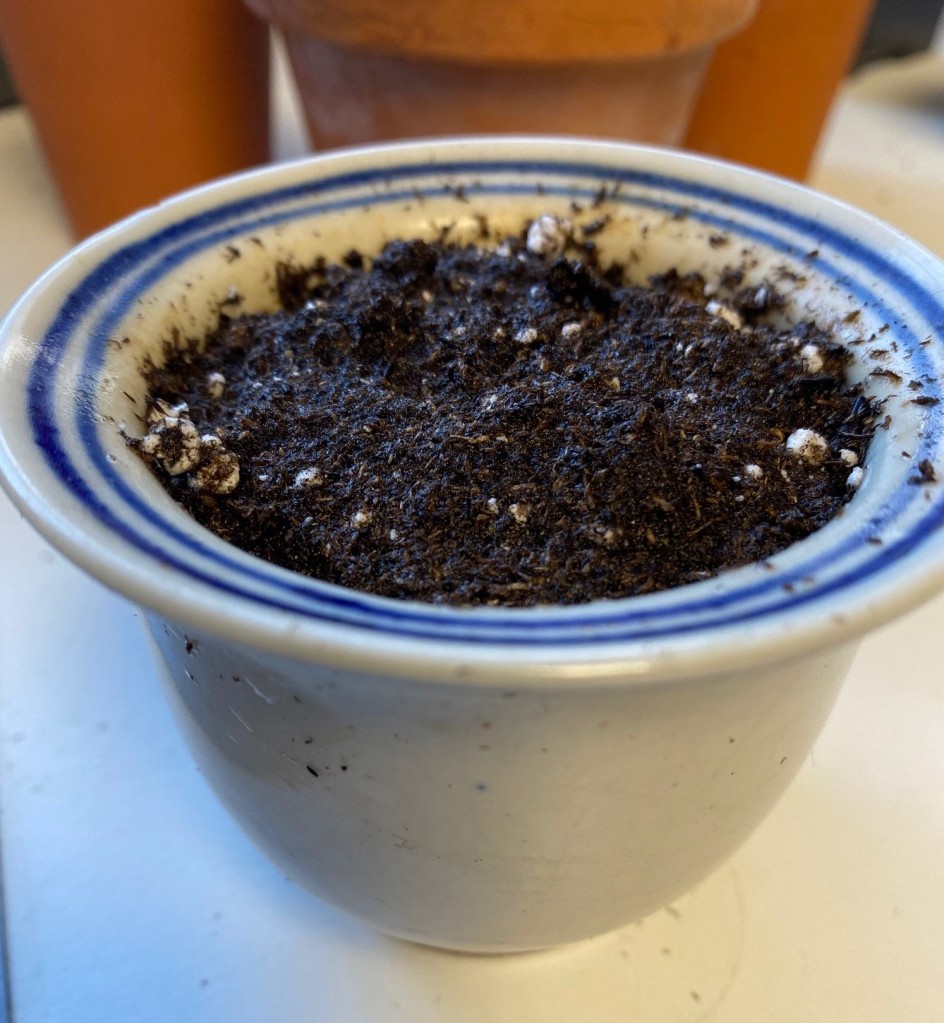
Fill pots to within 1/4 inch of the top edge.

Use a bowl to hydrate the dry potting mix from the bag. Give it a few minutes to soak the water, then spoon or trowel it into the pot being used as the home for the new plant. Fill the pot to within a 1/4 inch of the top lip of the pot. This ensures good air movement over the surface of the soil and leaves just enough space so that the water will run out of the planter over its edge.

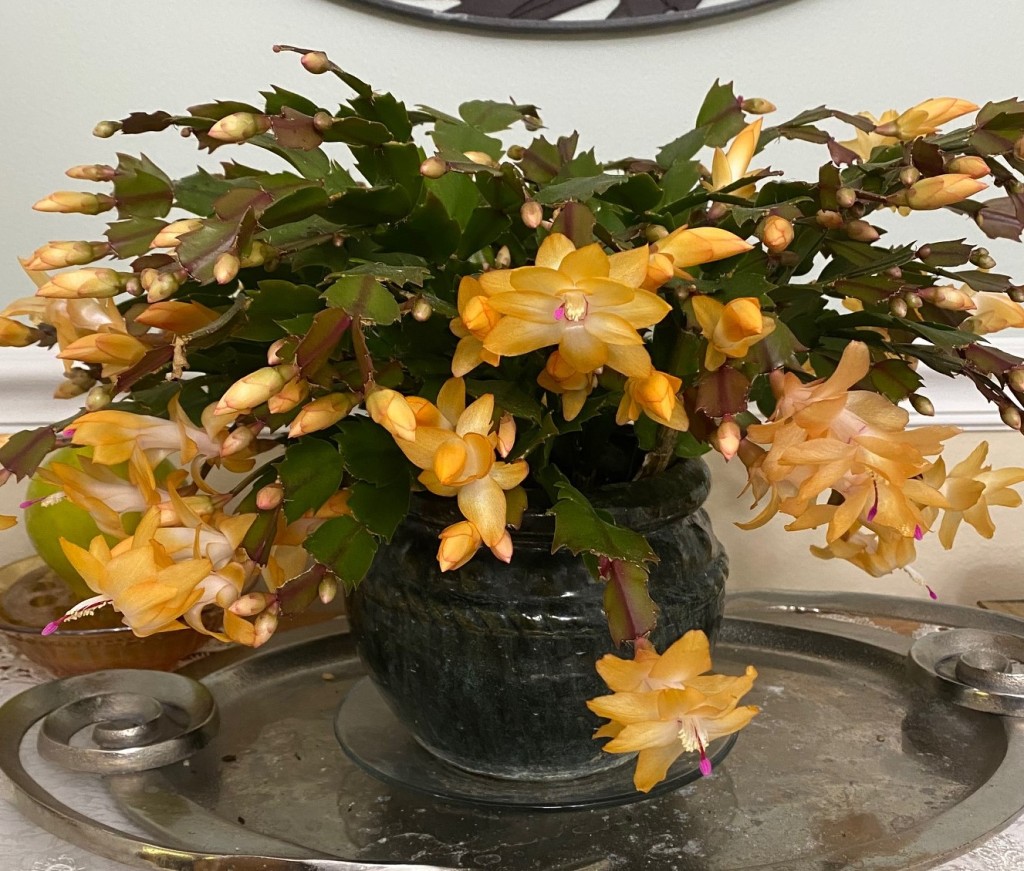
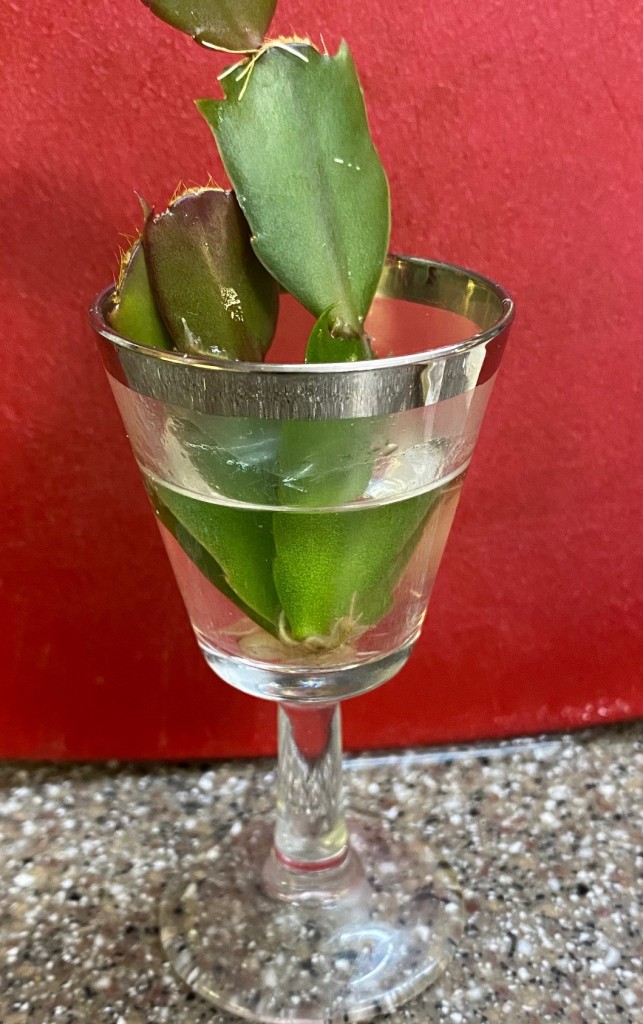
Christmas cactus cuttings in water.
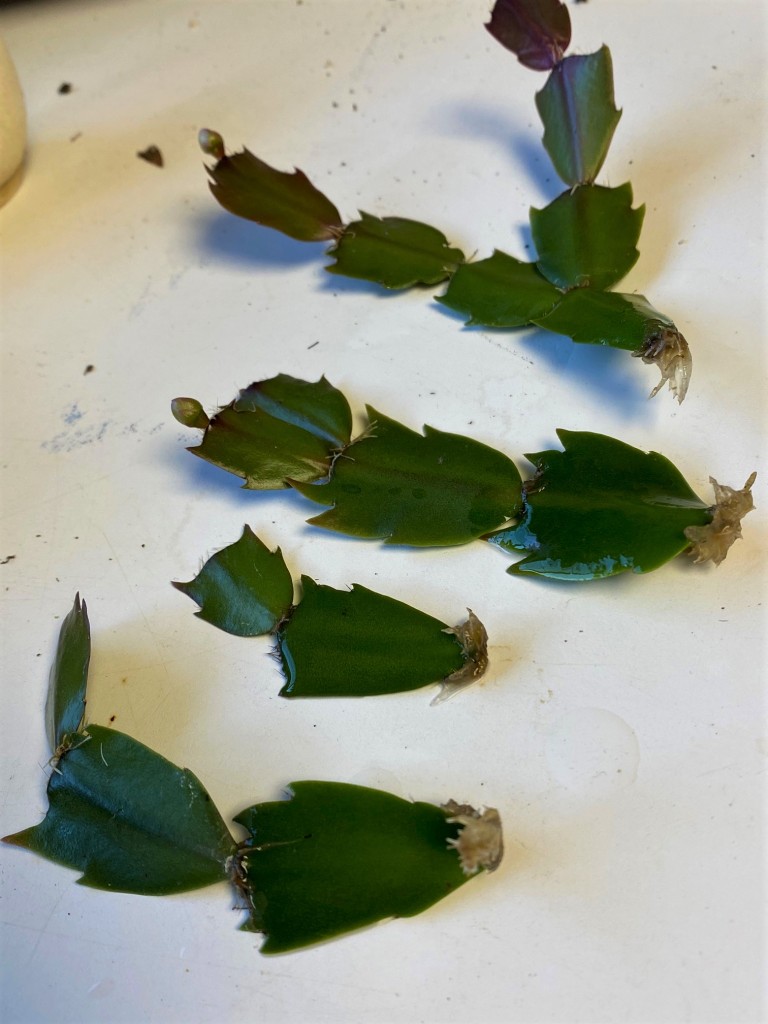
Christmas cactus leaf cuttings after several root of sitting in water to develop roots.

From the Christmas cactus above, I twisted off a few leaf segments. I prefer to set them in water for a few weeks to initiate roots to grow, then plant them in potting mix. Another option is the stick the cuttings directly into moistened potting mix allowing the leaf pieces to set roots directly in the soil and container. The soil must be kept damp until the roots have grown enough to anchor in the soil. Both ways work.

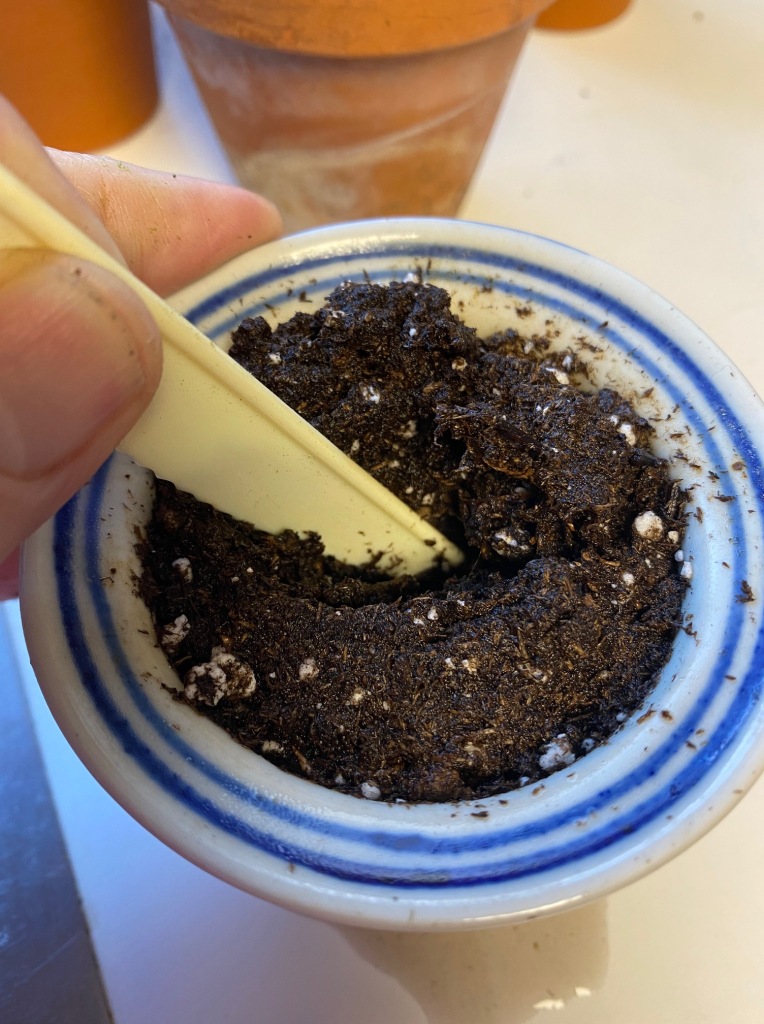
Make a hole.

Make a hole to insert the cutting or cuttings.

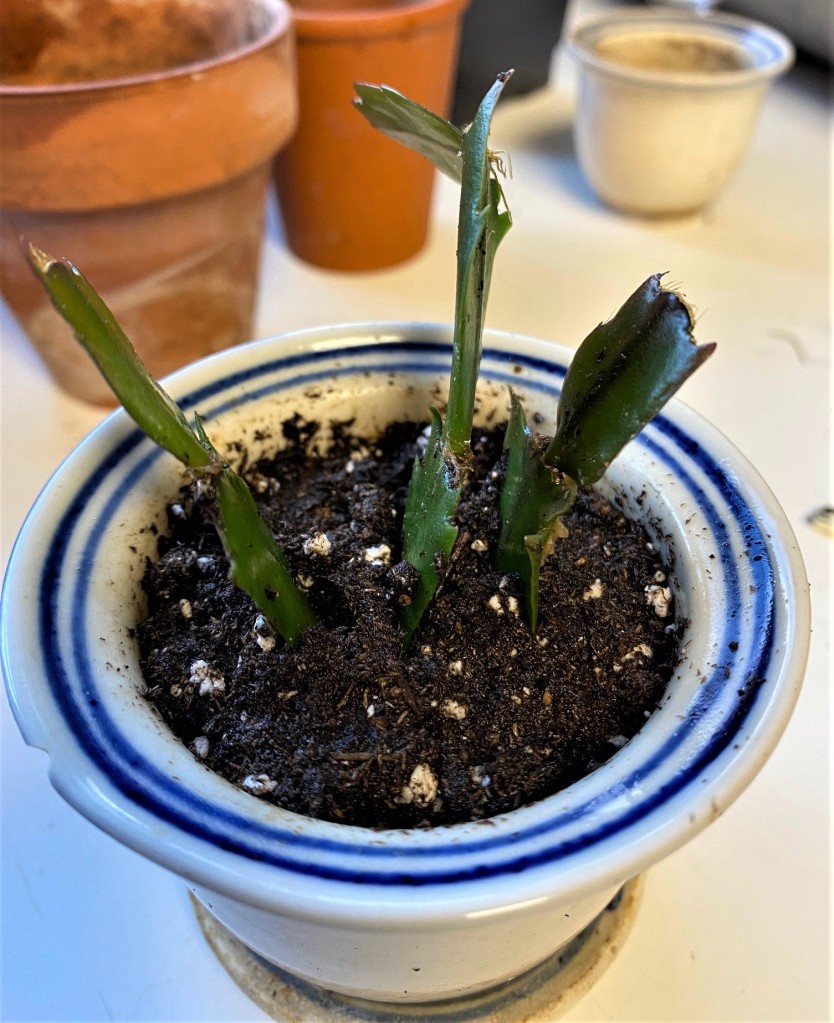
Three cuttings are placed in this one pot.

It may look a little sparse in the above plant, but it will fill in soon.

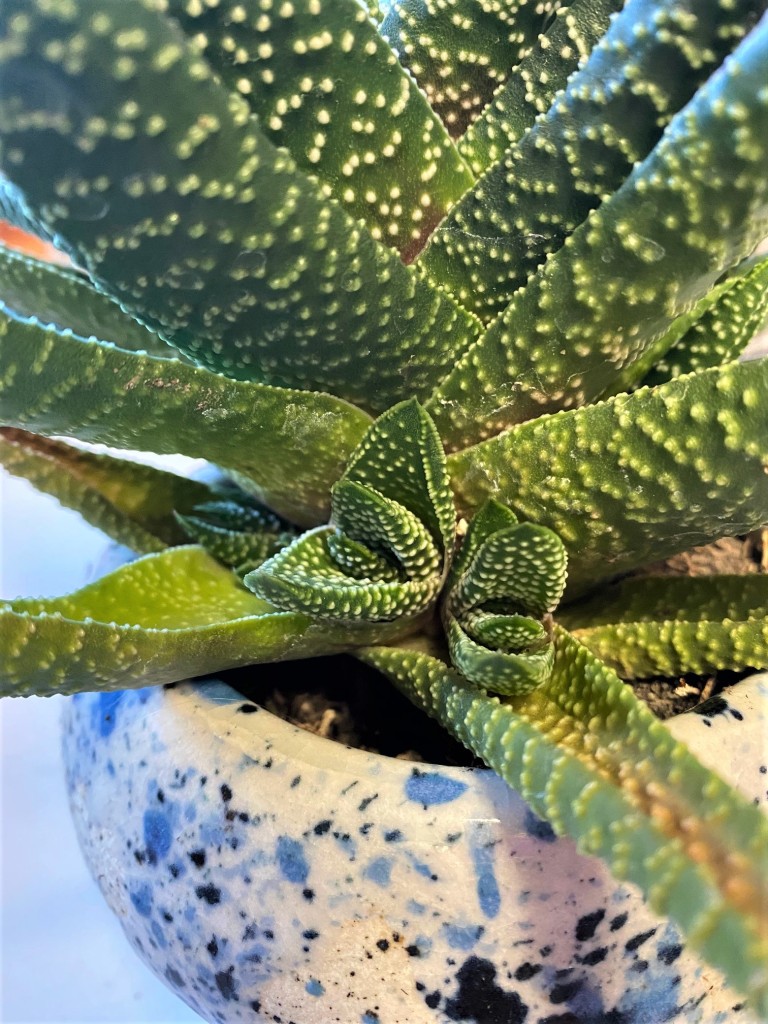
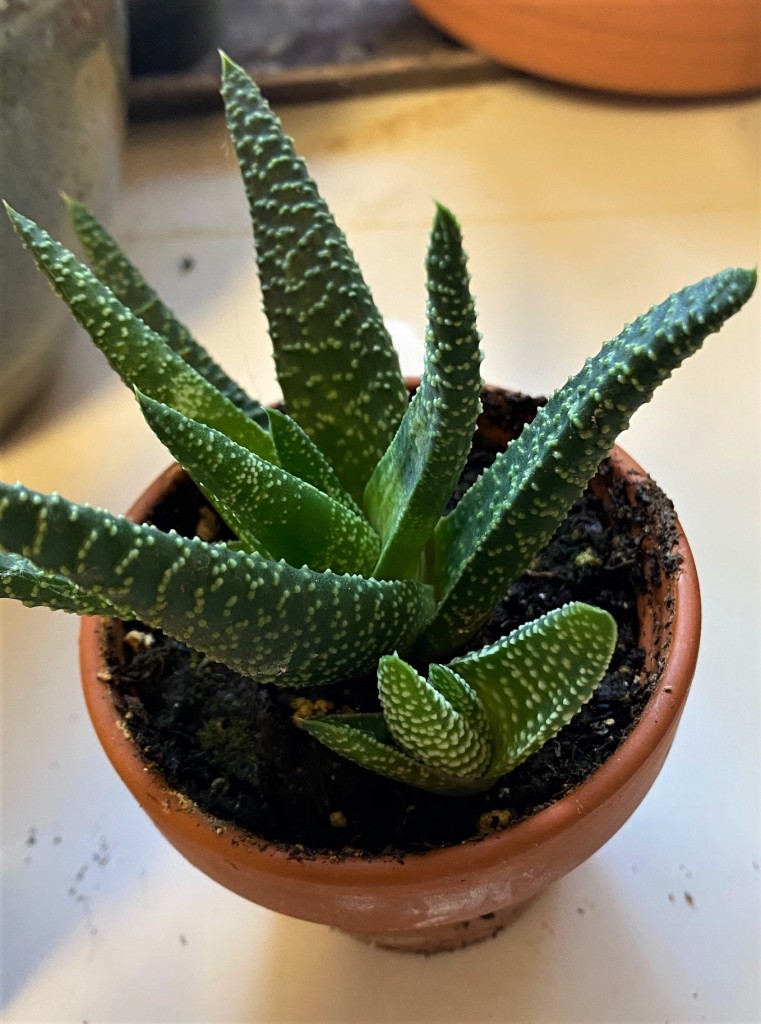
Haworthia

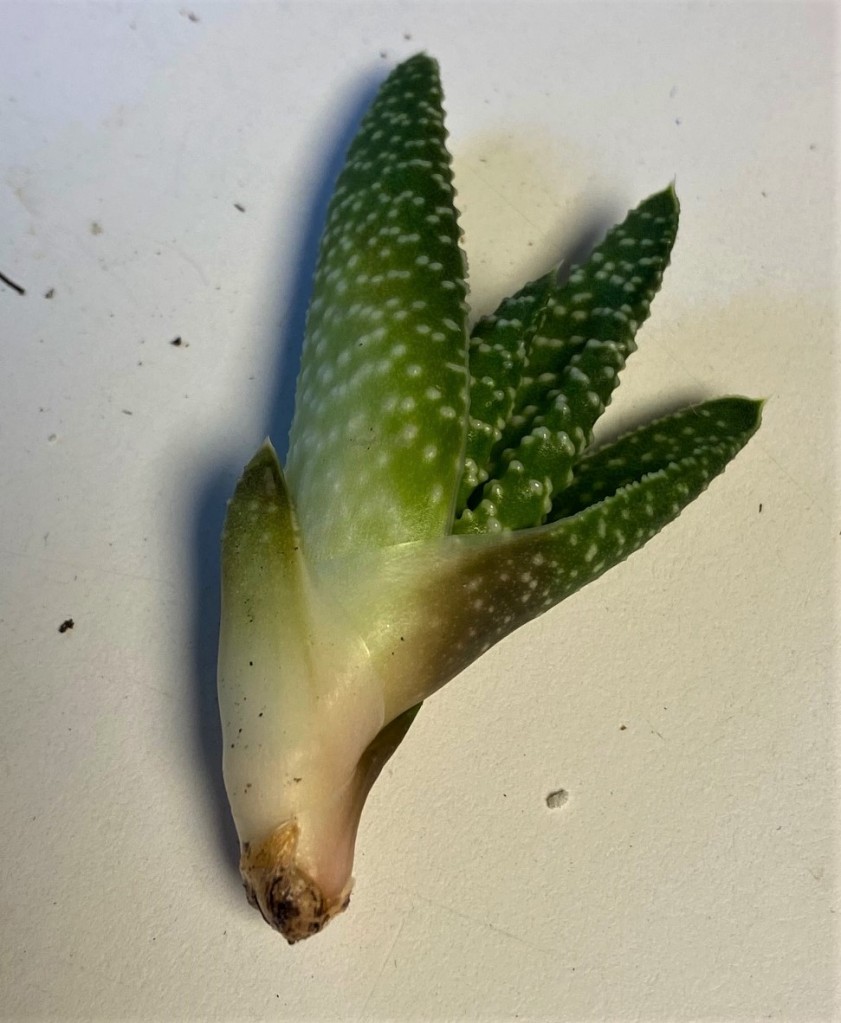
Haworthia is a wonderful succulent that sets baby plants at its base. These baby plants can be twisted off the mother plant and stuck directly in moistened soil. Again keep soil moist to develop a new root system. Examine the mother plant to see if it needs repotting if it is root bound. Sometimes just removing the newly produced babies will give the old plant enough room without repotting.

Removed Haworthia baby plant.

Above photo shows the Haworthia baby right after being twisted off of the mother plant. See the attachment point where new roots will emerge once replanted.

Newly planted Haworthia babies.

Keep damp to get roots to grow. Rooting hormone can be used on the bottom tip, but not necessary as they root so easily.

Spider plant.

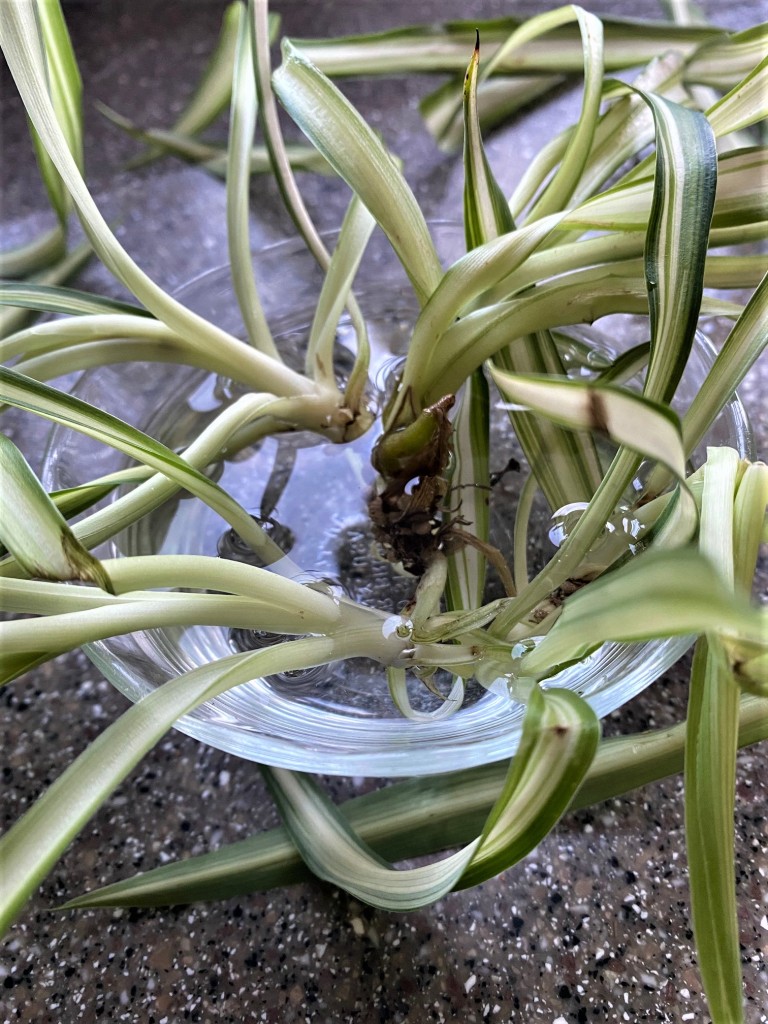
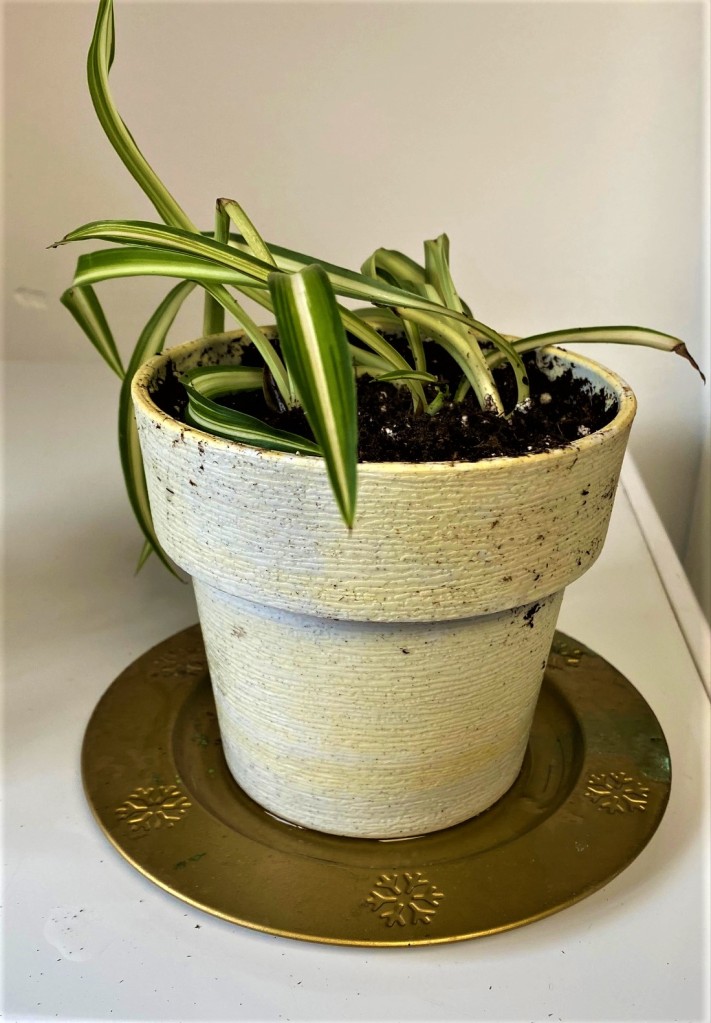
Spider plants send out long shoots with new plants at the end. Shoot growth will continue to grow adding more baby plants as they extend their reach. In the wild, the new plants will land on a fertile spot and anchor in via new roots produced from the baby plant. As a houseplant these babies can be cut from the shoot and planted directly in moist potting soil or rooted in water. Spider plants are very easy to grow and propagate in vegetatively.

Close up of shoot and new spider plant baby.
Rooting babies in water for a few weeks.
Potted up new spider plants.

by Carol Quish.

As we head into the short, cold days of the winter solstice is there any food that so evokes thoughts of warm and sunny climes as well as citrus does? As a species, citrus has been cultivated since 3000 BCE and may originated in the area of the Himalayas more than 5 million years ago. Grapefruit, lemons, limes, oranges, and tangerines are among the domesticated sweet-tart fruits of the genus Citrus that we know and love. Most of them are descended from Citrus medica, also known as citron, a large, fragrant citrus fruit. The lemon is a hybrid of citron and bitter orange (Citrus x aurantium), and the many varieties of limes are hybrids of citron, pomelo, mandarin orange and micrantha (a slow-growing, unpalatable species from tropical Asia).

IMG_20191204_131430999

From the top, a pomelo, navel orange, lime, clementine, grapefruit, and in the middle, a lemon.

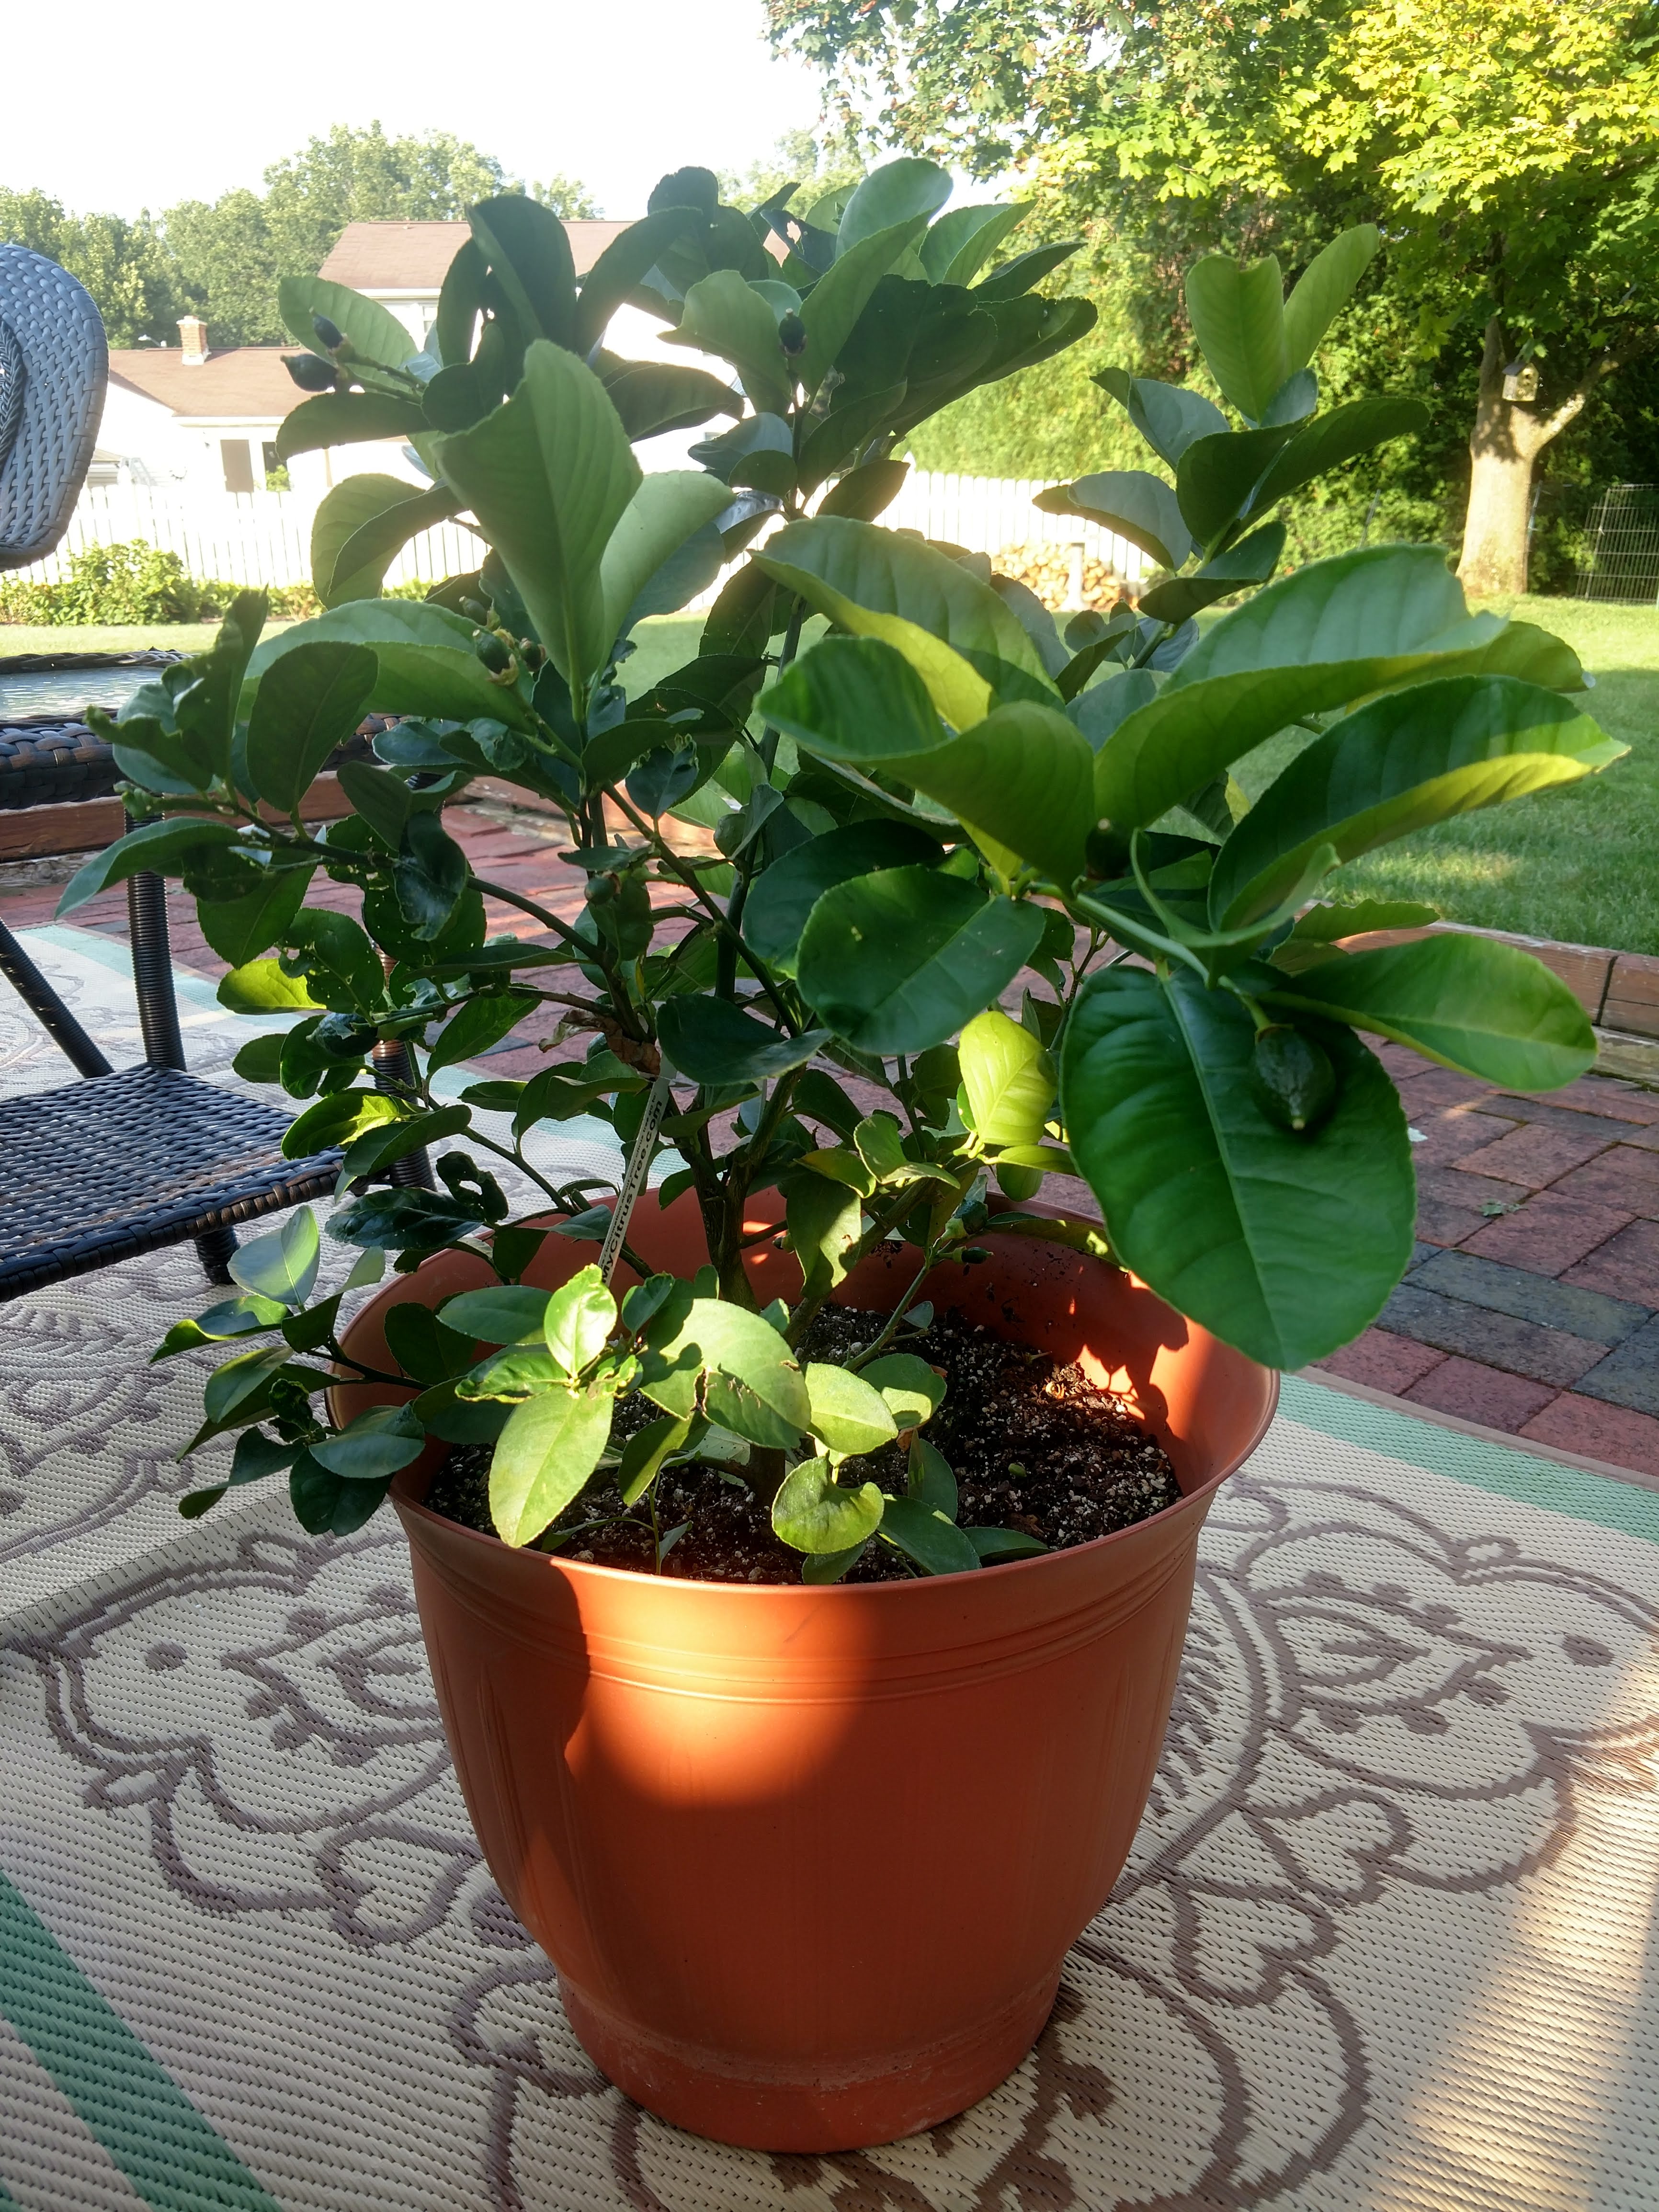
The Ponderosa lemon, Citrus x pyriformis, is another hybrid of the citron, this time with a pomelo, Citrus maxima. An ever-bearing slow-growing tree with glossy leaves and large ovate fruit, it is often grown as an ornamental plant in Connecticut. Less cold-hardy than a regular lemon, can be grown outside from May to October but will need to be overwintered indoors. I acquired one of these this summer and enjoyed the lovely scent of the large, purple-tinged, blooms each time I passed by it. As of October, none of the many fruit had ripened although they were much larger than the average commercial lemon. I later learned that they can reach the size of grapefruit and that this can take up to nine months!

IMG_20190812_182736559_HDR.jpg

Ponderosa lemon tree outdoors.

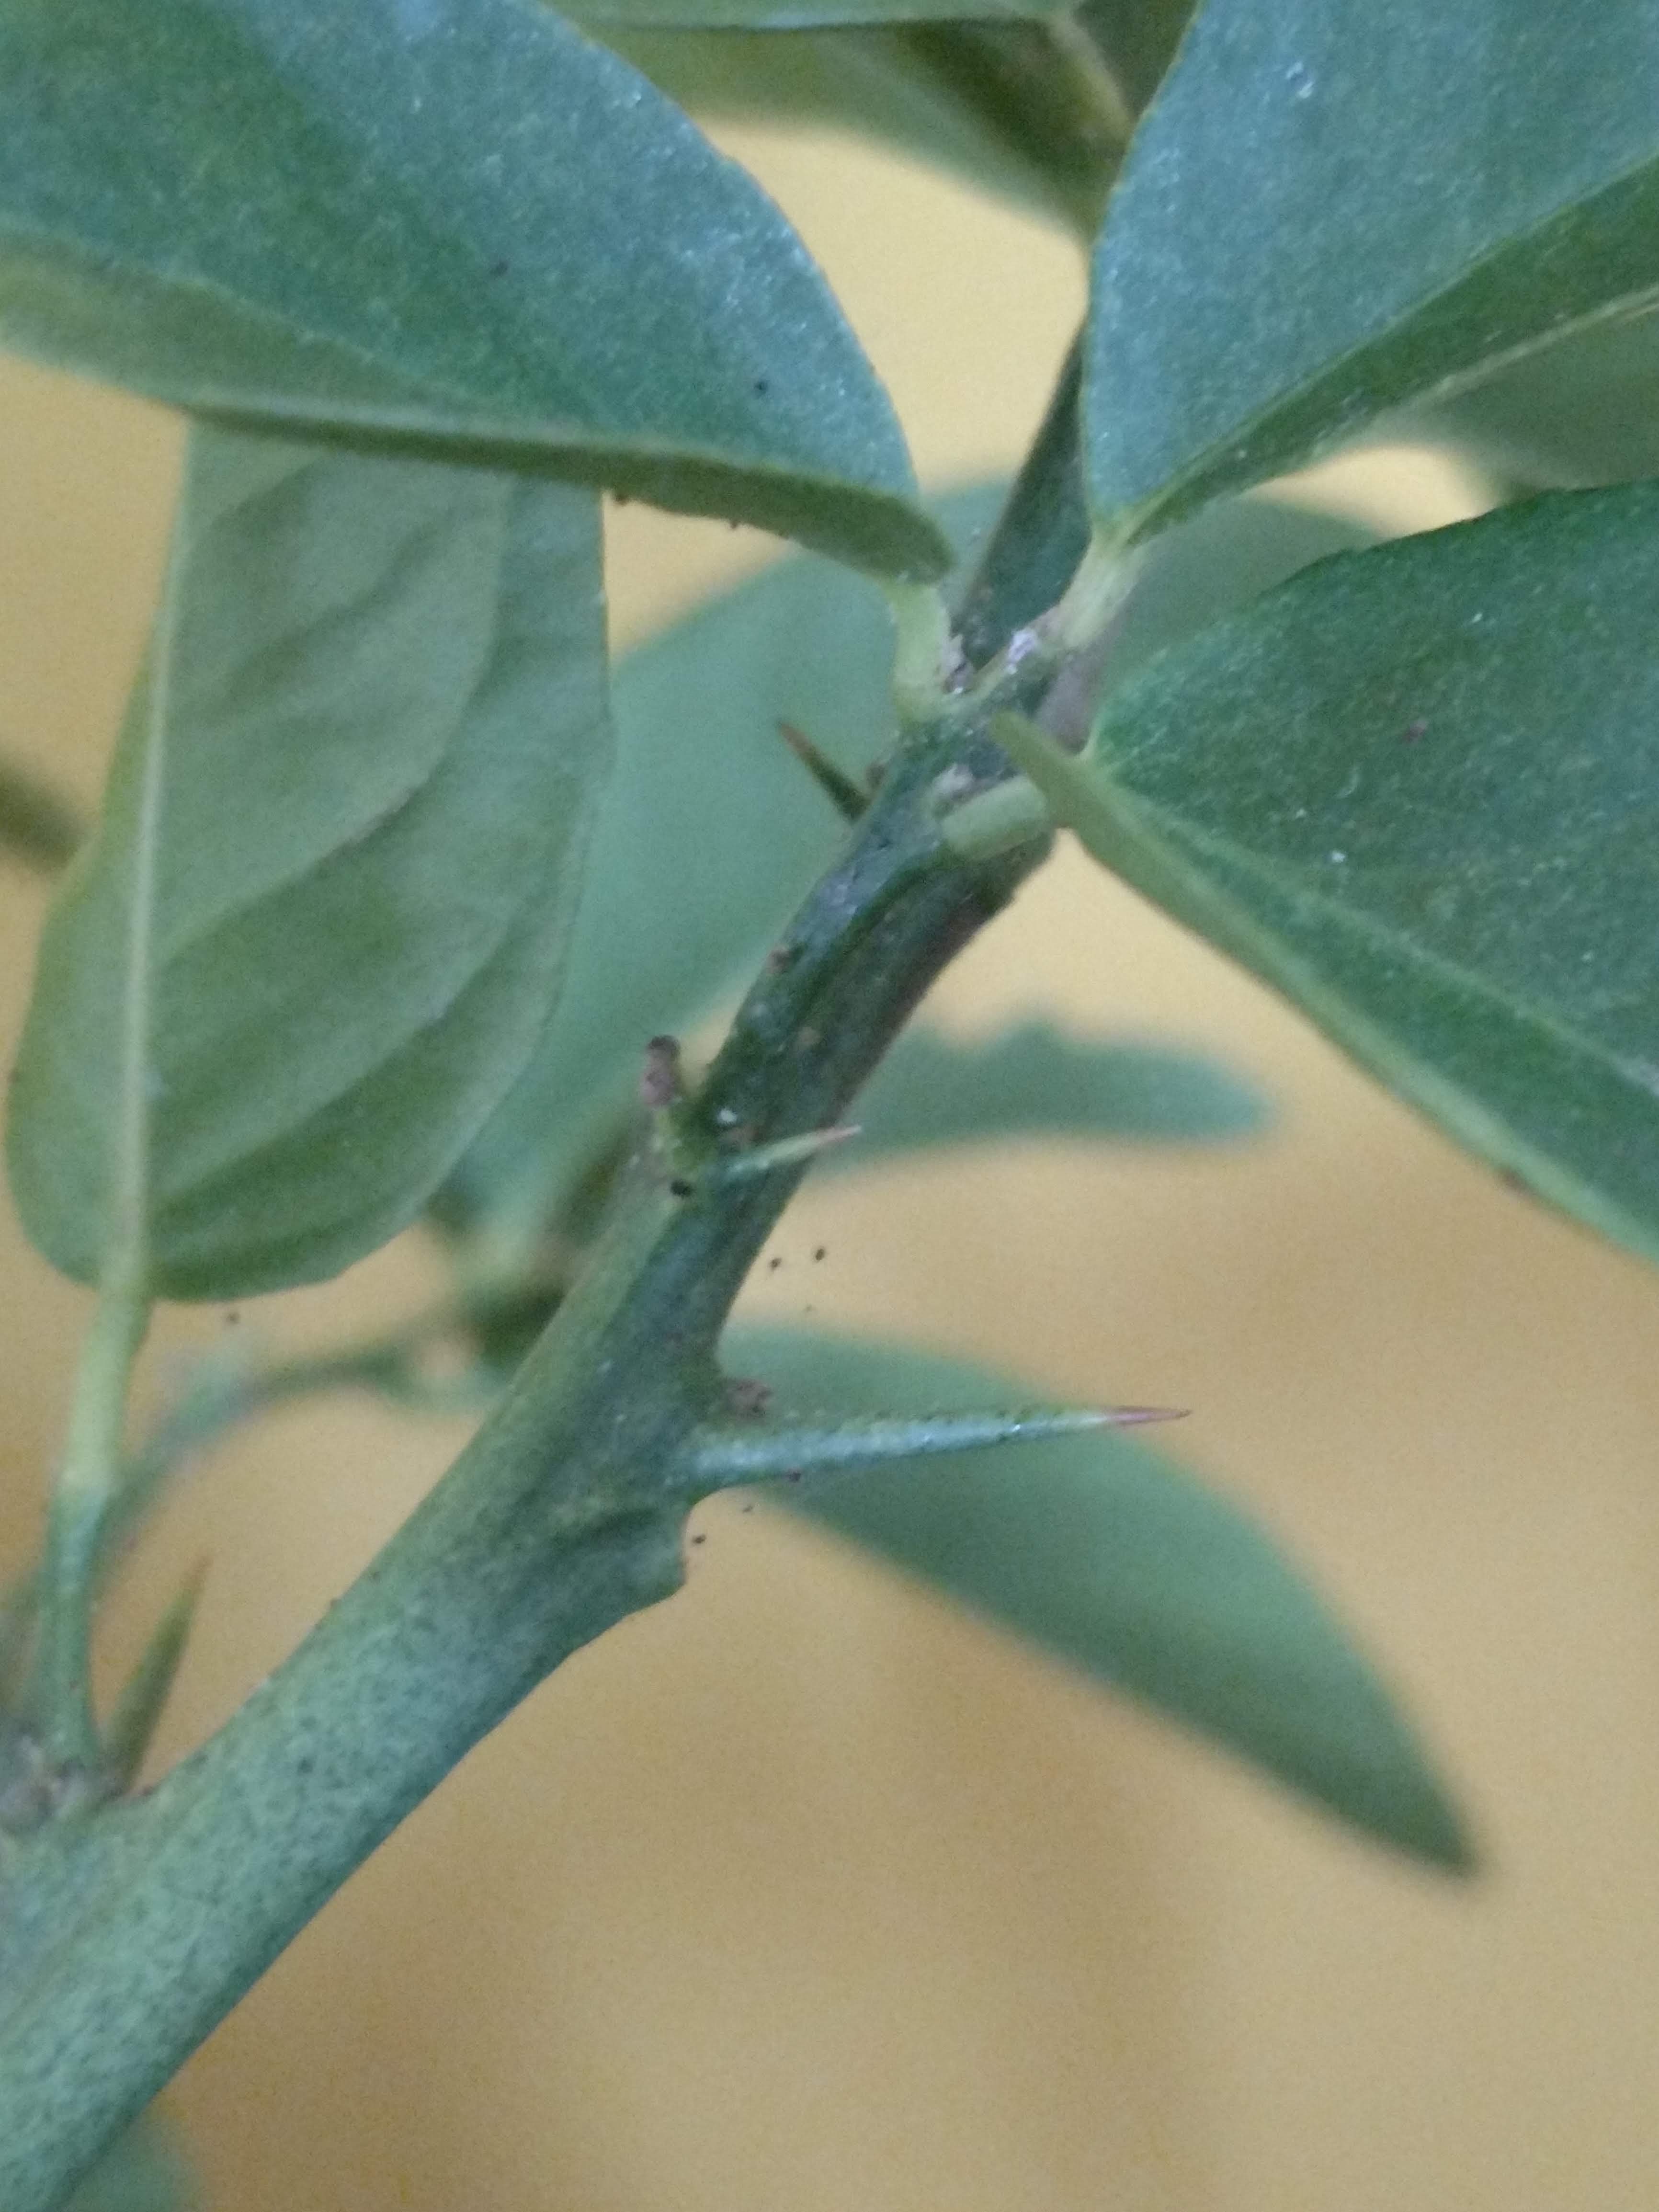
Taking care of a Ponderosa lemon is easy. Keep it in a clay or other porous material container that has good drainage. Allow the top inch of soil to dry out between waterings and then give it just enough to moisten the soil without allowing it to become soggy. When the plant is outside during the warmer months it may require daily watering like other container plants. Back inside, it may benefit from being placed on, but not in, a shallow tray of pebbles and water to keep the humidity level up. A monthly dose of a liquid fertilizer while indoors will benefit it, twice monthly when it is actively growing outside. Ponderosa lemon plants may be grafted onto dwarf rootstocks to keep their size manageable. They may still need some pruning to shape them at any time of the year but keep an eye out for the abundant spines along their branches.

IMG_20191203_105505321.jpg

Spines on a Ponderosa lemon tree.

The Ponderosa lemon produces blossoms and fruit year-round. You may wonder how pollination may occur in a home environment where there aren’t any bees or other insects flying about. It is due to the fact that the flowers of the Ponderosa lemon are perfect flowers, containing both male and female reproductive parts within the same blossom. Out of doors the movement provided by a breeze is enough to transfer the pollen grains from the stamens to the stigma. In your home, simply brushing a hand lightly against the flowers can achieve the same result.

So, while the Ponderosa lemon fruit will not be ready for use for a few more months there are still many other varieties of citrus that are ready and willing to grace our holiday tables and treats. For most varieties of citrus, the harvest runs between November and April and possibly into May if the conditions are good. The satsuma, or mandarin, orange (Citrus reticulata) produces fruit from August until December and so it has always been a favorite treat for a Christmas stocking, since the 19th century. We made a Victorian-style ornament from dehydrated slices of oranges, lemons, and limes many years ago and it still graces our tree each year.

The Florida navel oranges, Citrus x sinensis, are at their best from November to January, the California navel from December to May. Using the rind of navel oranges to make candied orange peel is one of the hallmarks of the holiday season for me. Candied, or crystallized, orange peel may seem to be an old-fashioned confection but it is always a popular addition to any cookie tray at the end of a meal. Crystallizing fruit is an easy process of preservation whereby small pieces of fruit or rind are cooked in a simple sugar syrup. When I make candied orange peel for the holidays, I start with 4-5 large navel oranges that have been rinsed and dried. The first cuts remove the navel and stem ends of the fruit. Standing the fruit on one of these flat cuts, cut longitudinal slices of peel away from the inner white pith. These slices often need to be cut lengthwise again into 2 or 3 strips.

IMG_20191203_102237317

When all of the orange peel has been prepared in this way they are put into a saucepan and covered with cold water. Bring them to a boil and then simmer them for 15 minutes. Drain the peel. Repeat this process two more times. This helps to remove bitterness from the peel.

While the peel is draining for the final time, bring one cup of water and two cups of sugar to a boil in the saucepan. Add the drained peel and reduce the heat to a simmer. Allow the peel to simmer until it has become translucent, up to an hour. Transfer the peel to a piece of parchment paper and allow it to cool. Toss the pieces of candied peel in superfine or confectioner’s sugar and allow it to dry overnight.

Keep it in an airtight container and use it to garnish your holiday trays or simply enjoy a few pieces with a cup of tea as you relax in front of the fireplace.

Susan Pelton

UConn Home & Garden Education Center

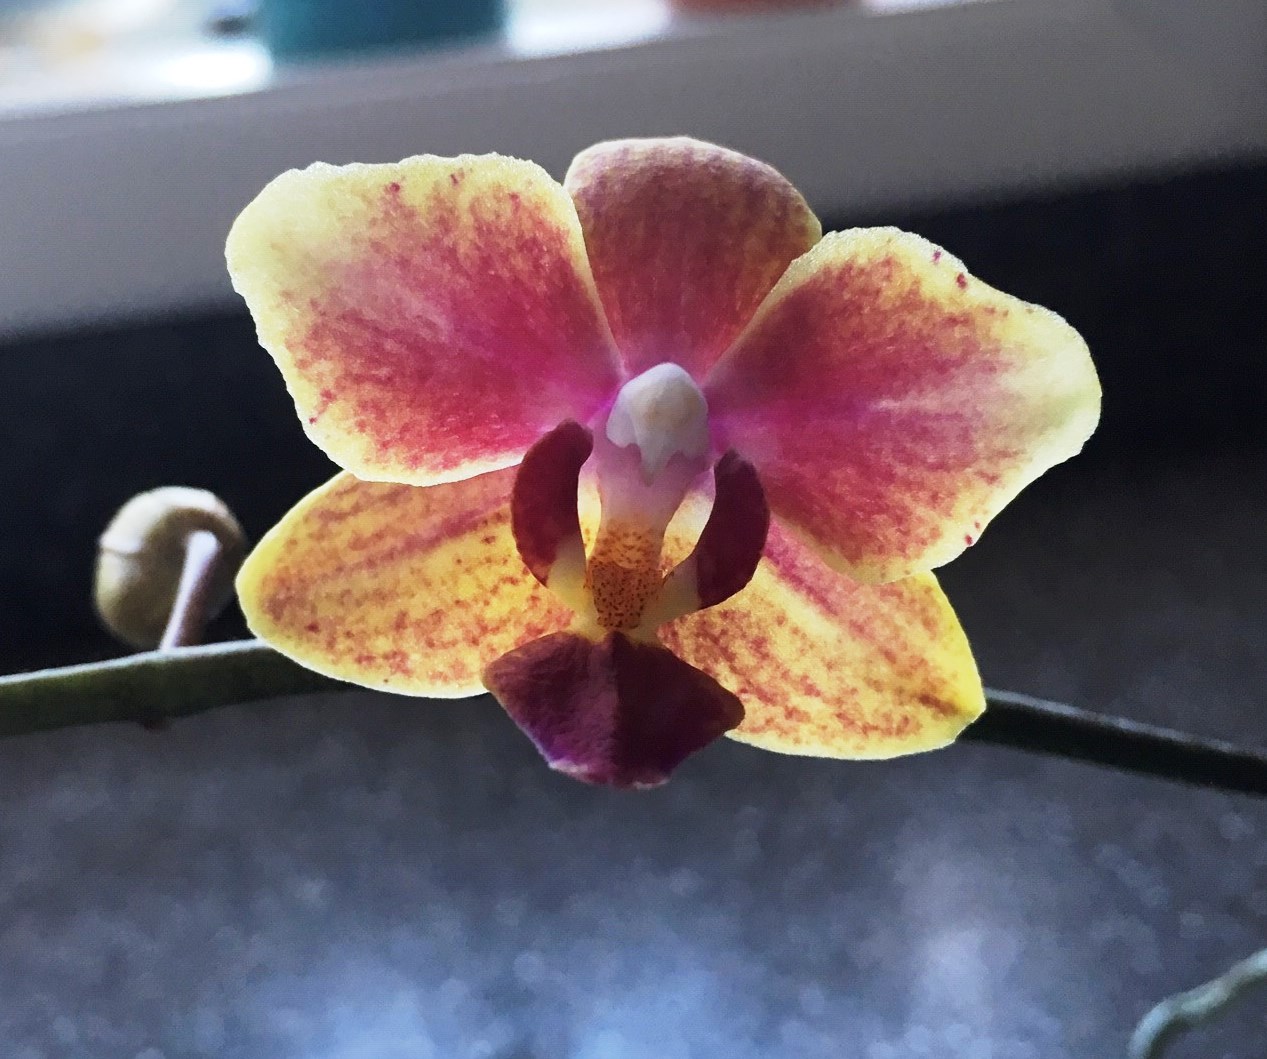
orchid yellow flower

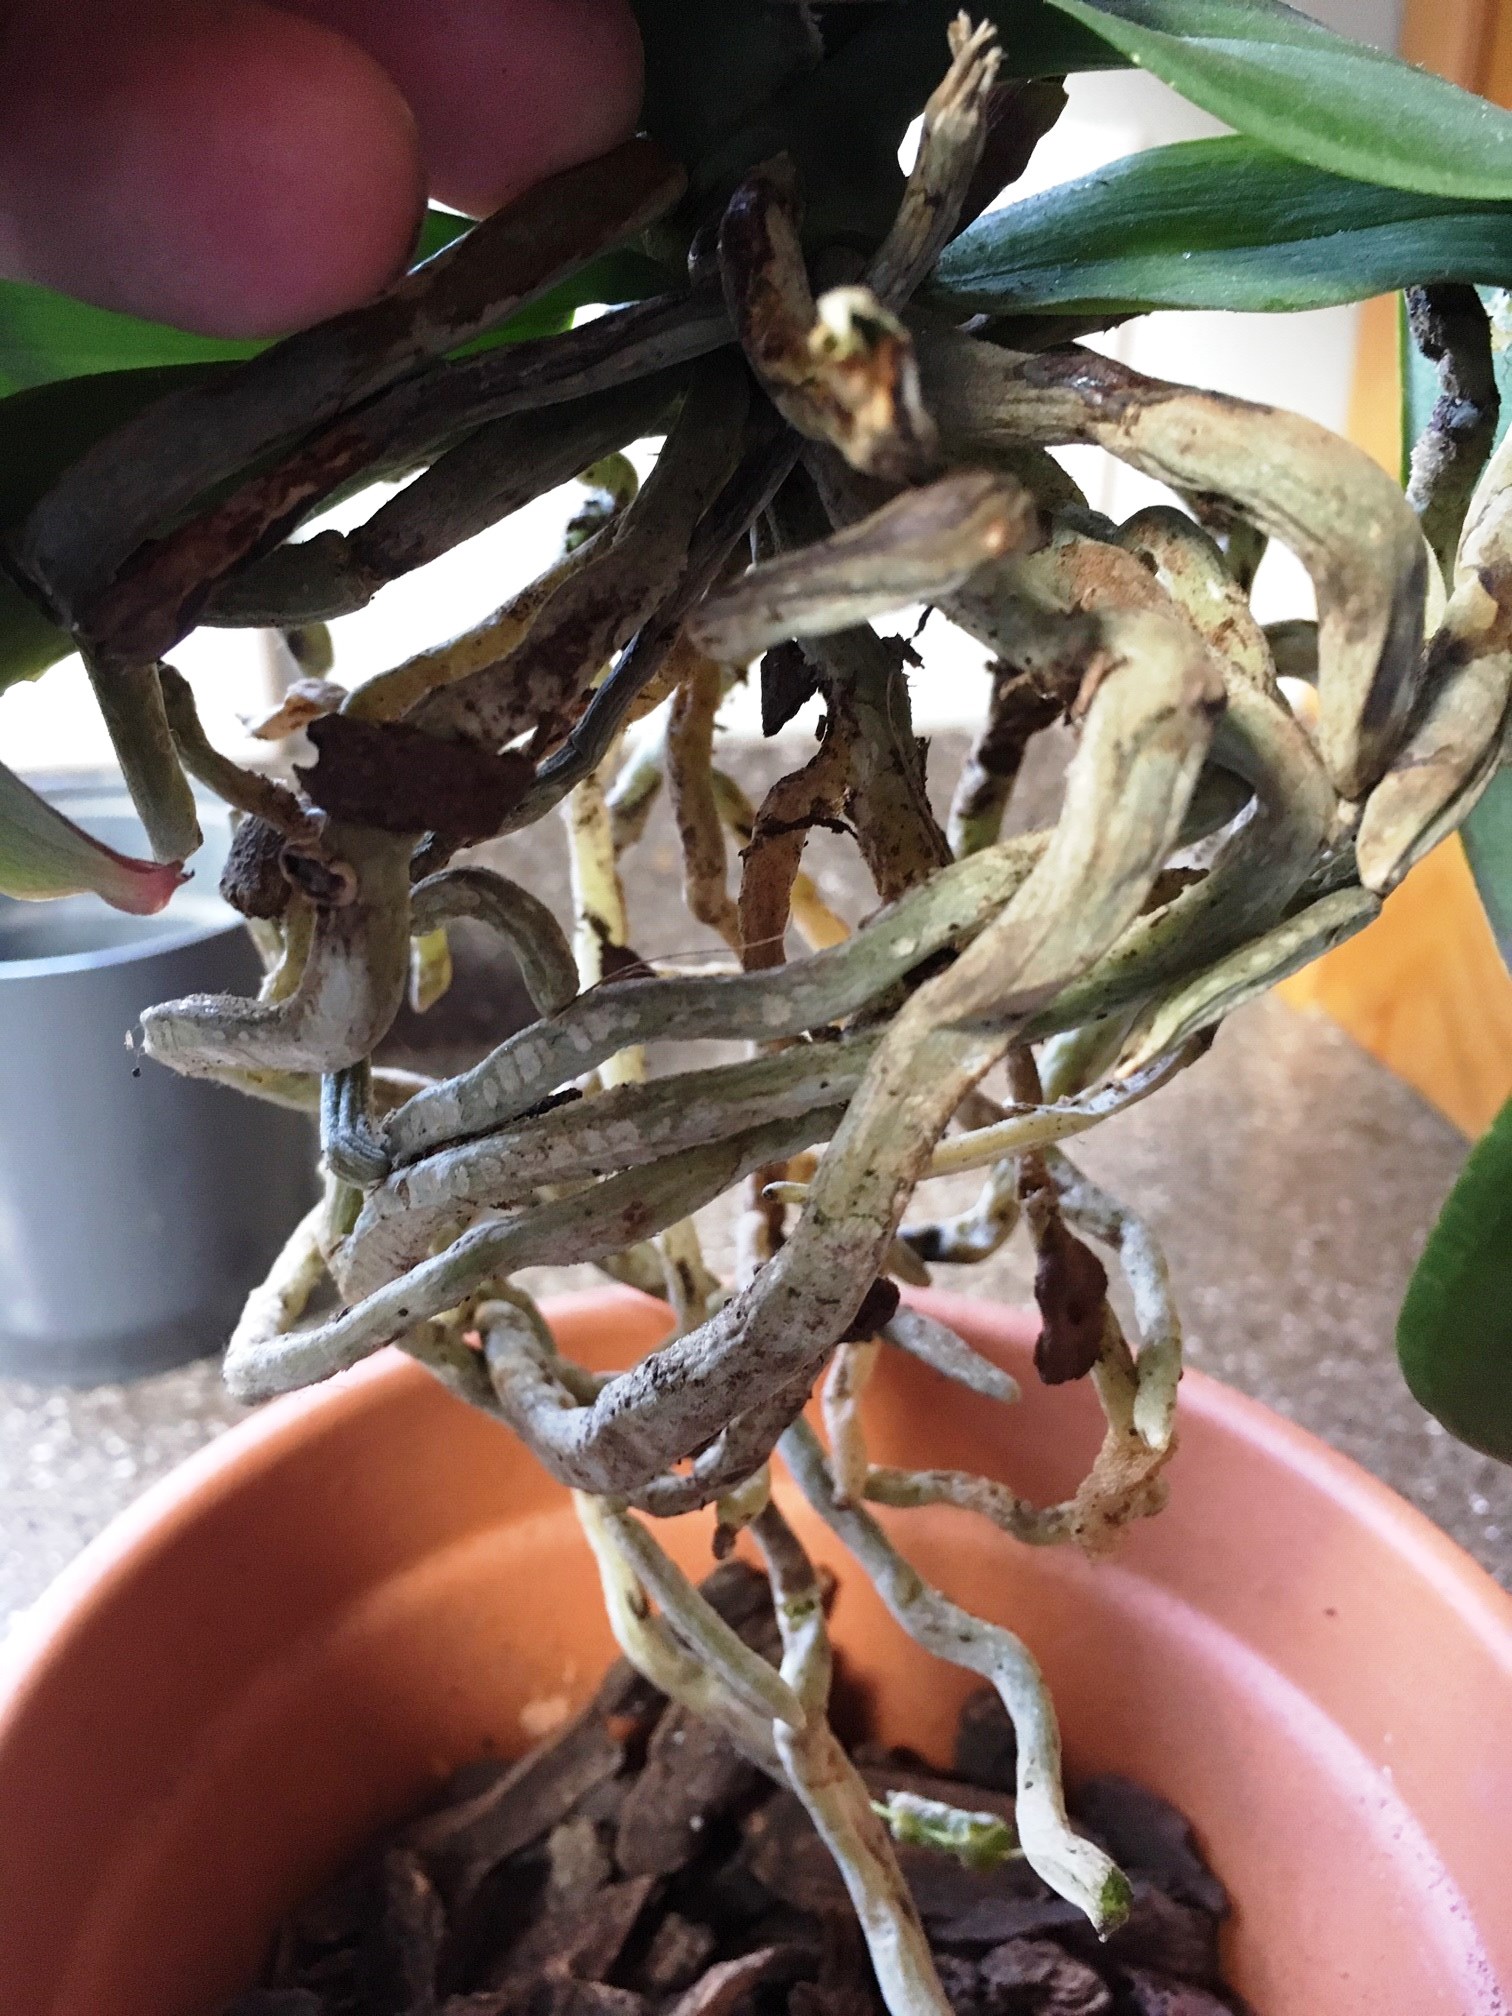
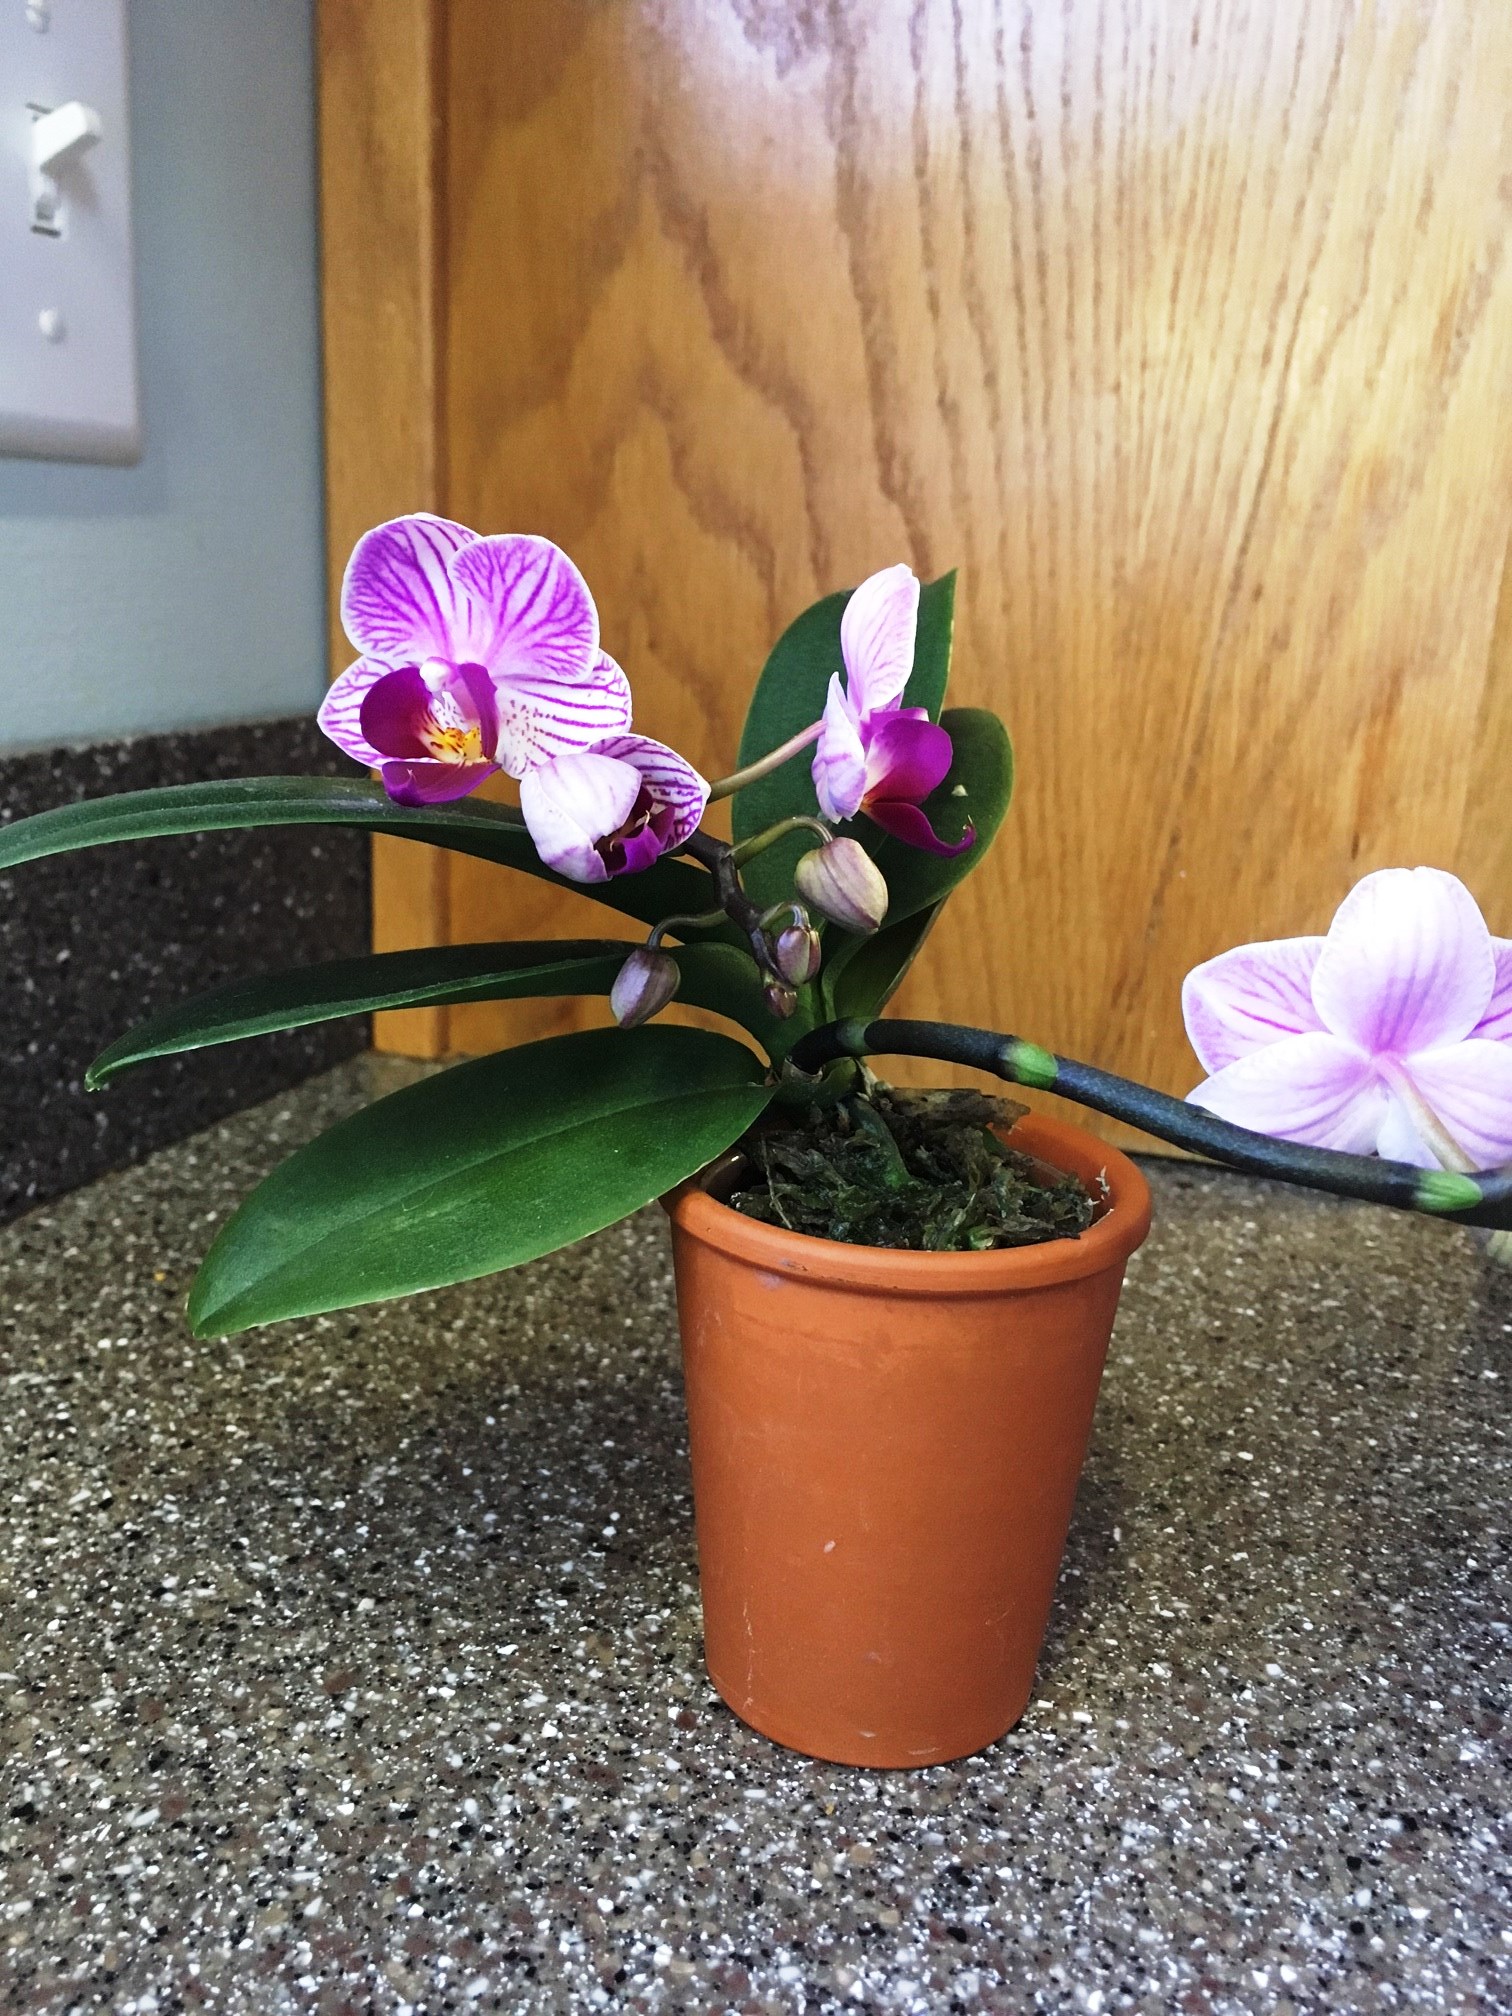
Cold weather keeps gardening chores indoors. A recently acquired, but neglected moth or Phalaenopsis orchid came my way and needed some attention. I had another one on the window sill in need or repotting and set to the task. Moth orchids can outgrow their pots in about a year’s time as their wandering roots reach outside and above the edge of the containers. In their natural environment, they grow high in the trees, above the soil, taking all of their nutrients from the humid, tropical air, rain and debris which may land around the plant. This manner of growing is called epiphytic.  Leaves grow from a center grouping, sending roots out from just below leaf axis.

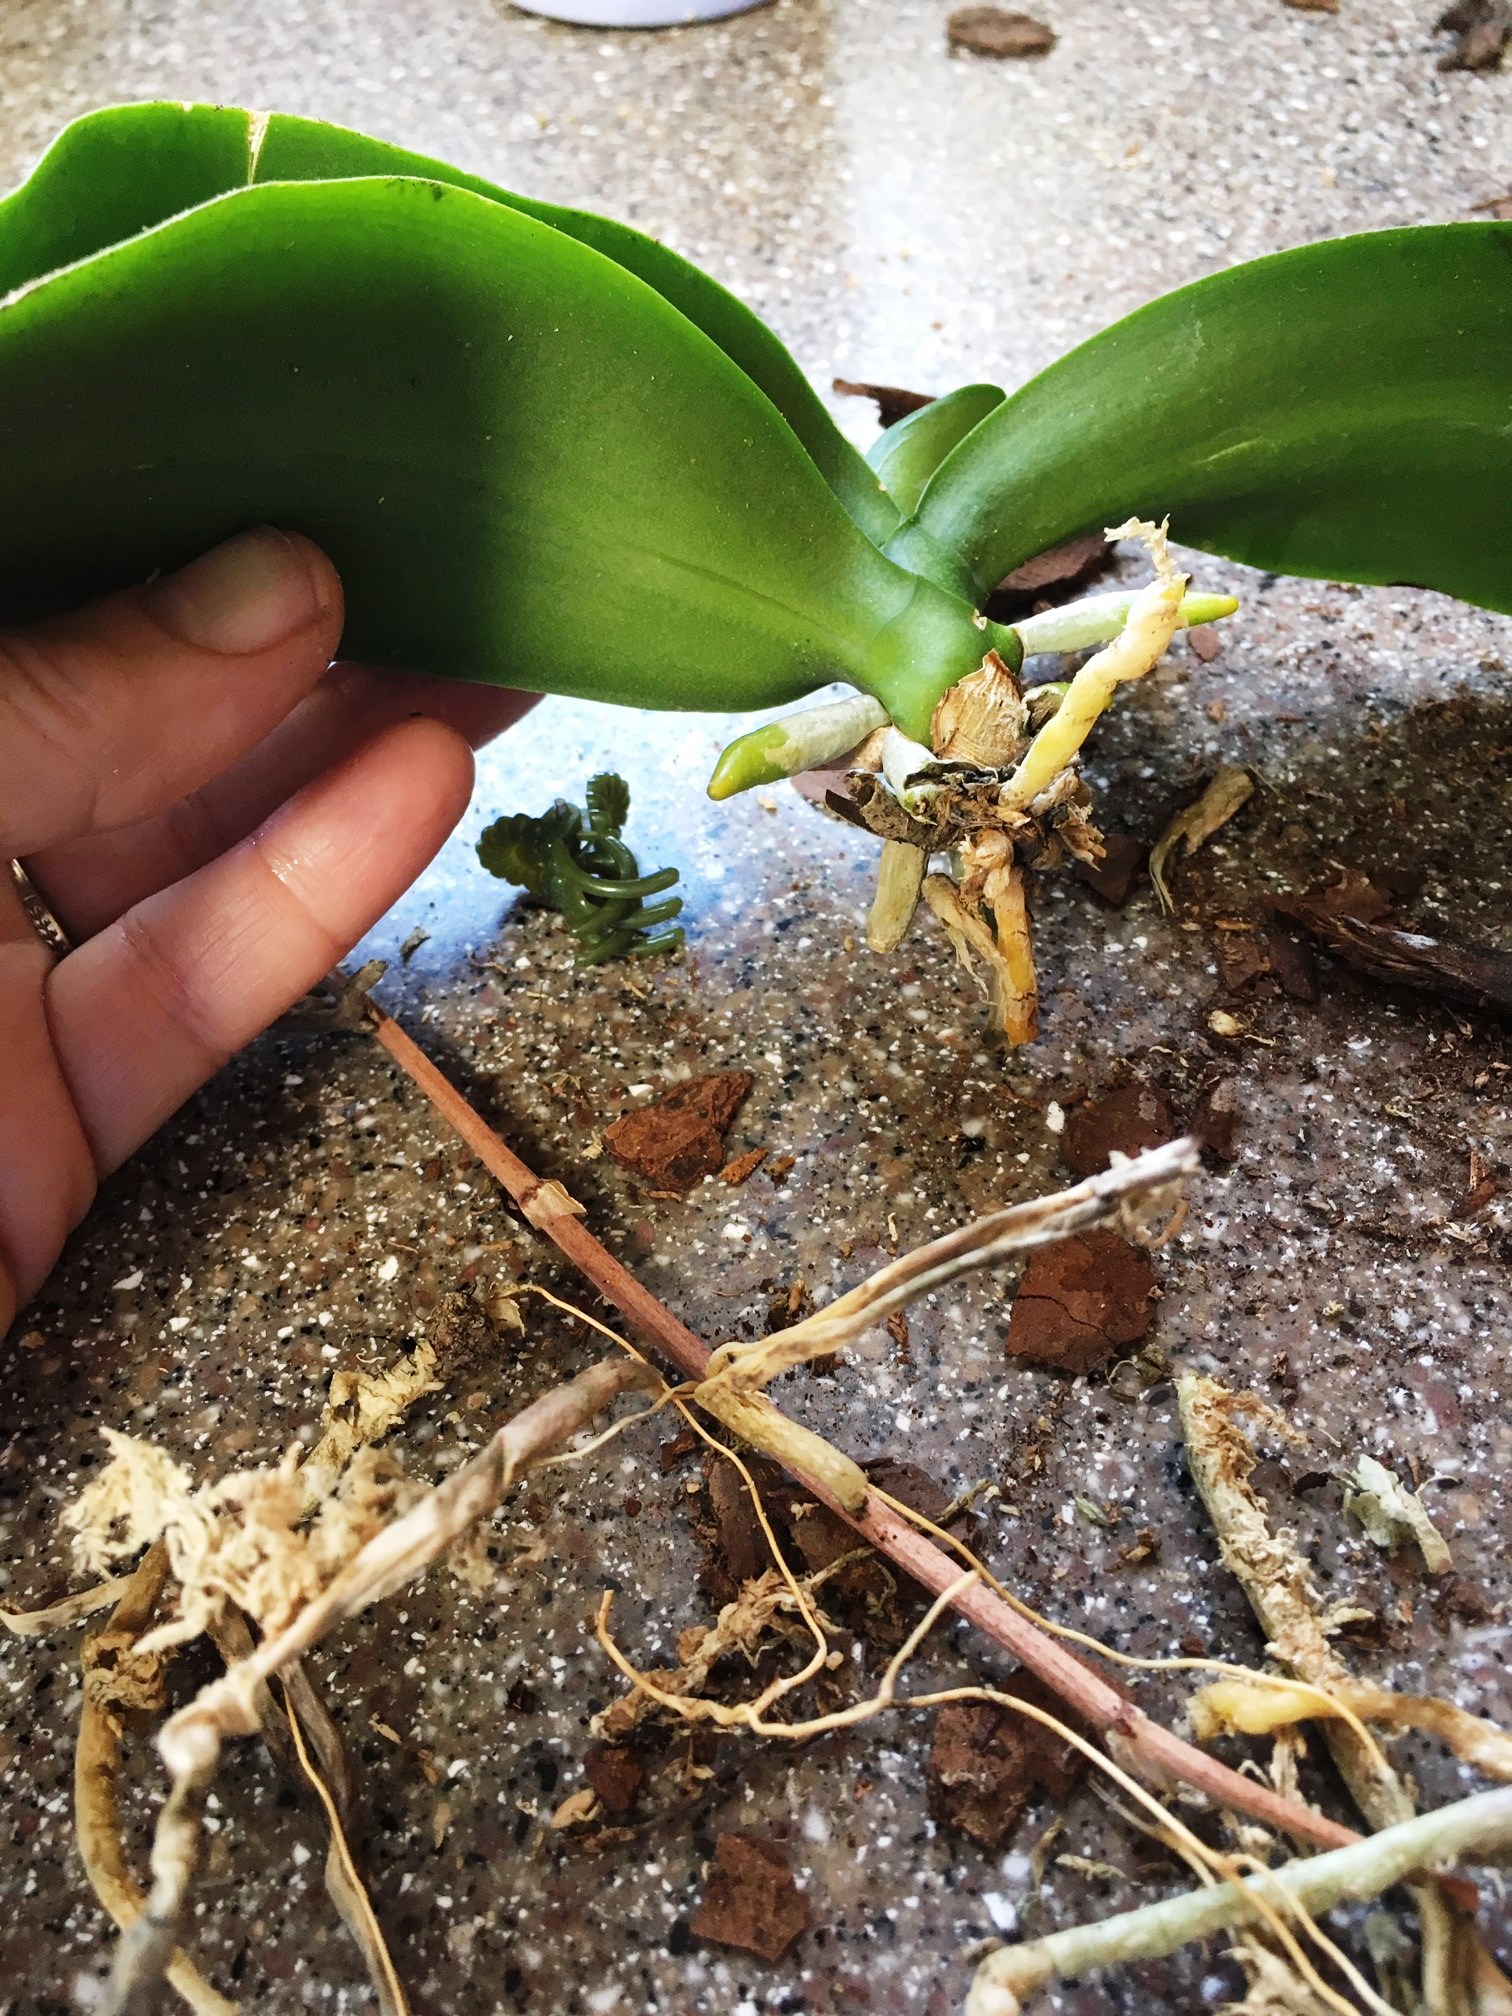
Mature plants usually flower late winter into spring. Flower show can last for several months. Repotting is best right after flowering. New orchids are often sold with roots packed in sphagnum moss to keep them moist during the shipping and retail portion of their life. Once home, moss and any plastic packing and pots should be carefully removed. Orchid roots like air and will rot if keep soggy and wet.

After removing moss.

Cut back any dead or rotted roots.


roots trimmed - Copy

After cutting back dead roots in moss.

pot half filled with roots above - Copy

Neglected roots cut back.

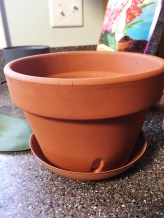
Phalaenopsis orchids prefer a porous pot such as terracotta which provides plenty of air. Some decorative orchid pots have holes designed in the sides for the roots to access more air. Water these plants and pots over the sink as water will readily run out.

Use specially formulated orchid bark mix for potting. The mix should contain bark, perlite and horticultural charcoal. Old bark deteriorates over about a two year period, and should be refreshed annually by repotting to keep the plants strong.

Fill the pots half full of bark mix, then set the trimmed root ball onto the bark, spreading out the roots carefully. Insert a plant stake or chopstick through the bark mix, next to the plant to help anchor the orchid.

pot half filled - Copy

Half filled with bark mix.

Gently add more bark mix over the roots to within one half inch of the top edge of the pot. Fill a large cooking pot or bowl with tepid water. Immerse the entire pot containing the bark and plant into the water to soak the bark for about 20 minutes. Then lift the terracotta pot containing the plant out of the water and let is drain in the sink. If settling occurs, add more bark. Orchids should never completely dry out. Keep the bark moist by soaking weekly, or water just the bark from above. Holes in pots are a must for good drainage.

Moth orchid should be placed in bright light, preferably east window. A south or west window will need a sheer curtain or the plant moved back out of the directly rays of sun to avoid leaf scorch.  In their wild home, they would be shaded by the tree canopy.

Orchids thrive in high humidity and temperatures around 75 degrees F with a slight drop at night. In the fall, reduced daylight and night temperatures of 55 degrees F will initiate flower bud formation. To provide more humidity, mist with clear water in the morning or set potted plant on a tray of pebbles and shallow water. The water will make a cone of evaporation surrounding the plant. Fertilize every two weeks with a balanced houseplant fertilizer during spring, summer and fall. Cut to half strength during the winter.

orchid 4

-Carol Quish


It’s that time of the year again: the Christmas holidays are days away. If you are looking for last-minute gifts for the gardener in your life then here are some ideas, including some new trends.

Herb-growing kits are one of the latest trends in indoor gardening. I always bring an herb planter in at the end of October when it gets too cold at night for it to remain out of doors. It generally does very well in a southwest-facing den window for a few months but the reduced sunlight and cooler nighttime temperatures usually cause it to gradually decline in vigor.

IMG_20181219_133207047_HDR

Unfortunately, the window in my kitchen faces northeast and therefore is the least desirable growing spot in our house. There are many herb growing kits available now that have growing lights built into the units so that if you or your gift recipient also have a kitchen with a window that gets low light (or no window at all), fresh herbs can still be within reach of your culinary efforts.

IMG_20181218_172732064_HDR

There are more than a few lower maintenance herb kits that come in a variety of containers, one of which is sure to fit the décor of any home. Burlap or heavy paper bags come complete with all that is needed to grow flowers and herbs.

The Eggling kits would be a great gift for a young gardener who would really enjoy cracking open the top of the egg to see that it contains everything (except water) that is required to grow herbs, strawberries, or flowers. Colored glass canning jars contain everything from herbs to palm trees!

Another way to grow fresh herbs or micro-greens is a portable water garden that incorporates a fish tank and a plant bed in a unique symbiotic relationship. We gave one of these to our daughter for her birthday in April and have seen the mini-aquaponic system in action. The cut-and-come-again micro-greens that sprout and grow to harvesting size in a week to ten days include radishes, broccoli, arugula, spinach, and wheat grass.

This closed system circulates the water from the fish tank up through the rock garden that sits atop the tank. As this water is rich in fish waste it supplies fertilizer to the plant’s roots. The water that is returned to the fish tank has been cleaned by the plants.

Once the herbs have been grown, whether indoor or out, there are special containers to keep them fresh and assorted culinary tools to prepare them such as a stripper that eases the removal of small leaves from herbs such as rosemary and thyme. A larger variation of the stripper works well with larger-leafed vegetables like kale. A cactus-shaped herb infuser allows any cook to add a bouquet garni to their cooking pot and then easily remove it before serving.

If your gift designee would prefer to adorn their table with flowers rather than grow them then there are plates for every style, from bold orange, green and black tropicals to powder blue backgrounds with delicate cherry blossoms to, my favorite, the high-contrast black and cream Queen Anne’s lace.

And of course, there is the traditional and always welcomed hostess gift of a flowering plant. Poinsettias are not the only way to brighten a home during the winter. Florist’s departments are teeming with an abundance of colorful blooms. Kalanchoe is a succulent houseplant that may be found with white, red, yellow, orange, and fuchsia long-lasting flowers.

IMG_20181218_185855796

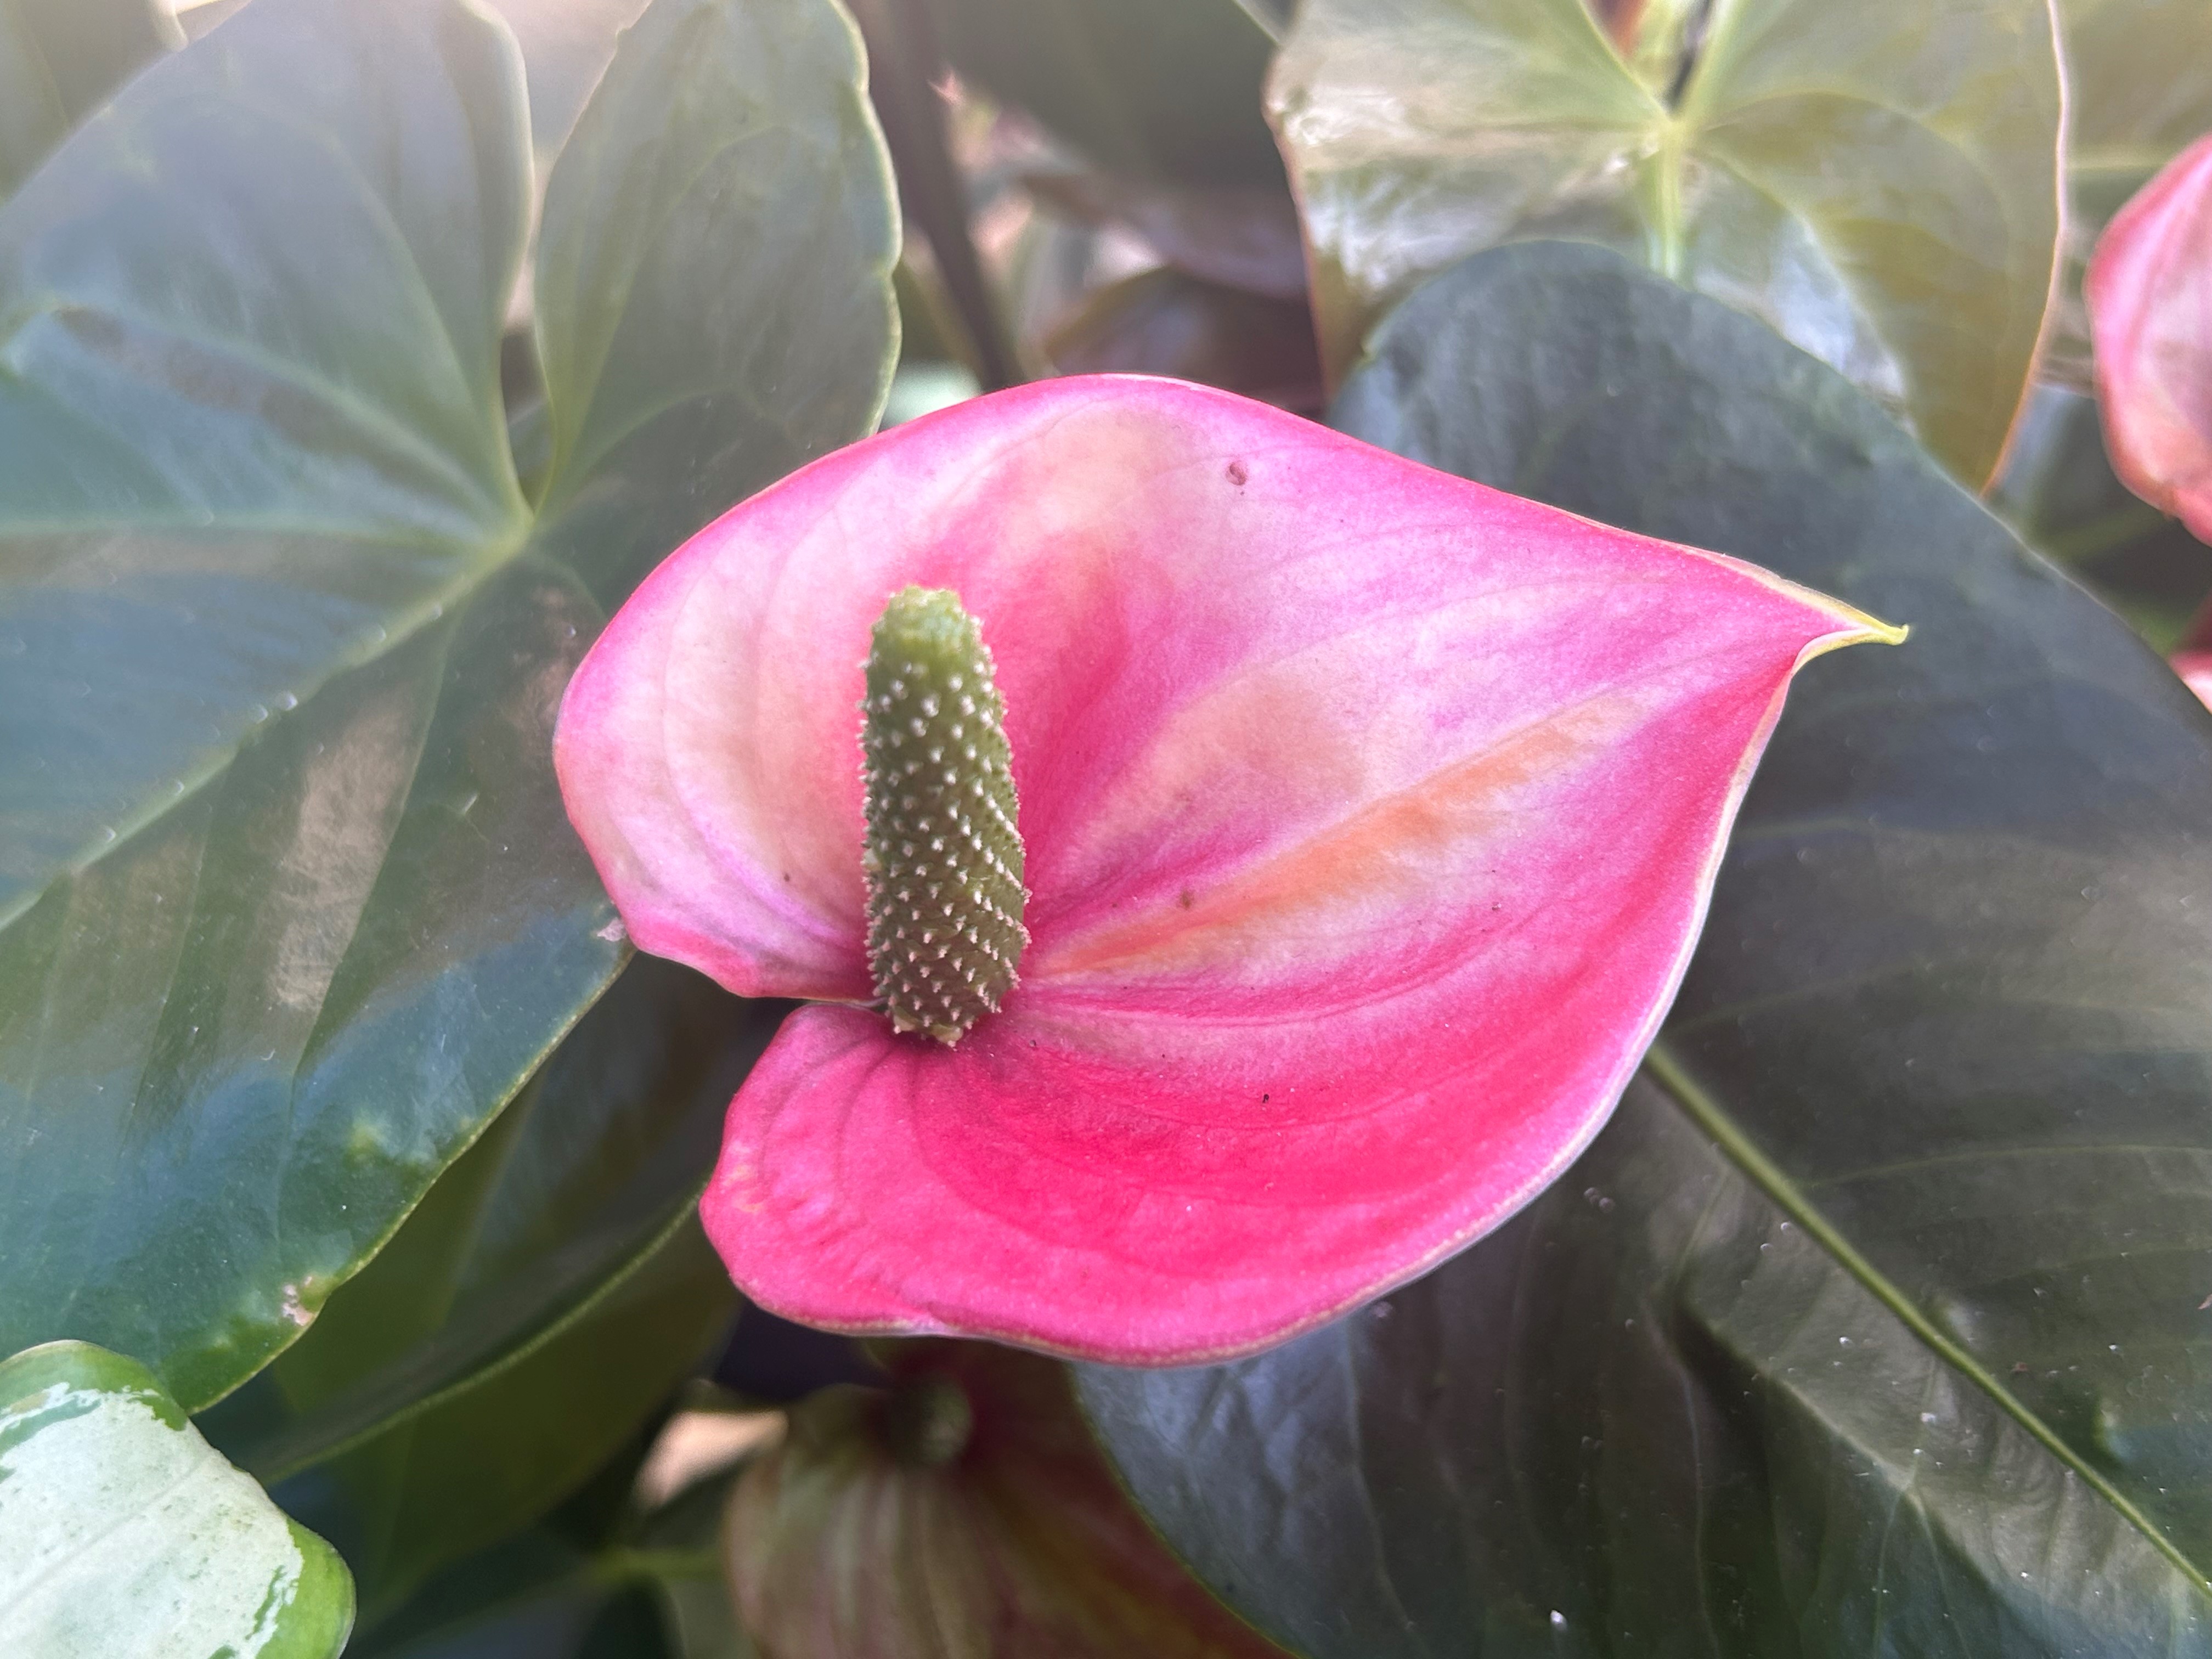
Anthurium, with its dark green, heart-shaped leaves and a tall spike of minute flowers that sit above a brightly-colored bract that may be white, pink, or red is a lovely houseplant.

IMG_20181218_185908091

Flowering plants in the Cyclamen species include Cyclamen persicum and C. coum, both of which bloom in the winter and C. repandum which blooms in the spring would be welcome gifts. Cyclamen have beautifully variegated leaves and up-swept flower petals that range from white to soft pink to deep red.

IMG_20181218_185834719

But if you are looking for a flowering plant that comes in a color to match any décor than nothing can top the appeal of the dramatic Phalaenopsis orchid hybrids. As seen in the image below, they are available in a veritable rainbow of colors.

IMG_20181218_185844047

Here’s a  suggestion that may also be a final destination for plant and herb refuse: a kitchen compost bin. Now available in many materials and sizes, these bins make composting easy and may only need to be emptied on a weekly basis, perhaps a bit more often if the household is basically vegetarian like ours is or if there is a coffee-lover filling it with used grounds.

IMG_20181218_173553169

If your gardener is also a coffee lover, then these mugs that reflect the current succulent houseplant trend would receive a warm welcome.

IMG_20181218_173732745

Its not too late to shop for your favorite gardener or, if one or two of these gifts happened to catch your eye, then print this off, circle your choices and leave it where Santa may find it!

Susan Pelton

All images by S. Pelton

geranium_lemon, missouri.edu

Lemon Scented Geranium, photo from Missouri.edu

As cold weather arrives, my garden focus switches to houseplants. I am particularly fond of growing scented geraniums inside the home. They are easy to grow and smell great, releasing aromatic oils into the air when their leaves are gently stroked, refreshing the stale scents of enclosed houses. Houseplants in general are a great way to increase the moisture level of dry, winter-heated air as water is added to their soil, and some moisture will evaporate into the air surrounding the plants.

Scented geraniums are in the genus Pelargonium, the same as the annual geranium with the large red, white or pink ball of a flower head. Even though both of these types of Pelargonium are have the common name of geranium, neither are related to the true perennial geranium (Geranium maculatum), commonly called cranesbill. Pelargonium species are not hardy in areas with cold winters. Scented geraniums can be planted outside and treated as an annual in addition to being a houseplant. They are native to South Africa, and were introduced to Europe in the 17th century by plant collectors as was popular at that time. Scented plants were especially prized in that era of limited sanitation and personal hygiene. Leaves and flowers were used in tussy-mussies to be carried by ladies whom wanted to smell better. The plant flower a smaller pale colored flower, usually pink or lilac depending on the specific variety.

scente geranium, arnold arboretum, historical print

Pelargonium
triste.
From
Canadensium
Plantarum

by J.
P.
Cornut.
P

mosquito_citronella_geranium_pelargonium_Barbara H. Smith, ©2018 HGIC, Clemson Extension.jpg

photo by Barbara H. Smith, ©2018 HGIC, Clemson Extension

Today scented geraniums are prized house plants for a sunny window or greenhouse. Leaves are edible, can be tossed in a salad or used as a garnish without fear of toxicity. Leaves are used as tea, and can be added to baked goods. Lining the bottom of a greased cake with artistically arranged leaves, then gently pouring in the batter creates a pretty and tasty dessert. Add one cup of fresh crushed leaves to simmering apple juice to make into flavored apple jelly following apple jelly recipe on pectin container. Dried leaves can be added to pot pourri and added to muslin sachet bags to place in a drawer. Sachets can also be used in hot baths or a relaxing spa experience.

The flavors or scents of scented geraniums are broken into several groups. The Rose Scented Group contain a number of different varieties with strong, clear rose scents to ones with a softer rose fragrance. Atomic Snowflake has a lemon-rose scent. Another scent group is the Citrus Scented geraniums. Lemon Crispum has a strong lemony fragrance, while Lime smells like a key lime pie. Prince of Orange sports crinkly leaves to emit its orange scent. The Fruit and Spice Group contain plants that smell like ginger, nutmeg apple and even strawberry. These are especially good in baked goods. The Mint Group, true to its name, has different plants with varying grades of minty scents. Peppermint, a peppermint lemon and a pungent peppermint with rose notes are all different. The last group is the Pungent Group with musky, oak, and camphor fragrances. It is best to feel the leaves and smell the plants before deciding to take one home to be sure it is agreeable to your nose and palate.

scented geranium, white flower farm photo

Scented geranium varieties, photo WhiteFlowerFarm.com

Growing requirements for all scented geraniums are fairly easy. They need a sunny south or west window or fluorescent lights, and well drained, light potting mix. Water them when the soil is dry to the touch. If the soil is keep soggy, the roots will rot. Drain any water from the saucer below the pot to avoid over saturation. Temperatures for optimum growth are in the range of 55 to 70 degrees F. Fertilize with a basic houseplant fertilizer every three month. Too much fertilizer leads to weaker growth and less scent production. Prune back the plant if it begins to grow too large, saving the trimmings of course!

Lemon Scented geranium at FS, DPettinelli

Lemon Scented Geranium on display at the flower show. photo by D. Pettinelli.

Every growing season brings a variety of inquiries into the UConn Home & Garden Education office, either by snail mail, email, or in person. This year was no exception and I would like to share some that I found particularly interesting.

As we are entering the Christmas season I will start with an image of a Christmas cactus with raised bumps on its leaves. Although they were the same color as the leaf they had a translucent appearance when viewed with the light from behind. These blisters are edema (oedema)are the result of a disruption in the plant’s water balance that causes the leaf cells to enlarge and plug pores and stomatal openings. Moving the plant to a location with more light and watering only when the soil is dry can control edema.

Edema on Christmas cactus

Christmas cactus with edema symptoms

The cold of winter can cause problems that sometimes aren’t apparent until later in the year. Tree trunks that are exposed to southern light during the winter can suffer from sunscald and frost cracks. Sunshine and warm daytime temperatures can warm a tree enough so that the sap begins to run but the nighttime temps will cause the sap to freeze and expand, weakening the bark and resulting in vertical cracks. Dogwood with sunscald (on left) and willow with frost crack (on right) are among the susceptible species.


There were several incidences of huge populations of black cutworm larvae emerging in the spring including a group that appeared to be taking over a driveway! The Noctuidae moth can lay hundreds of eggs in low-growing plants, weeds, or plant residue.

The wet spring weather that helped to alleviate the drought of the past two years also had an effect on the proliferation of slime molds, those vomitus-looking masses that are entirely innocuous. The dog stinkhorn (Mutinus caninus) is another fungus that made several appearances this year.

Hosta plants exhibited several different symptoms on its foliage this year and the explanations were quite varied, from natural to man-made. The afore-mentioned wet spring and summer or overhead watering systems can cause Hosta to have the large, irregular, water-soaked looking spots with dark borders that may be a sign of anthracnose (the below left and center images). In the image below on the right the insect damage that shows up as holes that have been chewed in foliage may be caused by one of Hosta’s main pests, slugs.

But one of the more enigmatic Hosta problems presented itself as areas of white that appeared randomly on the foliage. Several questions and answers later it was determined that the Hosta in question was very close to a deck that had been power washed with a bleach solution! Yeah, that will definitely give you white spots.

Bleach damage 3

That bleach bath also affected a nearby coleus (below on left). Coleus downy mildew (Peronospora sp.) also likes the cool the cool temperatures and humidity of spring (below on right). The gray-purple angular blotches of this fungal disease were first observed in New York in 2005. Fungicides can be helpful if used early and thoroughly, and overcrowding and overhead watering should be minimized.

The grounds of the residence where my in-laws live have a lot of flowering plants in the landscape and as we walked one evening I noticed that the white roses had spots of red on them. These small, red rings are indicative of Gray mold (Botrytis cinerea), a necrotrophic fungal disease that is also a common problem in grapes called botrytis bunch rot. The disease is a parasitic organism that lives off of the dead plant tissues of its host.

The fungus Gymnosporangium clavipes, cedar-quince rust, on Serviceberry warranted several calls to the center due to its odd appearance. The serviceberry fruit gets heavily covered with the aecia tubes of the rust which will release the aeciospores that infect nearby members of the Juniper family, the alternate host that is needed to complete the cycle of the infection.

Two other samples that came in, goldenrod (below on left) and sunflower (below on right), shared unusual growths of foliage. Sometimes plant aberrations can be the result of a virus (such as rose rosette disease), fungus (such as corn smut fungus), or, like these samples, phytoplasma. Phytoplasma is the result of bacterial parasites in the plant’s phloem tissue and can result in leaf-like structures in place of flowers (phyllody) or the loss of pigment in flower petals that results in green flowers (virescence). Phytoplasma parasites are vectored by insects.

A frequent question revolves around ‘growths’ of a different kind, in particular the white projections that can cover a tomato hornworm. These are the pupal cocoons of the parasitic braconid wasp. The female wasp lays its eggs just under the skin of the hornworm and the newly hatched larvae will literally eat the hornworm to death. As the larvae mature they will chew their way to the outside where they will spin their cocoons along the back and pupate. As the hornworm is effectively a goner at this point they should be left undisturbed so that the next generation of wasps will emerge to continue to help us by naturally controlling this tomato pest.

Tomato hornworm 3

Tomato hornworm with braconid wasp pupal cocoons


Another wasp that was caught in the act was the cicada killer wasp (Sphecius speciosus), a large, solitary, digger wasp. Cicada killers, also called cicada hawks, are so called because they hunt cicadas to provision their nests. It is the female cicada killer that paralyzes the cicada and flies it back to her ground nest. The male cicada killer has no stinger and although its aggressive nature can seem threatening to humans, the male spends most of its time grappling with other males for breeding rights and investigating anything that moves near them.

Cicada killer wasp

A cicada killer wasp paralyzes a cicada


Speaking of noticing what’s going on around you, as my husband was walking past a False indigo (Baptisia australis) in July he heard a strange cracking sound and called it to my attention. The plant in question was outside of a gym on the Hofstra University campus where our son’s powerlifting meet had just ended. As many lifters exited the building amid much music and commotion we stood their staring at the Baptisia, heads tilted in that pose that is more often found on a puzzled dog. The bush was indeed popping and cracking as the dried seed pods split open!


But none of our inquiries approach the level of oddity reported by a retiree in Karlsruh, Germany, who thought that he had found an unexploded bomb in his garden in September. Police officers called to the scene discovered not a bomb but in fact an extra-large zucchini (11 lbs.!) that had been thrown over the garden hedge.

skynews-courgette-germany_4146311

This is not an unexploded ordnance!


I look forward to next year’s growing season with great anticipation!

Susan Pelton

Through the Macro Lens

As the first month of 2016 nears its end it would appear that we are finally getting some true winter weather in the form of arctic cold and snow that will keep even the most ardent green thumb inside. Is it any wonder that January is a popular time for perusing seed catalogs and forcing paperwhite and amaryllis bulbs to bloom indoor? It also presents a great time to pay a bit more attention to our houseplants: cleaning the foliage, repotting specimens that have outgrown their current containers, and doing a visual inspection for insects. This year, however, checking for unwanted visitors took on a whole new meaning.

Poinsettia Flowers

I received a great present from my husband this Christmas in the form of a macro lens that clips over the camera lens of a smartphone (he knows how much I enjoy getting close-up images of insects and flowers). This tiny tool increases the magnification power of the ordinary camera lens by 10X allowing for some really incredible images from a phone camera. The first thing that I did with it was to start snapping pictures of just anything that was around such as the true flowers of a poinsettia that are usually insignificant, the new blooms of a paperwhite, and some fuzzy, cotton-like areas on a dieffenbachia.

What I saw in the lens was amazing. It was not just a cobweb substance on the dieffenbachia but a group of tiny insects that turned out to be the nymphs of the mealybug.

Mealybug nymphs 3

These tiny insects, along with scale and aphids, are a common pest of houseplants. They feed on the sap of the plant by piercing the outer layer of plant tissue with their long, slender beak. As a by-product they secrete a sweet honeydew that provides a base for the black fungus called sooty mold. Plant tissue that has been fed upon will be stunted, yellowed or malformed. A severe infestation can weaken a plant to the point of death.  I found that many of the mealybugs were in the crevices of the leaf axils or in the unfurled new leaf growth.

Mealybug nymphs 1

A bit of research showed me that one of the easiest remedies was to wipe the affected areas with an isopropyl alcohol soaked cotton ball. I did this, making sure to get both sides of the leaves as there were many nymphs on the undersides.


There are also many products such as insecticidal soaps and neem that can be used to control nymphs, scale, spider mites and aphids. These should be used with caution and always according to the label directions. A few more non-chemical approaches include spraying the plant with a forceful stream of lukewarm water, placing it near a cold window (only if the plant can tolerate the cold) so that the nymphs migrate to the leaf that is furthest from the cold and will therefore be easy to wipe off, or introducing a natural predator such as a ladybeetle (probably a good idea for greenhouse specimens, not plants in a home environment).

It is important to check for new generations of any insect pest that may not have been controlled with the first application. I have been scouting my houseplants every few days but I have not seen a recurrence. I can see, however, the results of the initial infestation. There are areas of foliage that are devoid of green, have turned brown and thin and almost appear like water spots. These areas are not much bigger than a quarter so I may leave that foliage on the plant and wait to see how it does.

I am really looking forward to getting outside in the upcoming seasons and getting some incredible close-up shots of flowers and insects, many of which will be shared with you in my blog posts. Happy New Year!

Susan Pelton

All images by Susan Pelton

Typically if it is January in Connecticut, one’s horticultural proclivities are turned towards indoor plants. I’m thinking this might be the beginning of another atypical year as temperatures in Storrs, CT were in the 50’s today and I had to water some outdoor hardy chrysanthemums under an overhang because they were wilting. These lovely burgundy mums have survived in this spot for almost a decade and they flower profusely each fall so I did not want to lose them. Usually the ground is frozen in mid-January and I throw some snow on them as a winter blanket. Snowfall has been in rather short supply this winter and the little I had covering them from last Saturday’s snowfall had melted quickly as temperatures rose.

In the case of these chrysanthemums, the young basal sprouts were wilting obviously because of a lack of water. I could see and feel the dry soil. Plants need water, just as we do, to grow and survive. Water is necessary for photosynthesis. It moves nutrients and photosynthates throughout the plant, it acts as a coolant and it gives a plant turgor along with many other less obvious but just as important plant functions. One might suppose that limited quantities of either natural precipitation or human supplied water would be the primary reason a plant would wilt. While it is a major one, there are three other situations where wilting could commonly occur – at least when dealing with houseplants.

Overwatering will cause a houseplant to wilt. In fact, I recall seeing somewhere that overwatering was the number one cause of houseplant death. Many houseplant owners like schedules (as a good number of us do) and water accordingly. So, if today is Saturday, it is time to water the houseplants. The problem is, the houseplants may or may not need water. When to water depends on the type and size of plant, the size of the pot, indoor temperatures, exposure to light, and the plant’s growth cycle among other factors. If heat is provided all or in part by a wood or pellet stove and plants are in this area, they will dry out faster and may need more than once a week watering. Those plants kept in a cooler, dimly lit area might only need water every 10 or 14 days. Our watering houseplant fact sheet (at www.soiltest.uconn.edu) may be of interest to new houseplant owners.

If plants receive too much water, the potting mix they are growing in becomes saturated. As this happens, any air in the root zone is pushed out and replaced by water. While this sounds counterintuitive to non-plant people, a plant’s roots need oxygen in the root zone to take up water. Once all the oxygen in the potting mix is replaced by water, the plant cannot take up water so they wilt. Usually the response to seeing a plant wilt is to add more water, thus exacerbating the problem.

What’s wrong with this plant?

Few roots, brown, unhealthy and overwatered.

Another scenario for wilting is caused by overfertilizing, especially with synthetic fertilizers, either in water-soluble or granular formulations. Fertilizers are primarily composed of nutrient salts. We use sodium chloride as our table salt at mealtimes, while some examples of fertilizer salts that are used to supply nutrients to plants include potassium chloride, ammonium nitrate and superphosphate.

You may have heard it mentioned that nature is always striving to reach an equilibrium (no matter how short lived it may be!). Well, if there are more nutrients in the potting mix, because of over-fertilization, than in the plant, curiously, the plant will release some of its water to try to dilute these salts so that the concentrations within the plant and surrounding the plant’s roots are more in line with one another, i.e. in equilibrium. In doing so, the plant loses water and wilts. On top of that the fertilizer salts can cause physical injury by the ‘burning’ or desiccation of plant root tissue. As plant roots die, there are less healthy ones to take up water so plants may still look water-deprived. Also injured roots because of overwatering or overfertilizing become susceptible to a variety of rot diseases.

Lastly, that plant that needs water on a daily basis probably is trying to tell you it needs to be repotted. There are so many roots growing in a restricted area that more water than you can supply it is needed. If plants are repotted on a regular basis, they are typically moved into pots that are one to two inches in diameter larger than the one they are presently growing in. If the roots are terribly overcrowded, you might select a pot that is 4 to 6 inches wider if the roots are not cut back. Do untangle or slice through encircling roots before repotting.

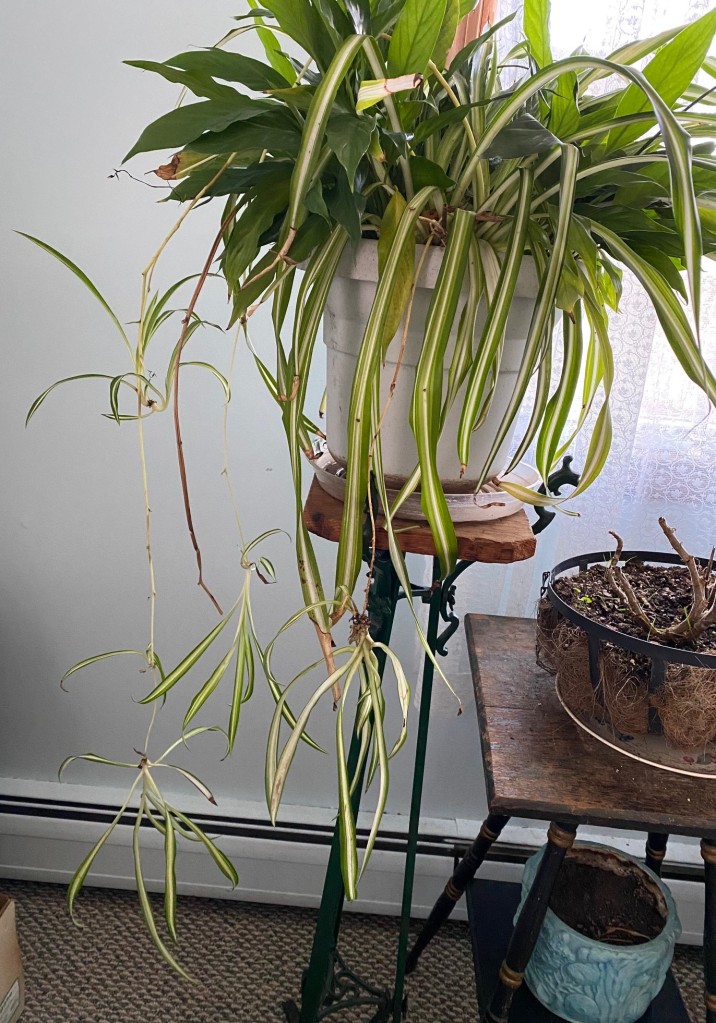
Spider plants need to be divided regularly to avoid overcrowding.

It is up to you, the houseplant caregiver, to figure out why your plant is wilting. Start by knocking the plant out of the pot and looking at the roots. They should be nice and white and crisp and the potting mix should be moderately moist but not dripping water or desert dry. If this is not so, try to figure out what has gone wrong. If you are stuck, please give us a call. Find our contact info at www.ladybug.uconn.edu

Happy Gardening,

Dawn